
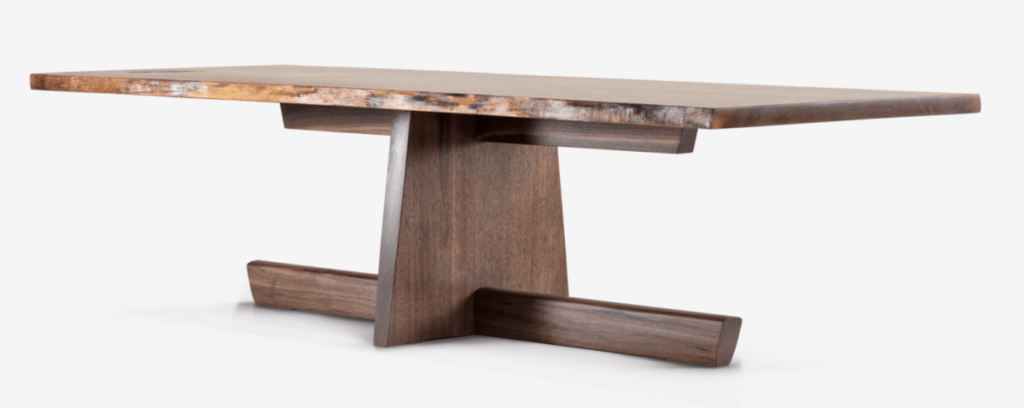
Your friends and family will be amazed when they see your show-room quality modern live edge coffee table. It looks like nothing they’ve ever seen before.
Transform a slab of a once-living tree into the centerpiece of your living room. Your coffee table is guaranteed to be one of a kind.
Say no to mass-produced furniture from Ikea. Say yes to building a beautiful work of art and heirloom to be passed down. An heirloom built with your own two hands and a little sweat and tears.
Fine woodworking can look daunting, but I’ll break it down step by step and give you options if you don’t have all the tools. We’ll use a design adapted from the great George Nakashima, along with simple but sturdy wood joints, hard live edge wood and a durable finish to bring it all together.
George Nakashima was a pioneer of woodworking design and popularized the use of live edge wood into everyday furniture.
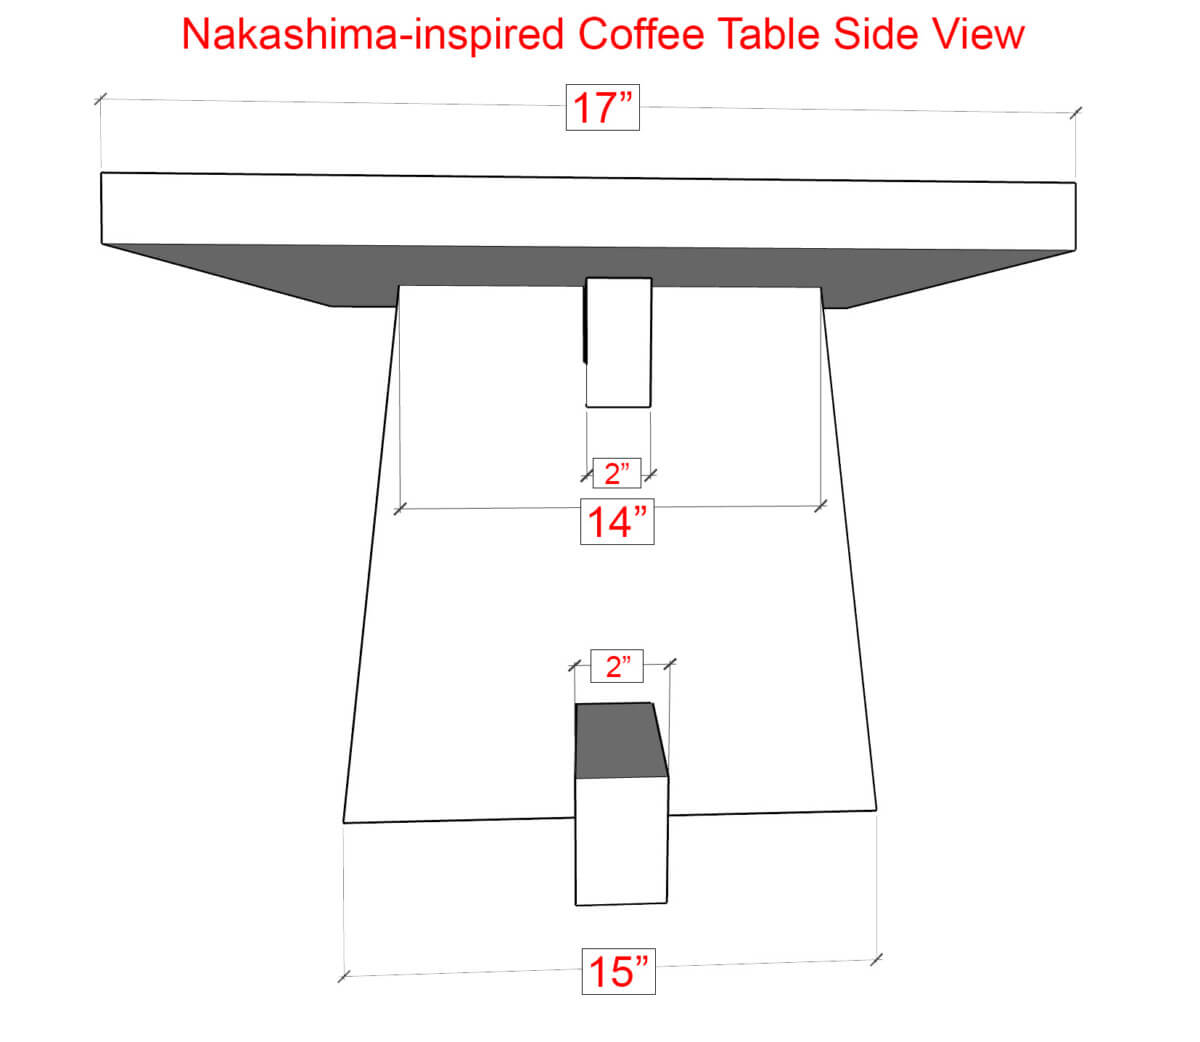
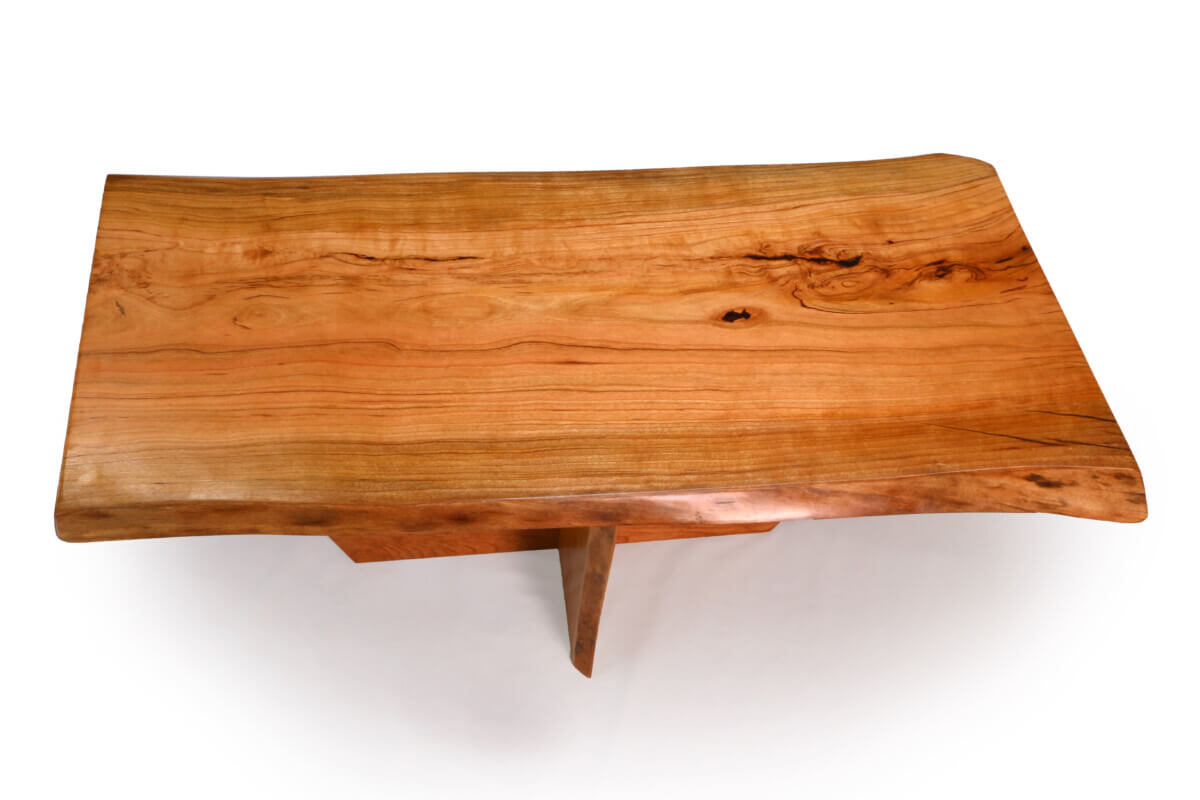
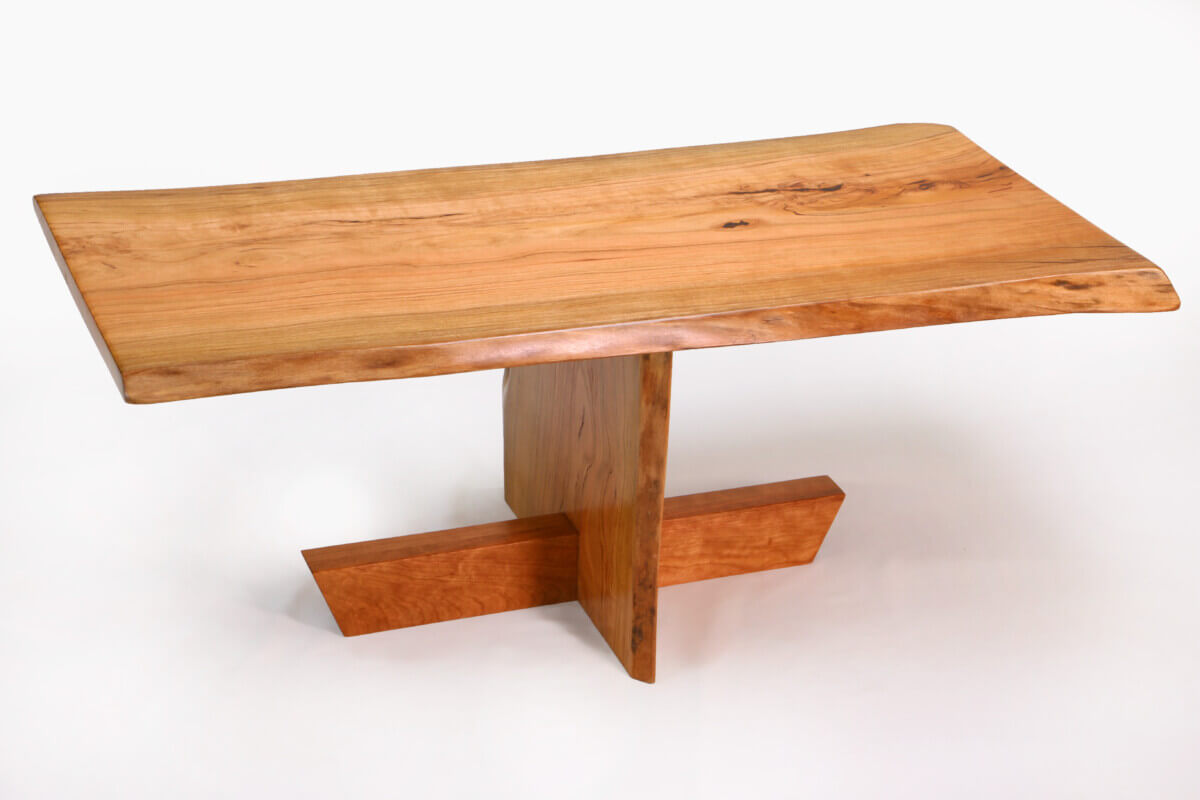
This Nakashima-inspired modern live edge coffee table is 36″ long, 17″ wide and 15″ tall. It combines the modern yet simple aesthetic of traditional Japanese woodworking with rustic live-edge lumber to create a remarkable piece of furniture.
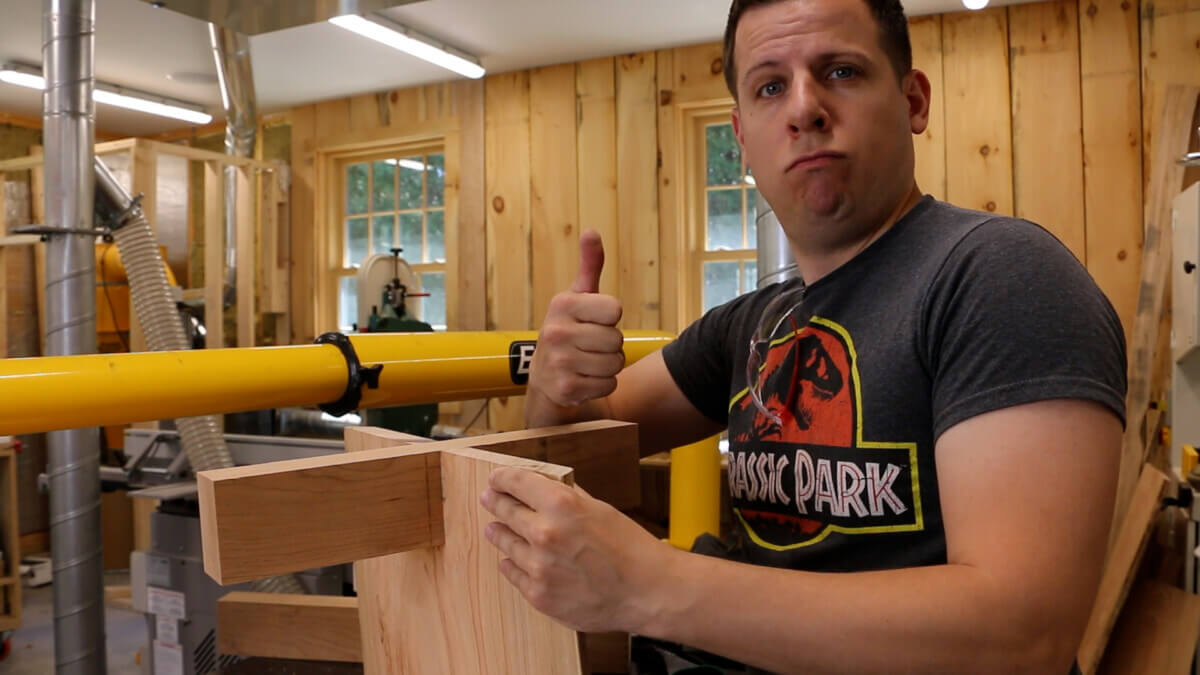
This project turned out great and is, I think, my most beautiful piece of furniture to date and something I’m the most proud of. And with these steps, you can build one too!
Read below for my step by step instructions, tool and lumber list and project measurements with diagrams. I’ll even walk you through the wood finishing process.
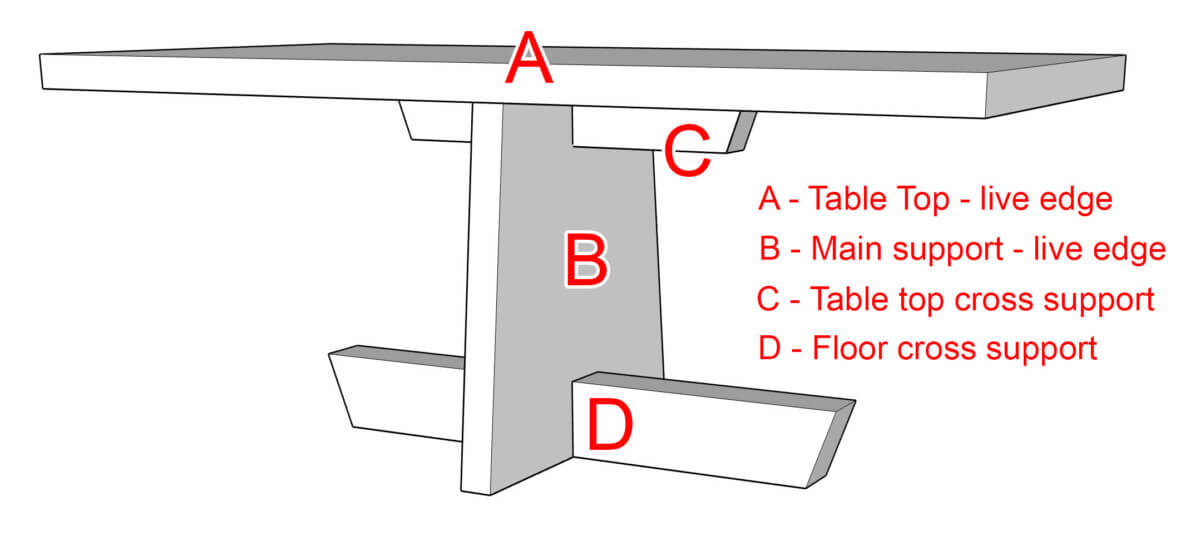
Live Edge Coffee Table Design
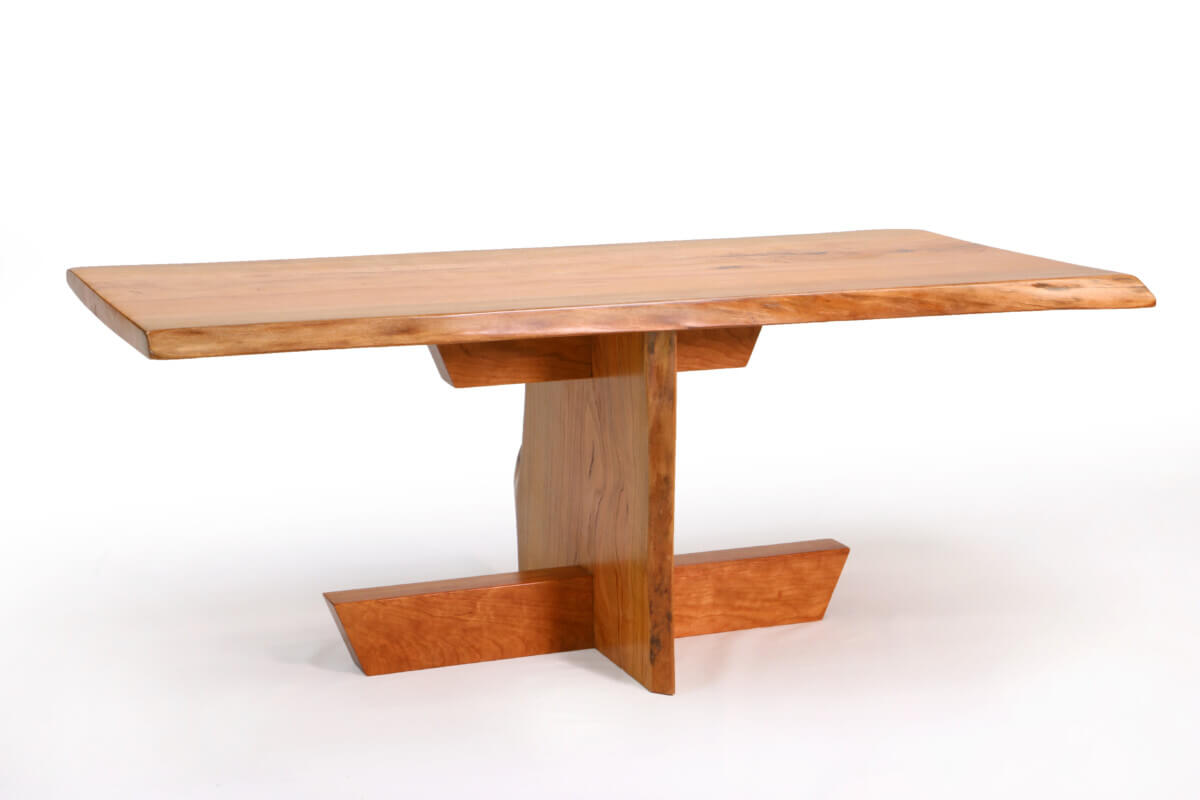
This table was designed with heavy influence from George Nakashima’s Minguren coffee table, below.
I made a number of design changes for my version of the table:
- Reduced the overall size from a 60″ table top down to 36″ and adjusted the cross supports and main support accordingly.
- Kept the same overall 15″ height and 22.5 degree design angles.
- Increased the thickness and height of the cross supports (C+D) slightly to make the table sturdier.
- Made the main support (B) out of live edge wood.
- Used metal table top fasteners to attach the top to make the table easier to transport safely.
Live Edge Coffee Table Dimensions
Here are the dimensions for my version of the Nakashima coffee table. You can adapt this to fit the size of your slab and your needs.
The key things to consider is the ratio of the cross-supports to the table top. These should be consistent. Also, the angles for the cross support Japanese style miters are 22.5 degrees.
All width measurements on the live edge pieces (A+B) are average measurements as live edge often has a wavy, tapered characteristic.

Tools
Shop Made Cross Cut Sled
Slab flattening jig or Hand Planes:
Lumber buy list
1x Live edge wood slab at least 54″ long and 17″ average width and at least 1″ thick. (A+B)
1x 8/4 rough cut lumber minimum dimensions:
24″x6.5″x2″ (C+D)
OR
1x 5/4 rough cut lumber: 48″x6″x1.25″ (C+D)
Materials
Package metal table top fasteners
Orbital Sandpaper – 40. 60, 80, 100, 120, 150, 180 and 220, 320, 400 grits.
Epoxy resin and hardener (optional if your slab has big voids or cracks)
Lumber: The Slab
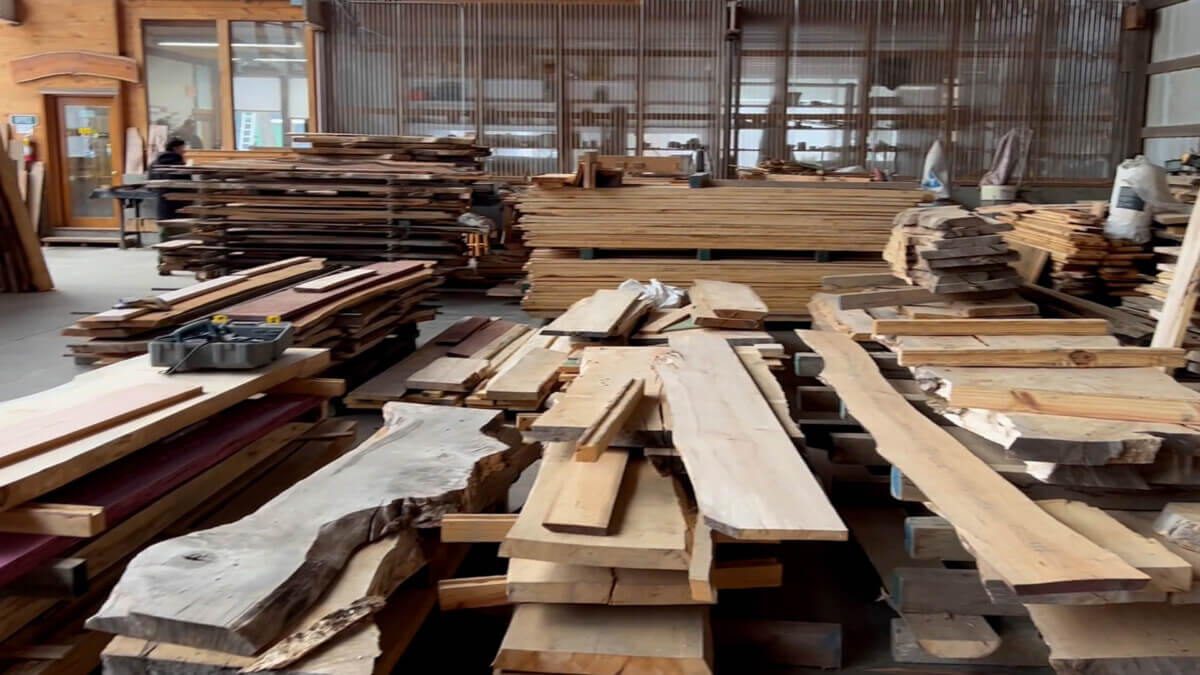
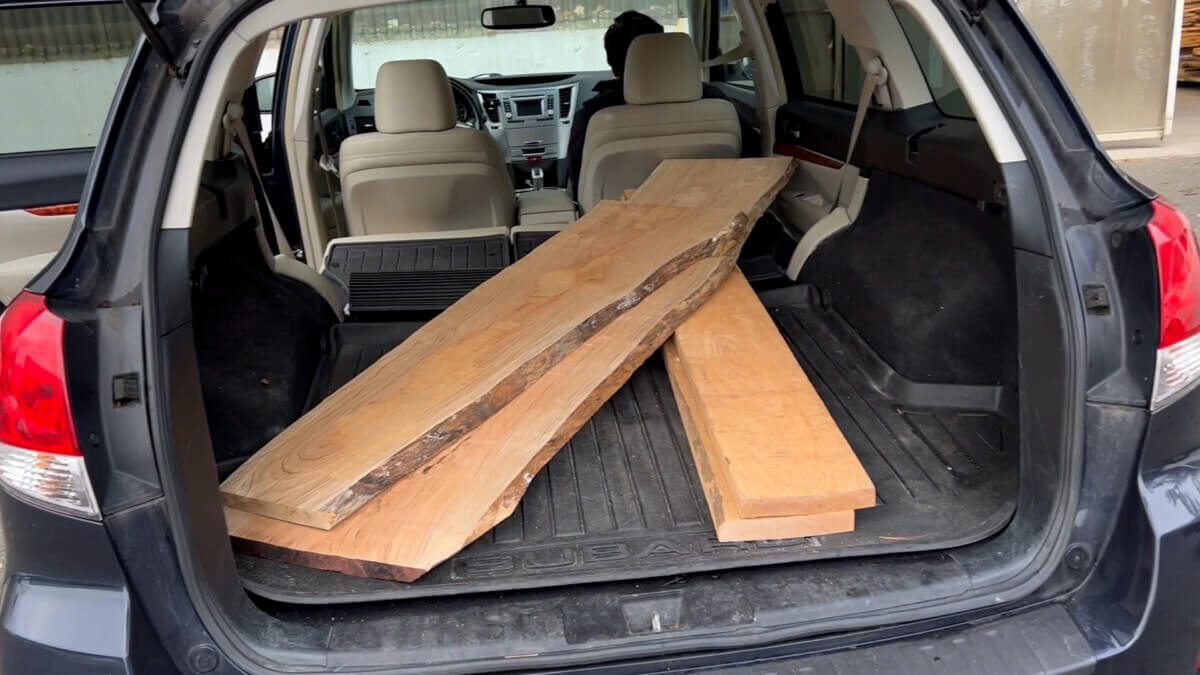
The first step is a quest. A quest to find a live edge slab that’s sized and figured to make a great coffee table.
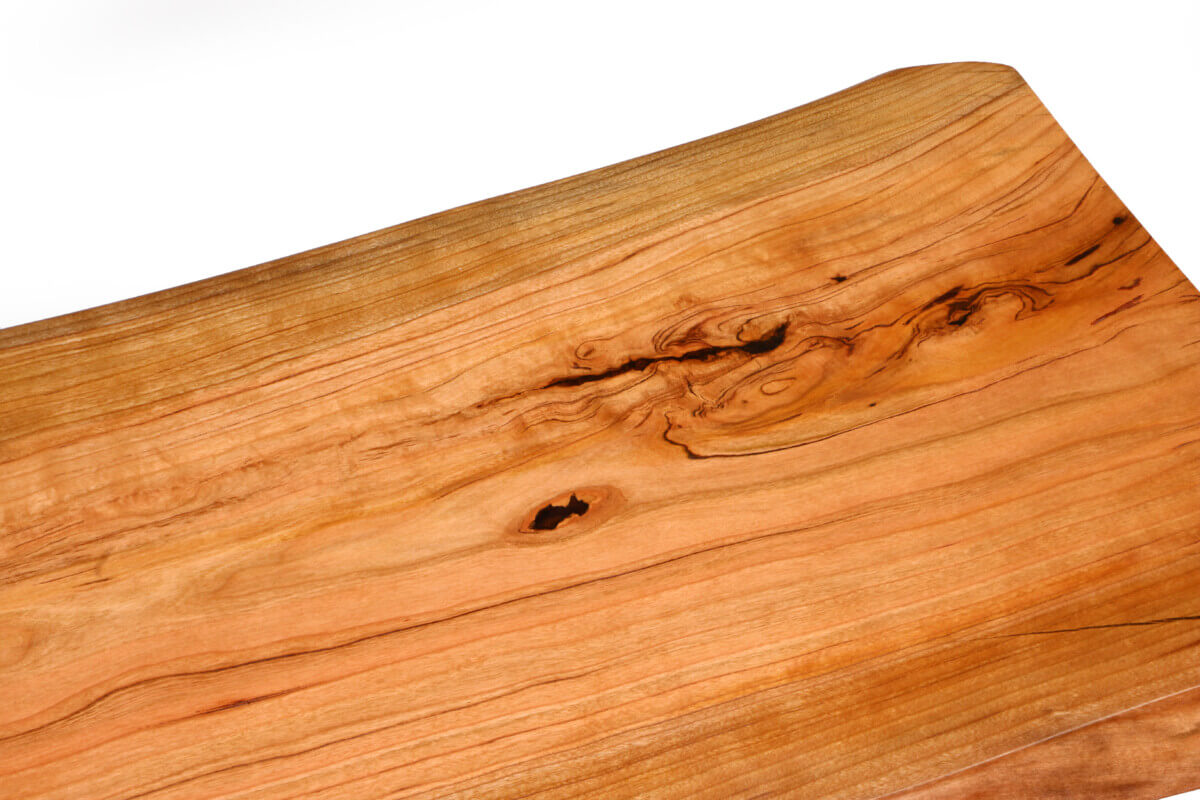
The same slab will be used for two parts of the live edge coffee table. A – the table top and B – the main support. The wood species is up to you, I went with my all-time favorite, Cherry.
When selecting a slab, here are the things to look for:
- Width is at least 15″ on average, 17″+ is better
- No big cracks or voids. Small voids are OK
- At least 54″ long
- At least 1″ thick
- Air dried for 2 years or kiln dried
- As flat as possible
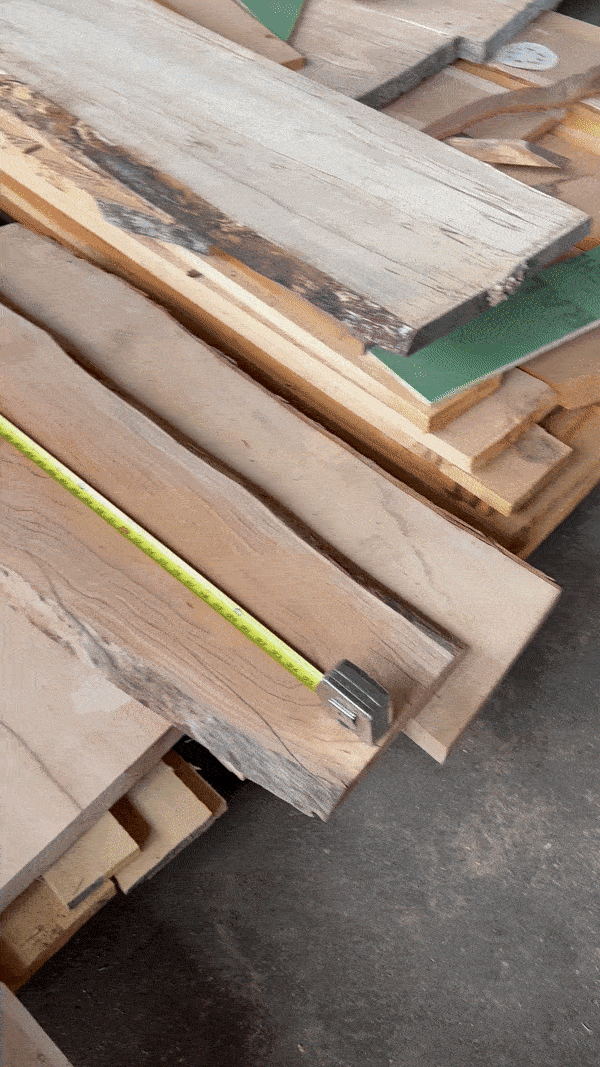
When choosing your slab, bring a tape measure with you and measure out which 36″ section of the board will be used for the table top (A). Beautiful grain and a wider width count the most for this section.
Remember to flip the slab and look at the underside!
It could have even more beautiful figure or… have a massive hidden crack that you want to avoid…
You’ll want to do the same thing and map out where on the slab you’ll take your 15″ piece for the main support (B).
Grain pattern matters here too, just less than the table top. You also want this piece to be less wide on average compared to the top. When assembled, the top will overhang the main support on both sides.
When I found the perfect slab for my coffee table, the board was 10 feet long. Since one coffee table only needs about 4.5 foot of usable slab, I marked two table tops and two side supports.
This meant I was able to make two beautiful coffee tables out of the same slab!
One slab was made for my best friend’s wedding, and the other one for sale.
You can find wood slabs at specialty lumber yards as well as from individual sellers on Facebook marketplace.
Many people on FB are selling green wood, which is not ready to be made into furniture until it’s dried. Wood warps and cracks as it dries and it can take 1-2 years to dry properly.
Lumber: The Support Wood
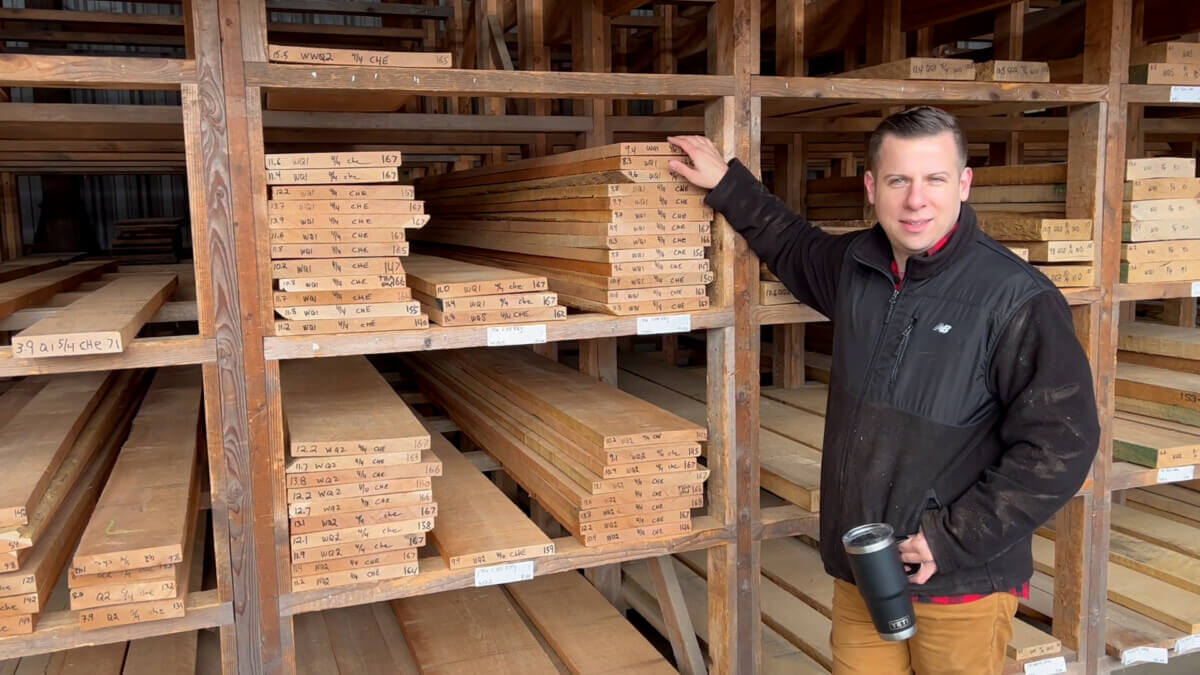
Next we need some dried rough cut lumber.
Rough cut lumber is like it sounds, it’s rough on at least one face and needs to be jointed and planed before it’s ready to be used.
With rough cut, you can select from dozens of high quality hardwoods like Oak, Cherry and Black Walnut.
PLUS, you can find premium figured woods like bird’s eye Maple, tiger maple, and curly Cherry.
Compare this to dimensional lumber that’s smooth on all 4 sides and usually is limited to varieties of softwood pine.
A key stepping stone in the path from carpenter to fine woodworker is mastering a jointer and planer to surface your own boards.
We’re going to use this lumber to make the two cross supports:
The smaller top support, (C) and the floor cross support, (D).
The top support (C) measures 15″ long by 2″ wide by 3″ tall.
The floor support (D) measures 22.5″ long by 2″ wide by 3″ tall.
You’ll need some 8/4 thickness lumber that’s a at least 6″ wide by 24″ long to avoid glue up. A small board.
The lumber yard I was at did not have any 8/4 cherry, so I had to use 5/4 (which is 1.25″ thick) cherry to glue up.
So using 5/4, you’d want a board that’s 48″x6.5″x”1.25″.
Because I was making two coffee tables, I got a board that was over eight feet and cut it down to fit in my car.
1.) Jointing and planing the raw lumber
Next, we are going to get into sawmill mode!
But why? Well, we can’t make fine furniture with goofy warped boards…
After we’re done, we’re going to turn even the most bowed, crooked, kinked, cupped or twisted board into a fine, smooth and straight piece of lumber with perfect 90 degree corners.
Plus, we can save some money here. You can usually get a good deal on boards that aren’t perfect. You just make up for it in milling time.
We’re going to prepare your rough cut 48″x6.5″x1.25″ board to make the table top and floor cross supports (C+D).
Surfacing the board with a jointer
Run one of the flat faces over the jointer until it is flat and smooth. I like to start with the side that rocks the least against the jointer table.
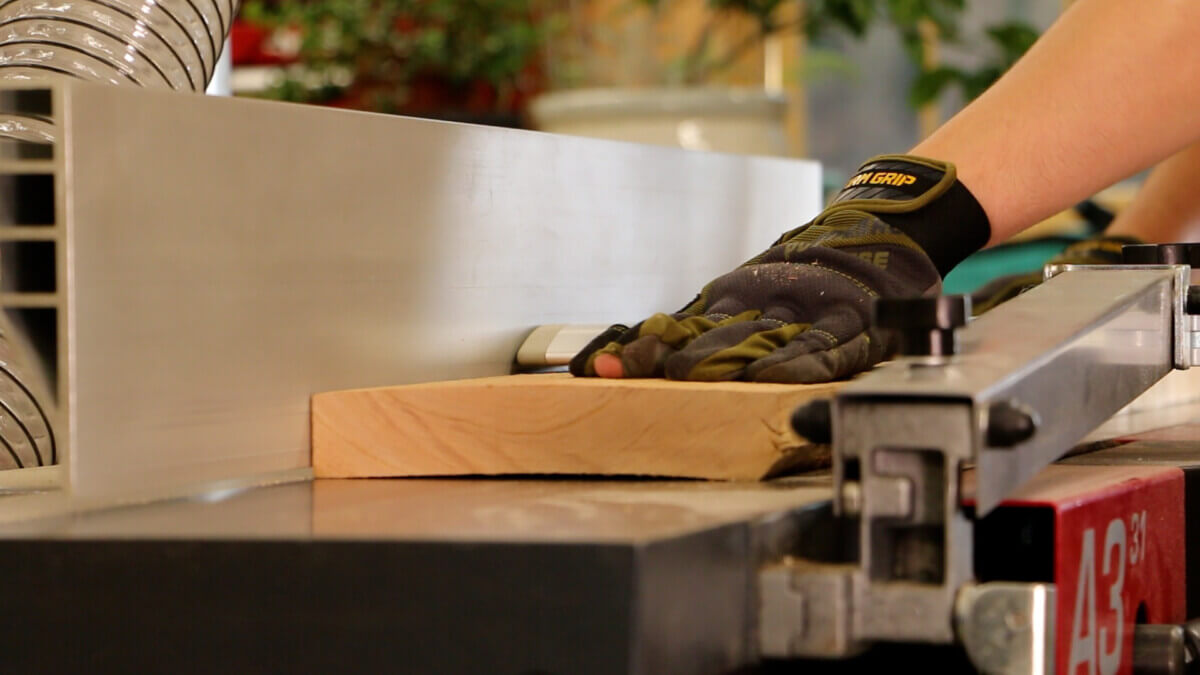
My board had a cup to it, so I placed it so that the cupped part was facing down (see above image). This way it did not rock when pushing it through the jointer, allowing me to make accurate passes to remove the cup.
One you have a good face that’s smooth, it’s time to joint an edge. Push the smooth face flush against the jointer fence and make passes until the jointer takes off wood for the entire length of the edge. Listen to the sound your machine makes when it’s cutting to give you a clue when it’s ready.
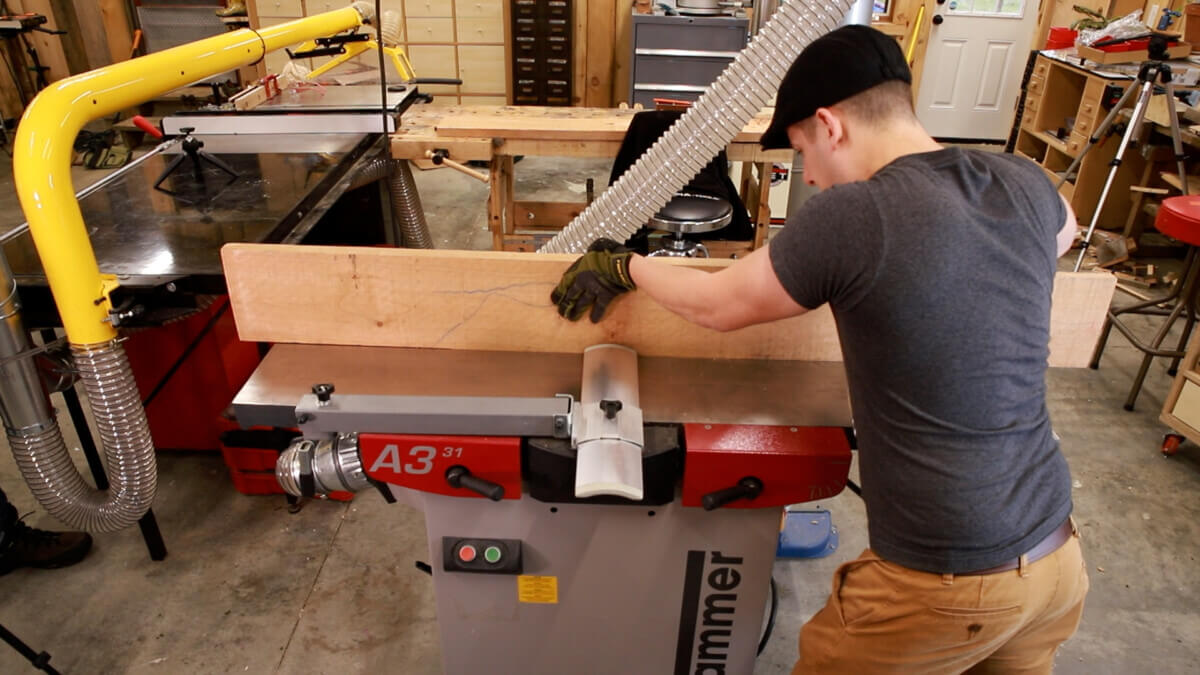
Truing the other face with a planer
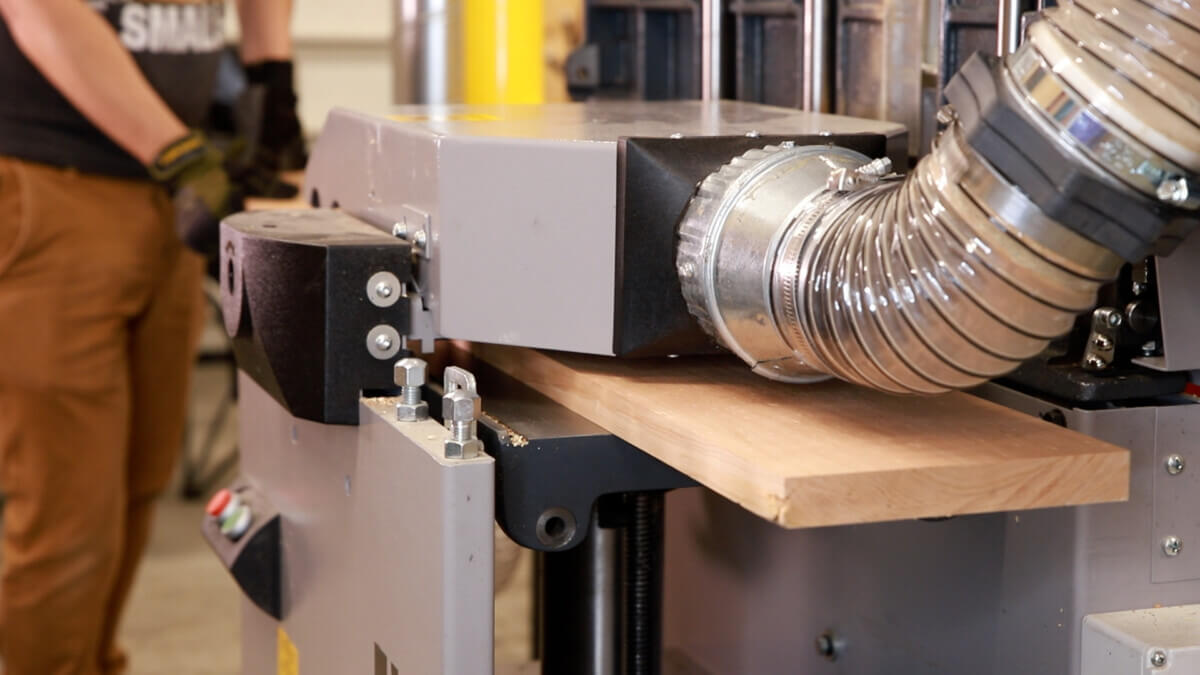
Now that your board has one true face and one true edge, it’s time to fire up the planer. Place your jointed face down against the bed of your planer. Take light passes until the face is flat and smooth.
Support the board at the beginning and end of each pass to avoid snipe!
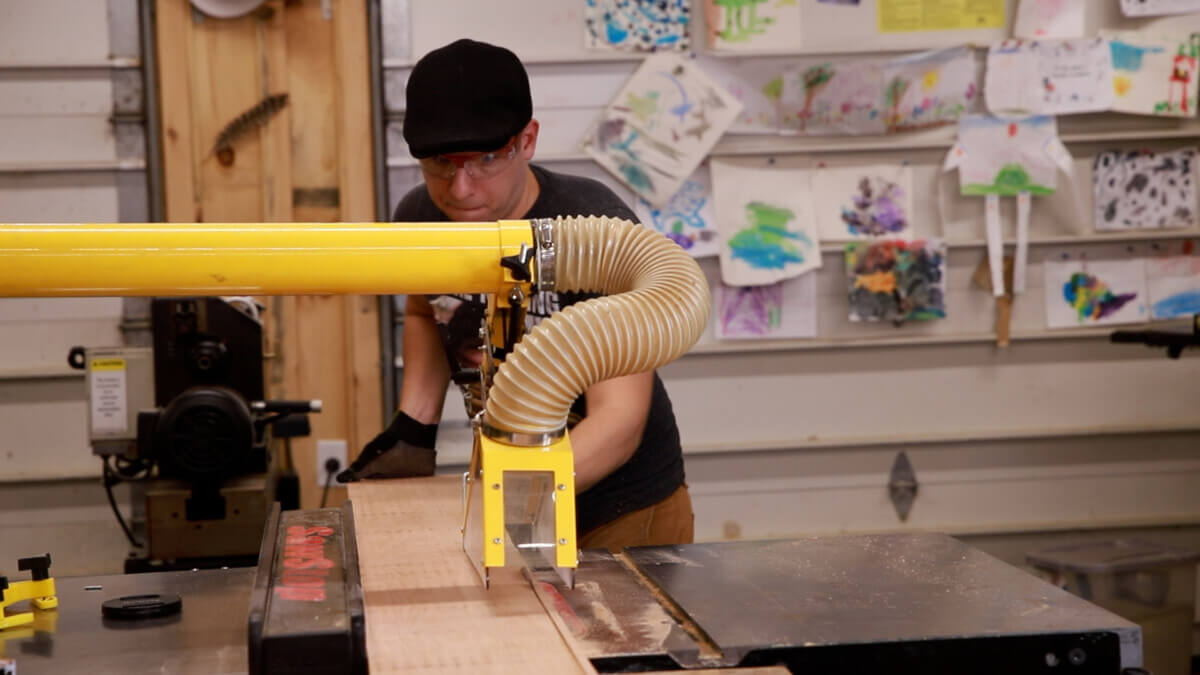
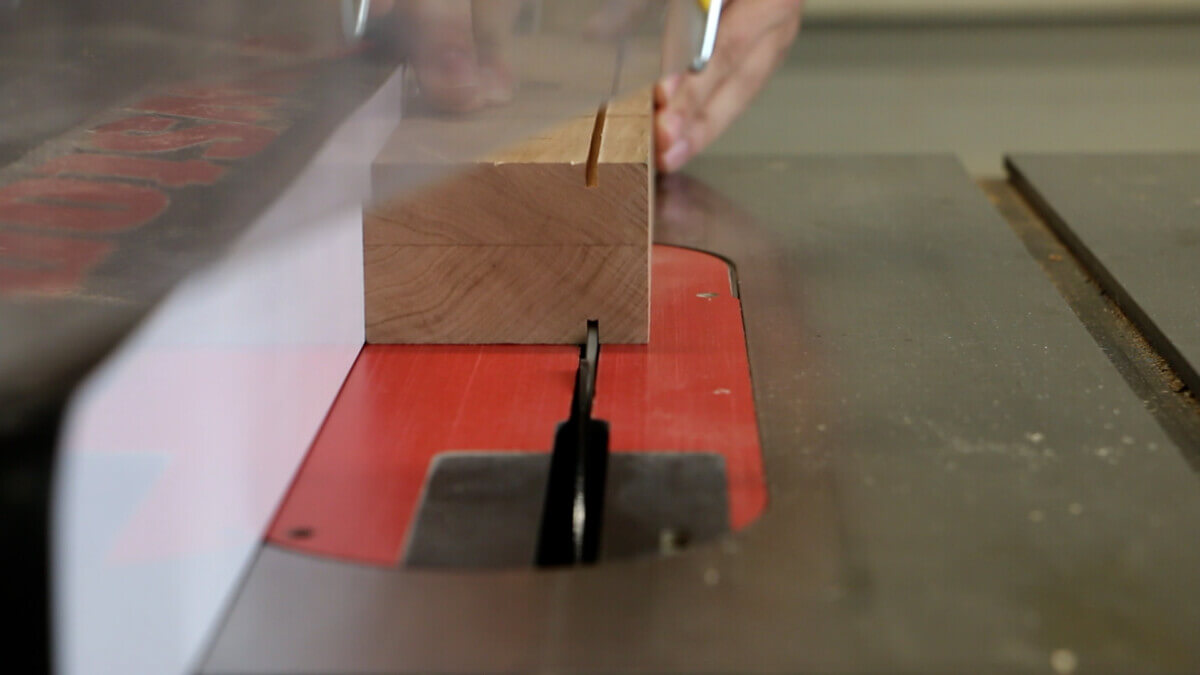
Truing the other edge with a table saw
For the last step, we’ll be using the table saw. Set your fence to 61/8” and put the jointed edge against it.
Make one pass and voila! You’ve now got a perfectly jointed, planed and true board! The final dimensions of the board will be about 48″x61/8“x1”.
Why not an even 6″? After glue-up, we are going to take off the dried glue on the edges with the jointer, so we want it to be a little wider than 6″ so it ends up at 6″.
2.) Glue Up the Live Edge Coffee Table Cross Support Boards
With our freshly milled board, we will cut it in half lengthwise on the table saw. We’ll end up with two boards, 24″x61/8“x1”. Now apply some wood glue and smooth it out with a business card (the only real practical use for a business card) or piece of cardboard.
Next, clamp the heck out of it and wait about 24 hours for the glue to dry. Straighten the boards out as you apply pressure, we don’t want them to glue up crooked.
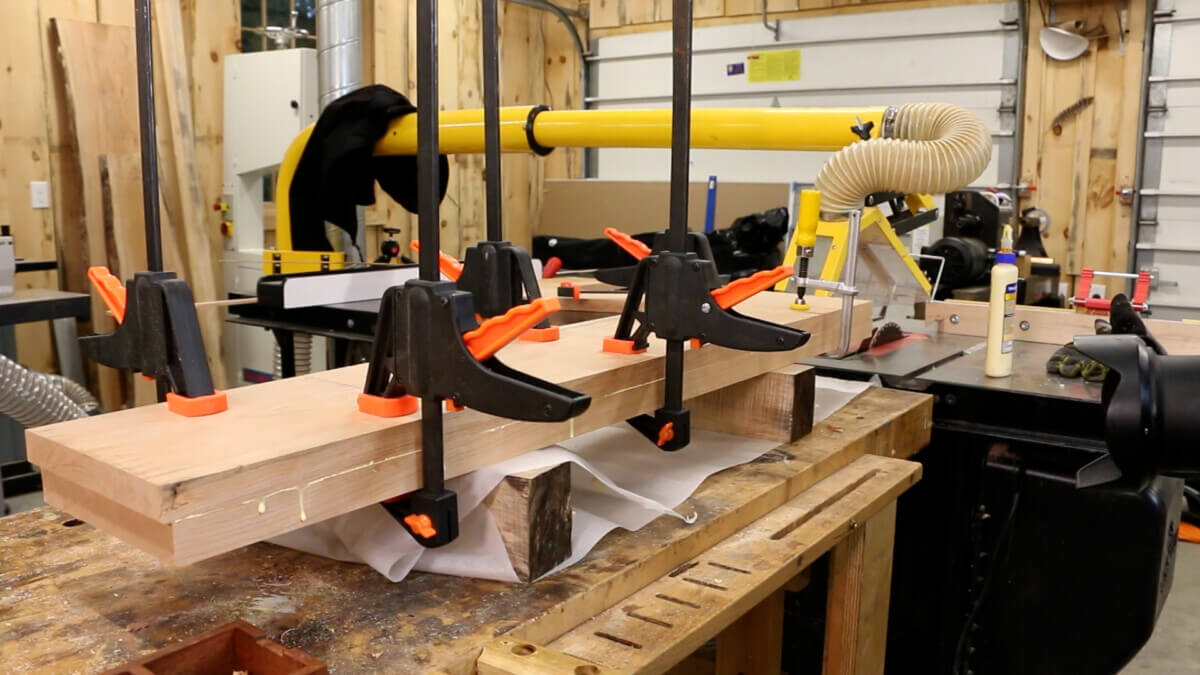
Once the glue has dried, make some very light passes with the jointer to take off the glue until the board is 6″ wide.
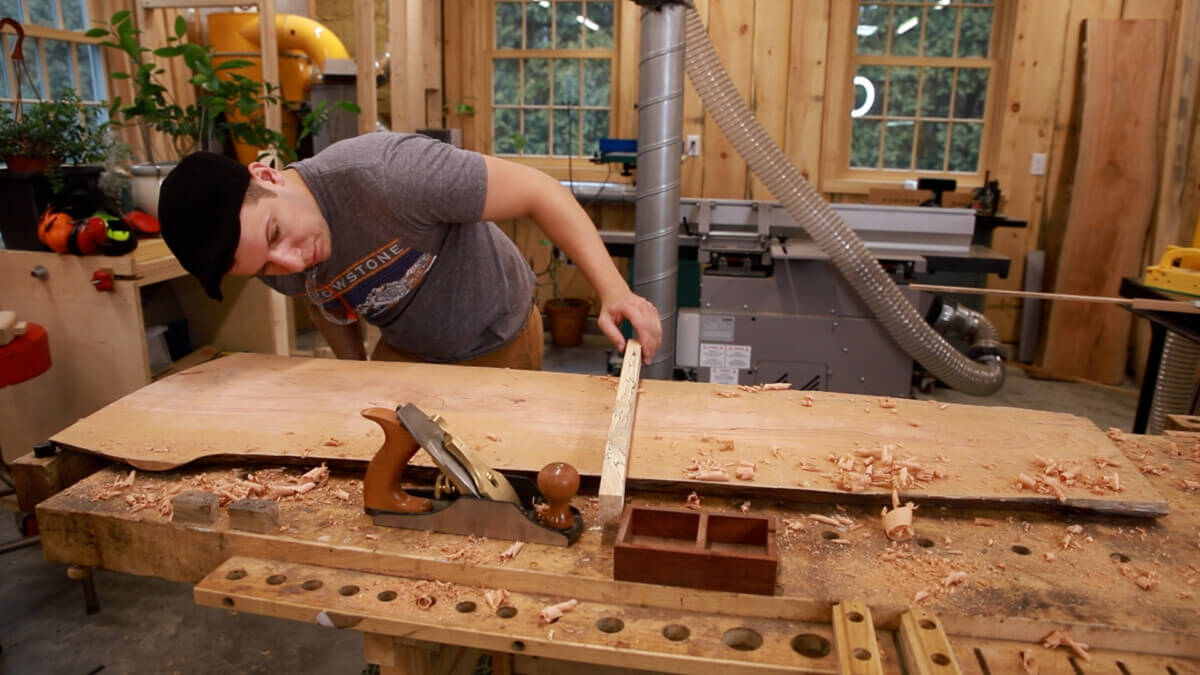
3.) Flatten the Slab
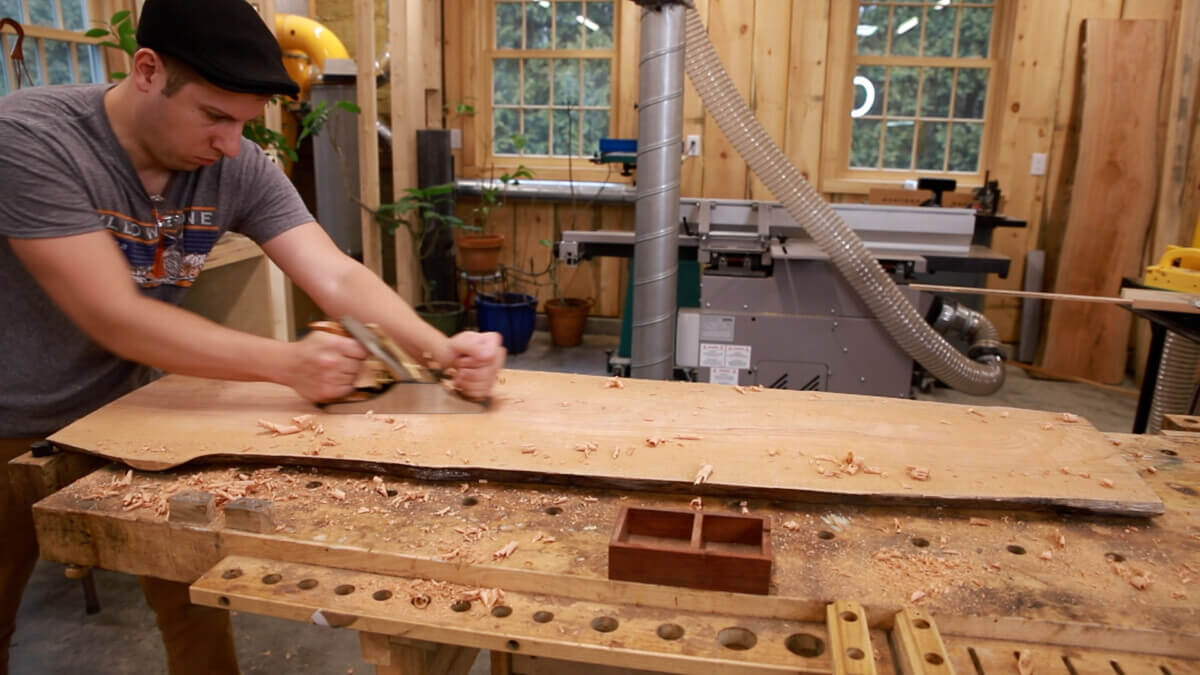
Prepare that elbow grease! The next step takes a bit of doing with hand tools…
We want to flatten both faces of the slab which will make up the top of the live edge coffee table (A), as well as the main support (B).
The flatter the top of the slab, the better our table will look. The flatter the bottom side of the slab, the more even it will lay on the stand.
If your board came already milled flat, then you just saved yourself a lot of work. You can skip to the next step.
But, if your slab has some imperfections and isn’t flat, we’ve got to fix that.
Now, there’s a much faster way to do this if you’ve got a router and a flattening jig. But I don’t have one yet so I broke out the hand planes. Another option is going ham with an orbital or belt sander to flatten it out.
For the hand plane method, the first step is to use a scrub plane. This is a unique plane that has a curved blade so it chunks out half-circle gouges in the wood. This means we can remove stock FAST. So only use this if you’ve got some serious material to remove.
Then follow that up with a jack plane to get rid of the big ridges. Finish with a smoothing plane to get a smooth surface.
If your wood’s grain is figured or not straight, you may need to finish by using sandpaper. Figured grain is difficult to work with hand tools and can cause chip-out.
However, hand planes leave a finish that’s smoother than any sandpaper and are satisfying to use. Filling your shop with silky gossamer shavings never gets old.
But if you want to get good results with a hand plane, you need two things:
- SHARP blades. Sharp blades glide and slice like a hot knife through butter. Dull blades hop and skip and leave a marred surface.
- A SOLID workbench. If you move your plane, and the board or bench moves, then you aren’t planing, you are pushing a table across your shop.
If you have these two things dialed in, you’re in for a treat. I recommend watching Paul Seller’s videos on tuning hand planes and how to flatten boards. It’s an excellent free resource for how to use these marvelous tools.
4.) Squaring Up the Slab
We want our table top to look nice and square. Using a square and measuring tape, mark a cut line that looks visually appealing. Mark a second line on the other end of the slab if you aren’t able to safely run the whole slab through your table saw.
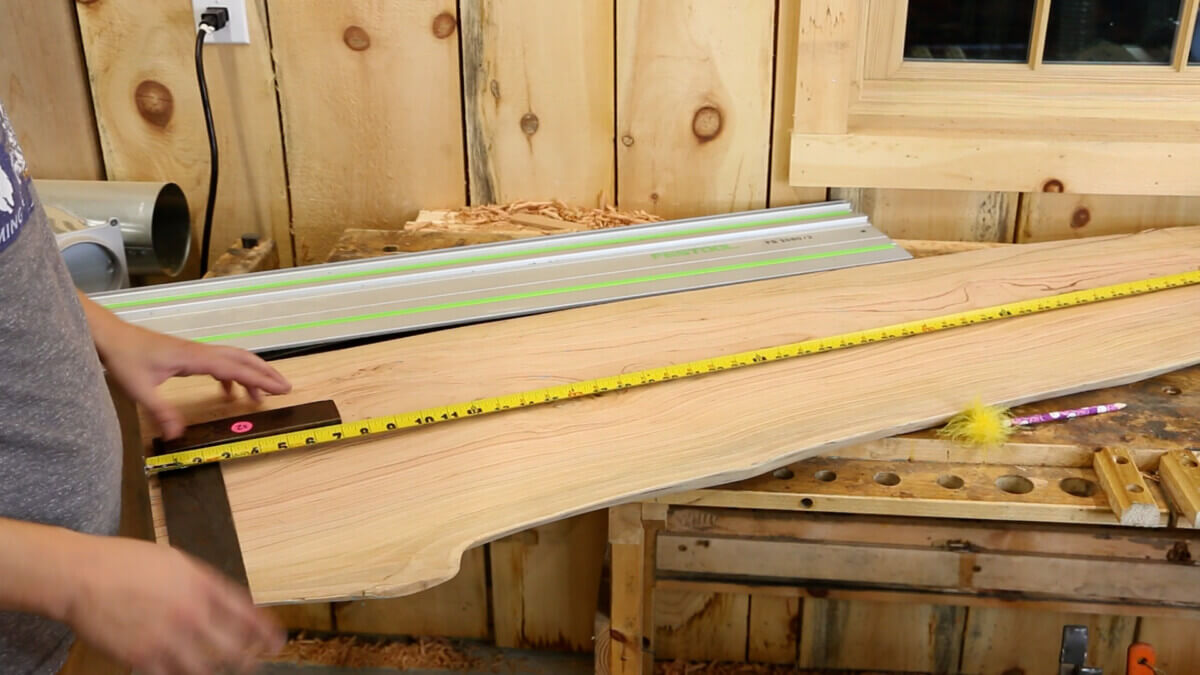
With your nice cut line in place, line up your circular saw using a fence and make the first cut.
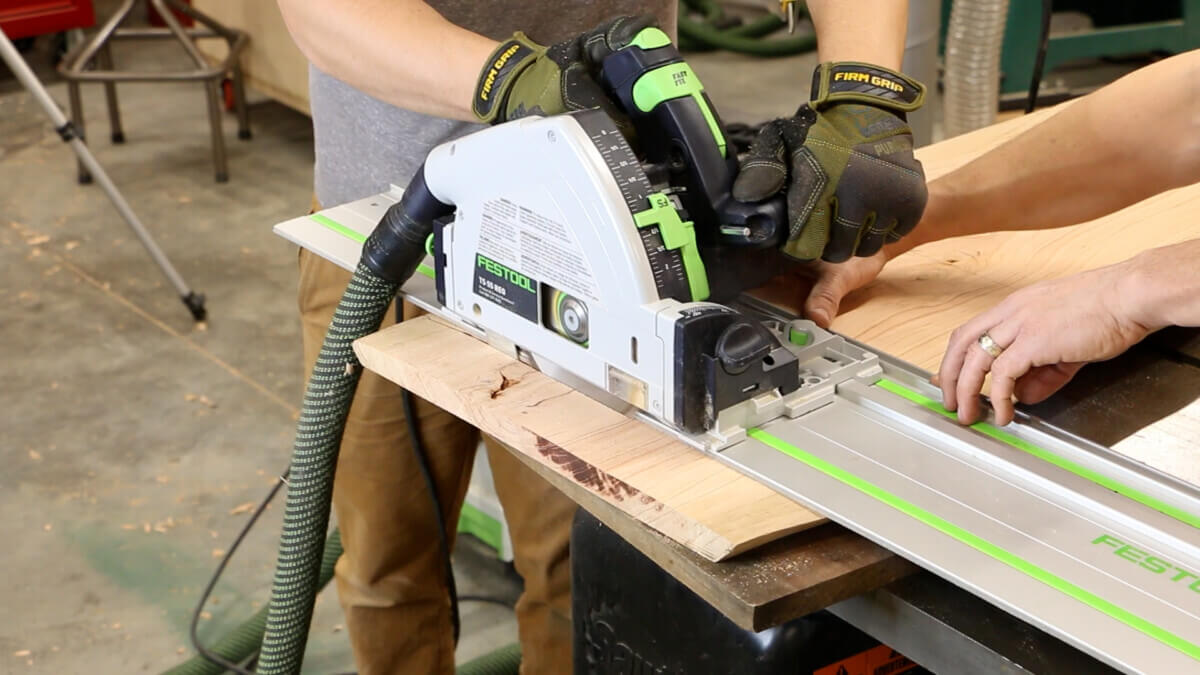
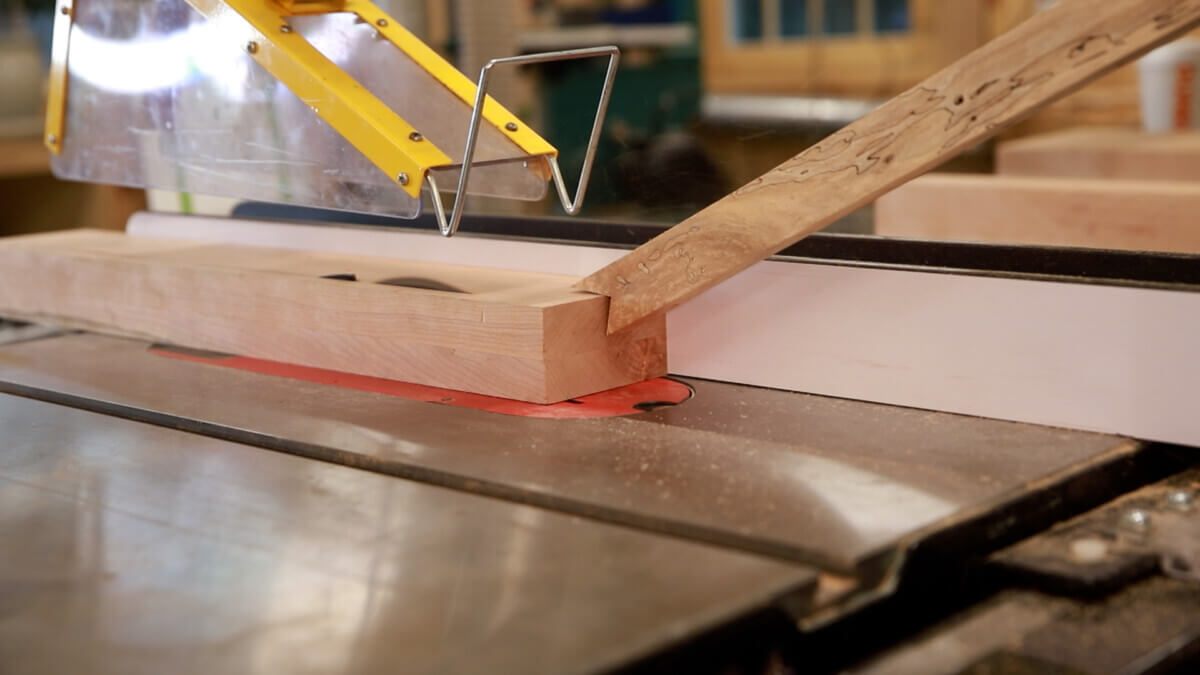
We want our table top section of the table top to be 36″ long. Put the edge of the slab that you just cut against your table saw fence and set it to 36″ and make a rip cut. We’ve now got our table top’s (A) final form. You may want to recruit some help to make this cut.
The main support will be about 14″, so with the 1″ thick table top, the height of the live edge coffee table will be 15″. Repeat the table saw rip cut process to get out the main support (B). You want to use a portion of the slab that is less wide as the table top and is aesthetically pleasing.

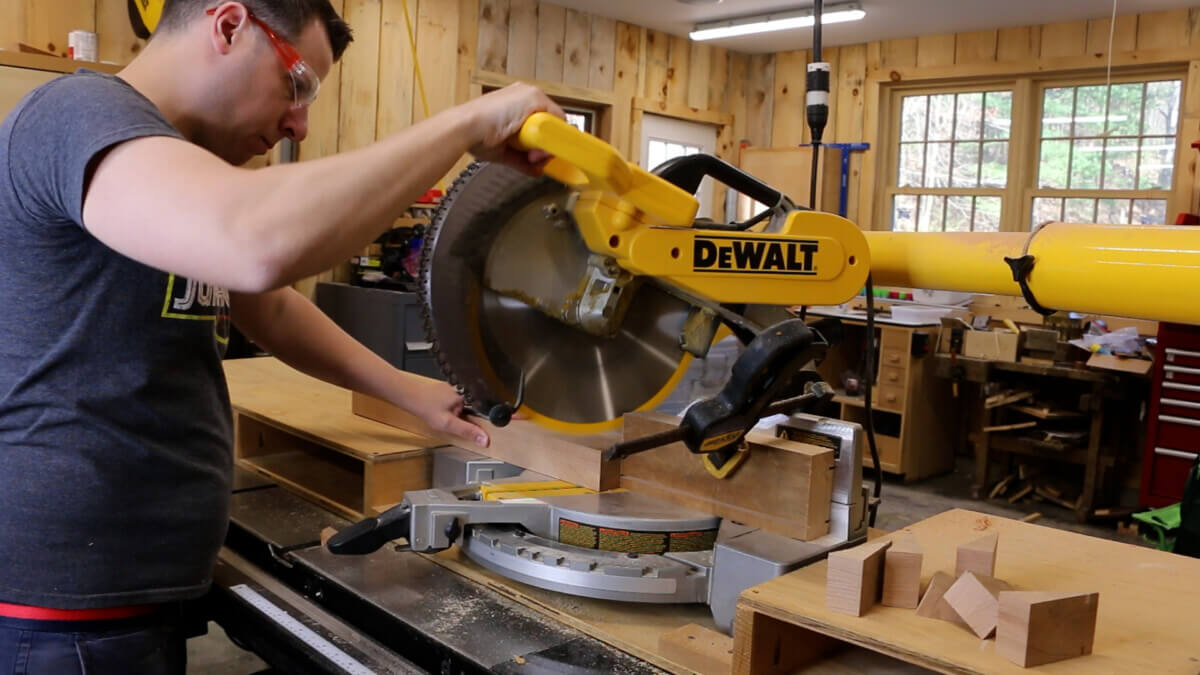
5.) Cut Out the Cross Supports
Let’s now take the boards we glued up from part 2 above and rip them to the proper size.
The board is 6″ wide and the cross supports (C+D) are to 3″ wide. Set your table saw fence to 3″ and tip the board.
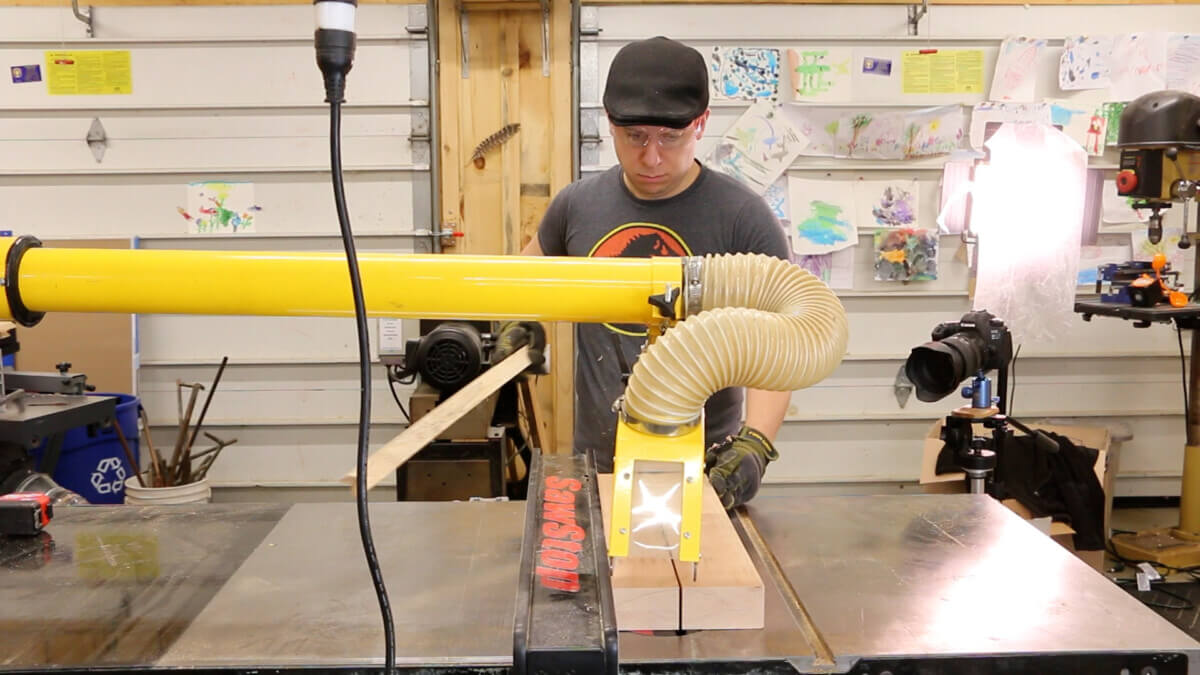
Then make another pass.
With your two 3″ wide boards, cross cut one of them to 22.5″ long (C) and one to 15″ long (D). Your final board dimensions will be C: 22.5″x2″3″ and D: 15″x2″x3″.
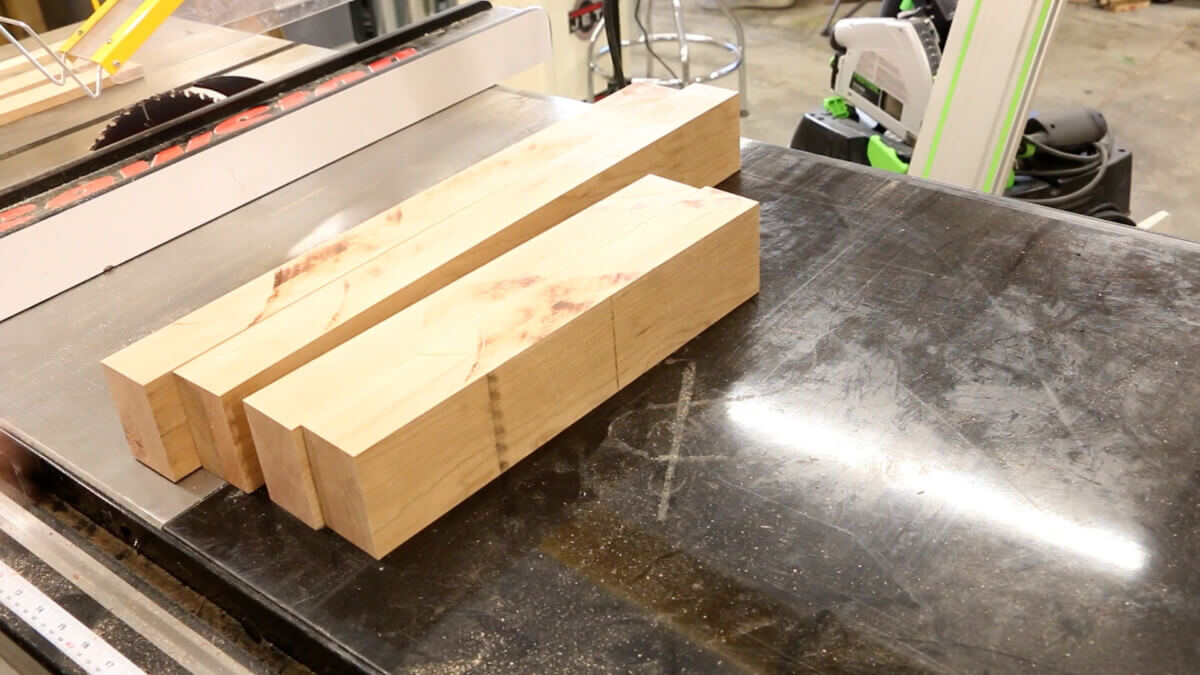
I’ve got double the cross support boards as I made two live edge coffee tables at the same time.
6.) Cut the Cross Support & Main Support Notches
Now comes the fun part. We are doing some basic joinery here. We’ll be doing a halved lap joint. Here’s a diagram of this type of joint:
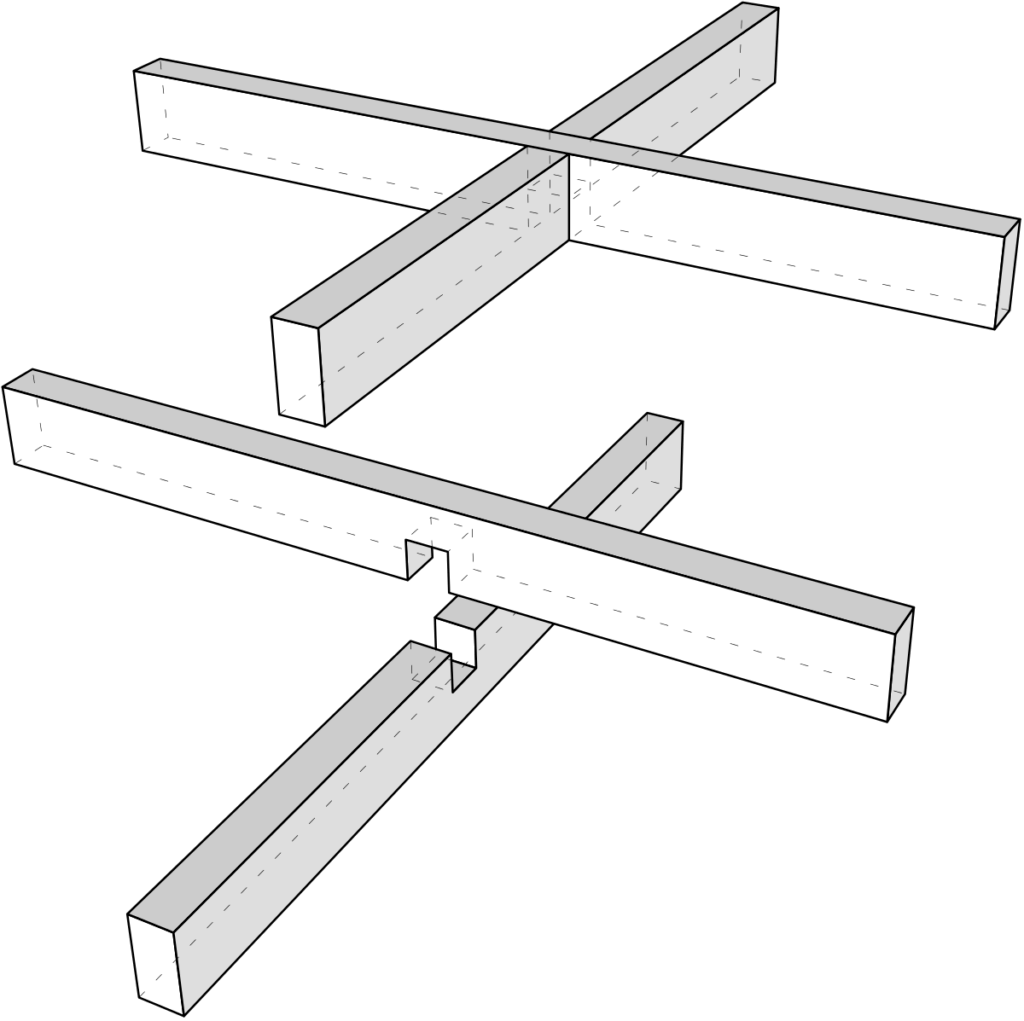
We will be cutting notches at the top and bottom of the main support (B). And a notch at the top of the floor cross support (D), plus a notch on the bottom side of the table cross support (C).
Measure twice, cut once. Measure a line for the center of each of the boards, B, C and D.
For the main support, B, our two notches should be about 2″ wide by 1.5″ tall. Note that our cross support boards are 2″ wide by 3″ tall. We want the notch to be the full width, but half the height so the boards will fit together flush.
For the cross supports, C and D, the notch’s width should be equal to the thickness of the main support B, right where it will fit together. Since we are working with live edge slabs, board B could be thicker at the bottom vs the top, so measure a third time for good luck.
The cross support notch heights should be 1.5″, consistent for both C and D and should look something like this:
Once you’ve measured and double checked your measurements, place a cross cut sled on your table saw and raise the blade so that it’s just shy of 1.5″ from the sled to the highest tooth on the blade.
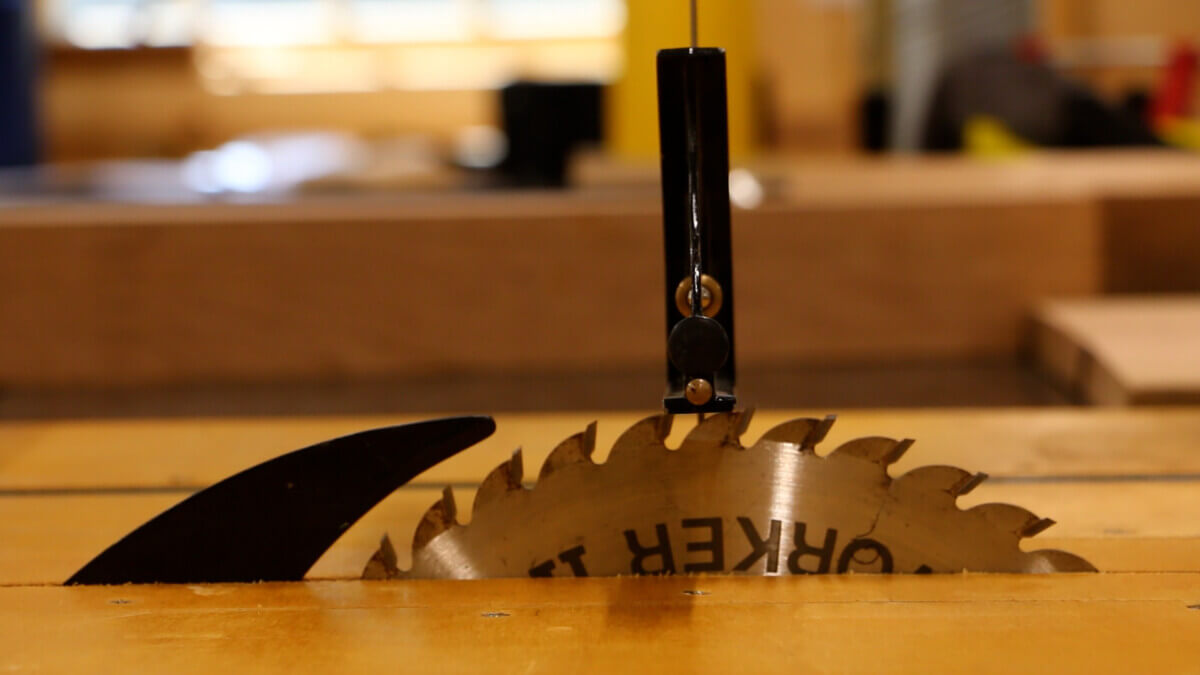
Start making cuts, sliding the board down by the width of the cut each time. Cut just shy of the lines and check your fit. If the board won’t yet fit over the main support, make another pass. Keep taking tiny passes until you have a tight fitting joint.
Repeat this process for the main support board B, cutting a corresponding notch.
If your joints are too tight, use a file and lightly abrade the notches on all of the boards until you’ve got a smooth fit.
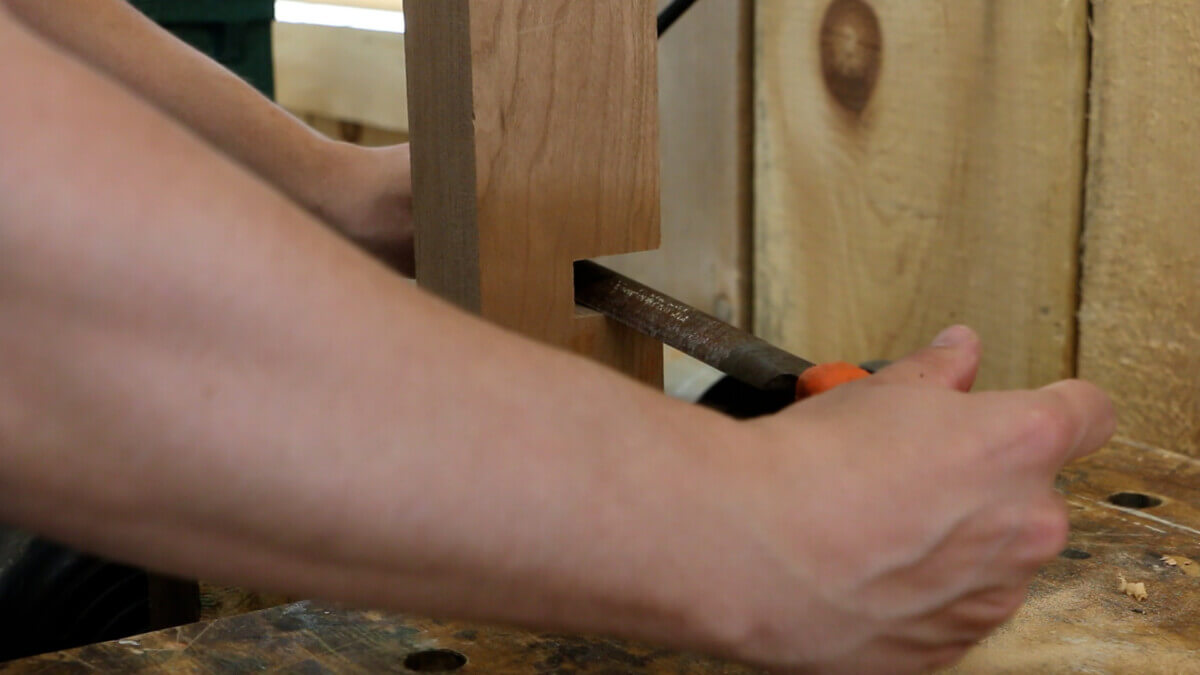
Stop filing when your boards slide together snugly, but not loosely. You should be able to tap them lightly with a rubber mallet and have the boards fall into place.
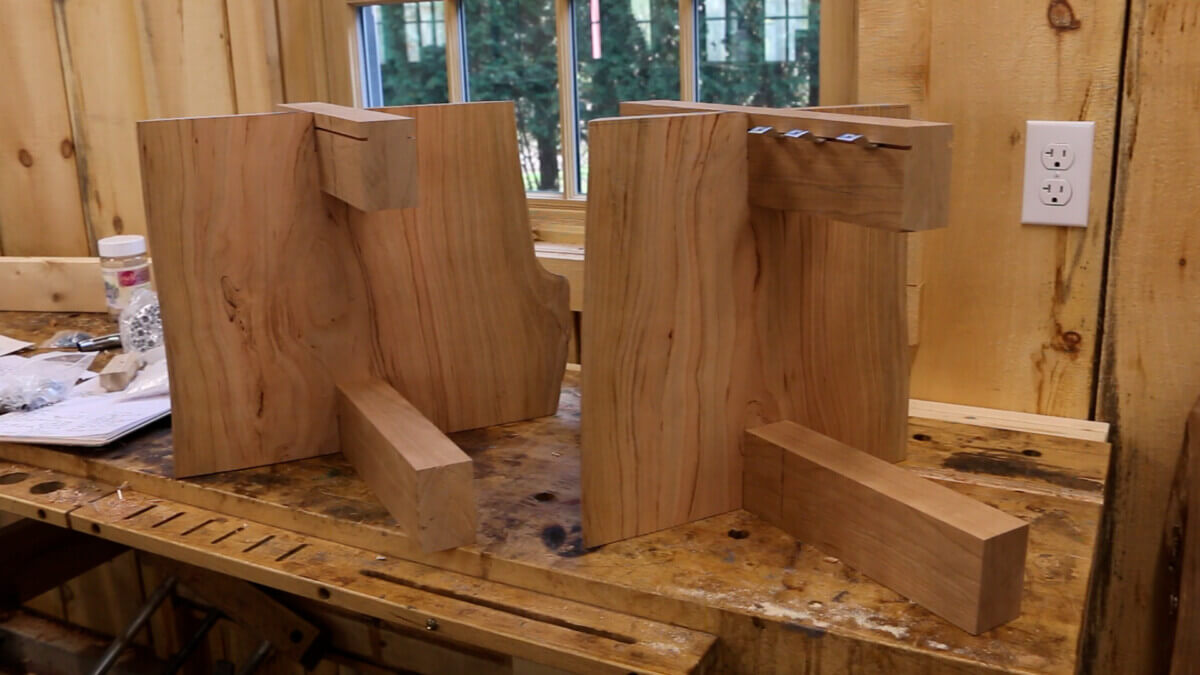
Here’s how the coffee table base will look when dry fitted together. We’ll go over those little metal pieces and channels at the top of the base in the next step.
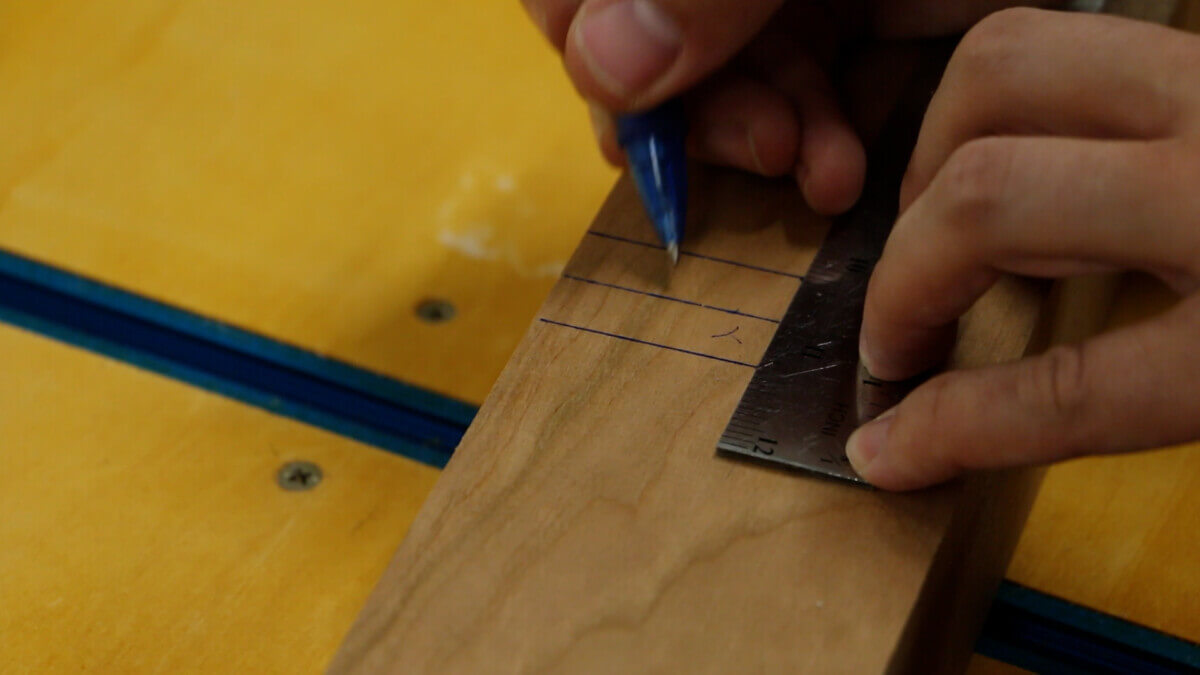
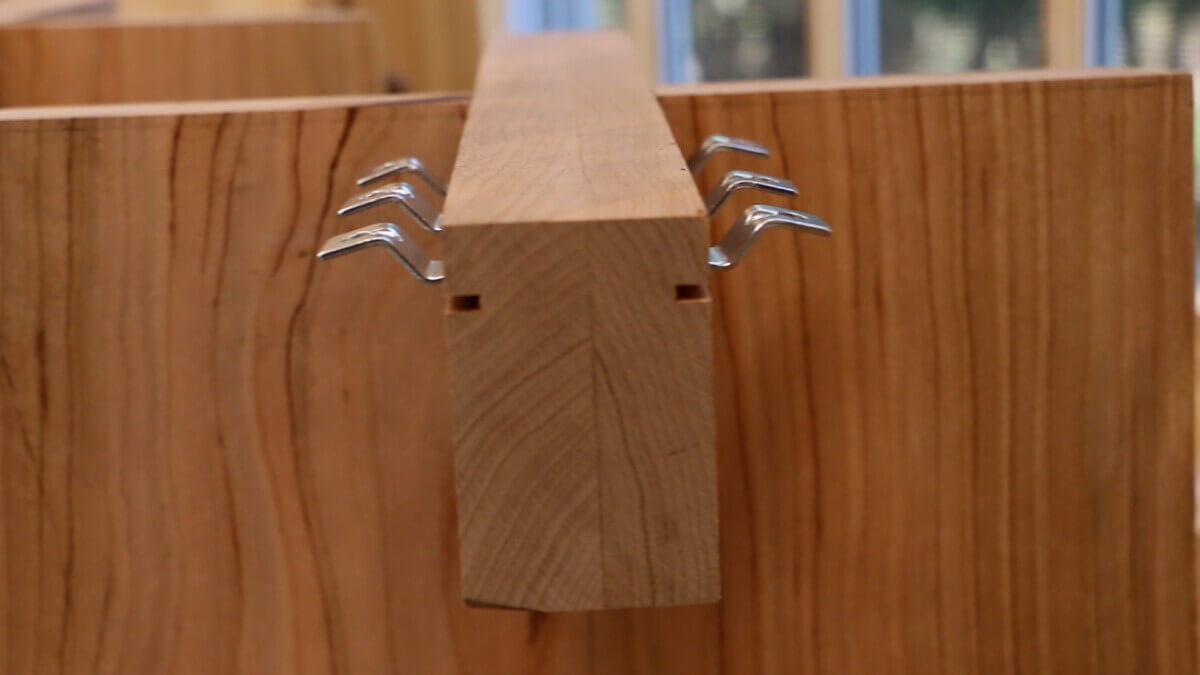
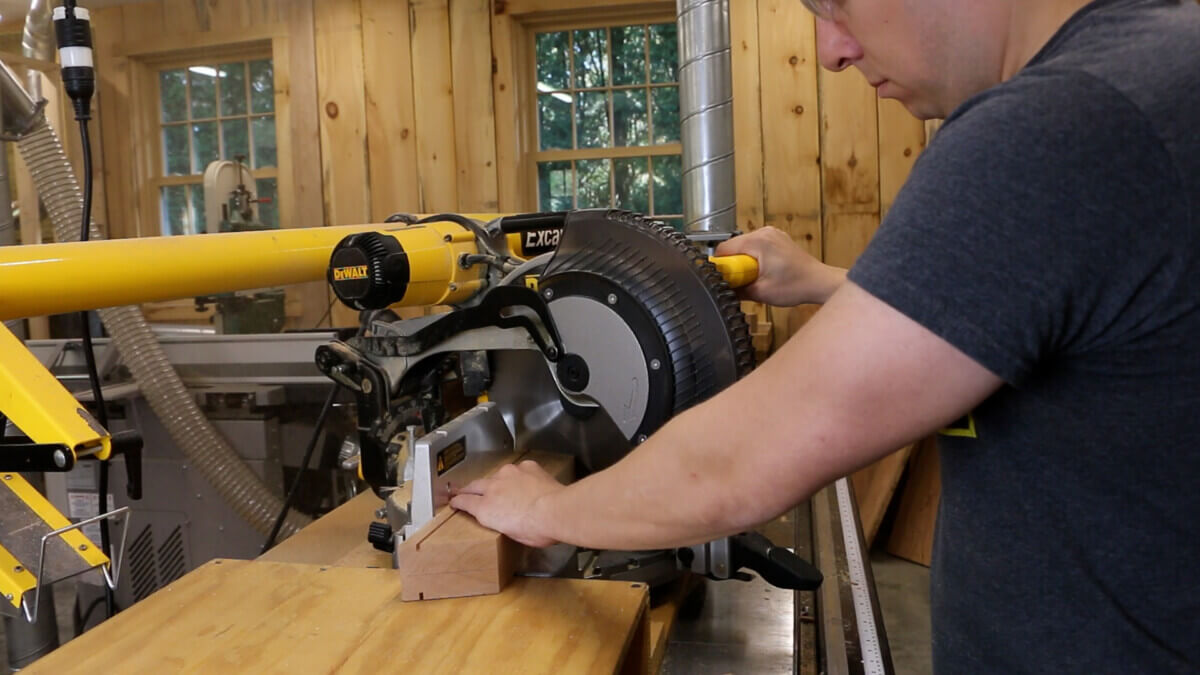
7.) Notch and Miter the Live Edge Coffee Table Cross Supports
We will be using metal table fasteners to attach our coffee table top securely to the top of the 15″ long table top cross support (C). Measure the correct notch placement based on the metal fasteners that you have.
I recommend doing a test using a scrap piece of wood. You want to make sure that the notch is at the correct placement so that the fasteners can grab into them and secure the table top.
Here’s how they will look before we attach the top:
A Nakashima live edge coffee table wouldn’t be complete with out some Japanese-styled accents. Get out your miter saw and attach a stop block. We will cut 22.5 degree miters at both of the ends of the cross support boards C+D.
See step 9 below for a visual of how these miters should look.
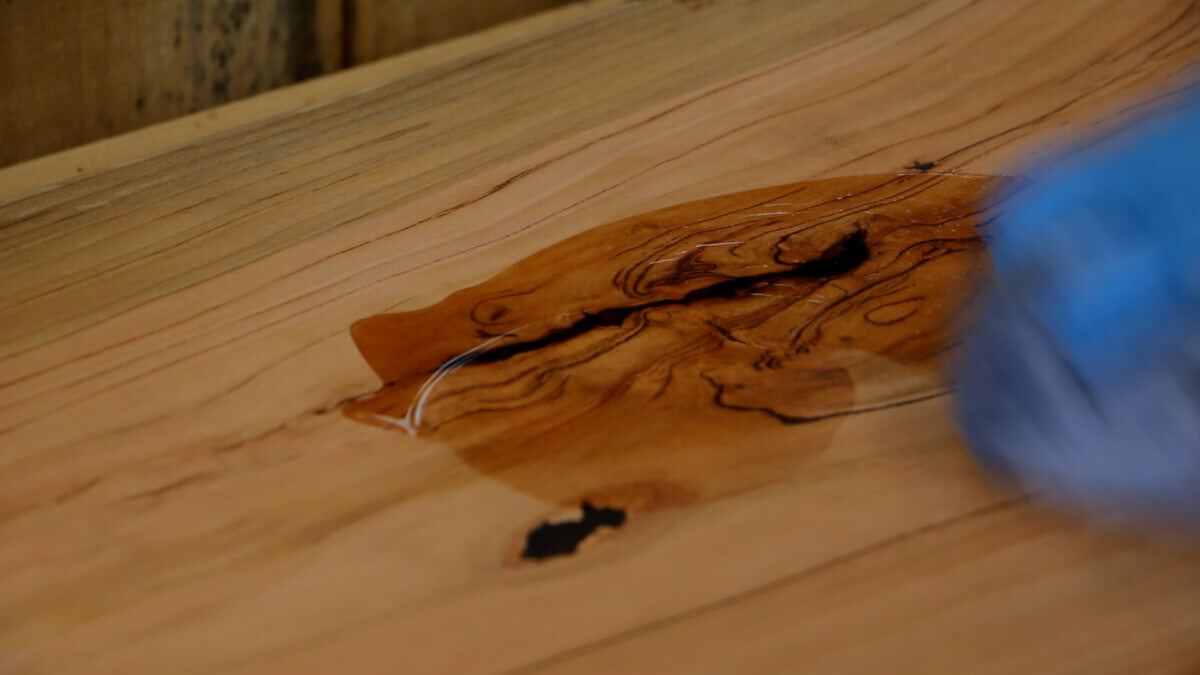
8.) Add Epoxy to Live Edge Coffee Table Voids (optional)
If the top of your slab has voids, splits or gaps that need filling, grab yourself some epoxy resin and hardener. Clear epoxy is a great way to fill in these voids so that you get a flat and flawless tabletop.
Read the instructions on your epoxy and mix together the correct ratio of resin and hardener.
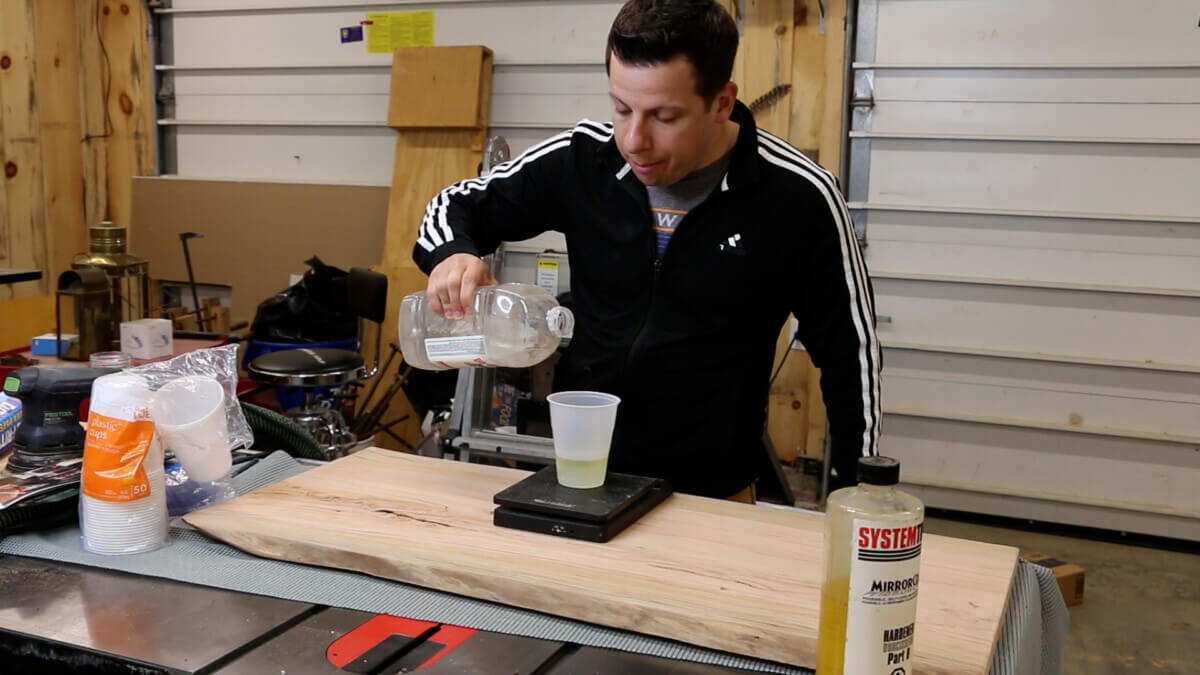
Pour the epoxy into all the cracks and voids. If any voids go all the way through the wood, you’ll need to seal them up on the other side first. Using duct tape or a quick drying super glue will do the trick.
Epoxy is like water. It will drip all the way through any cracks before it dries if there’s nothing to stop it.
Don’t be afraid to pour on extra epoxy, it’s easy to sand flush. Make sure that all the voids are filled to the surface of the table top.
Wait about 24 hours for your epoxy to cure.

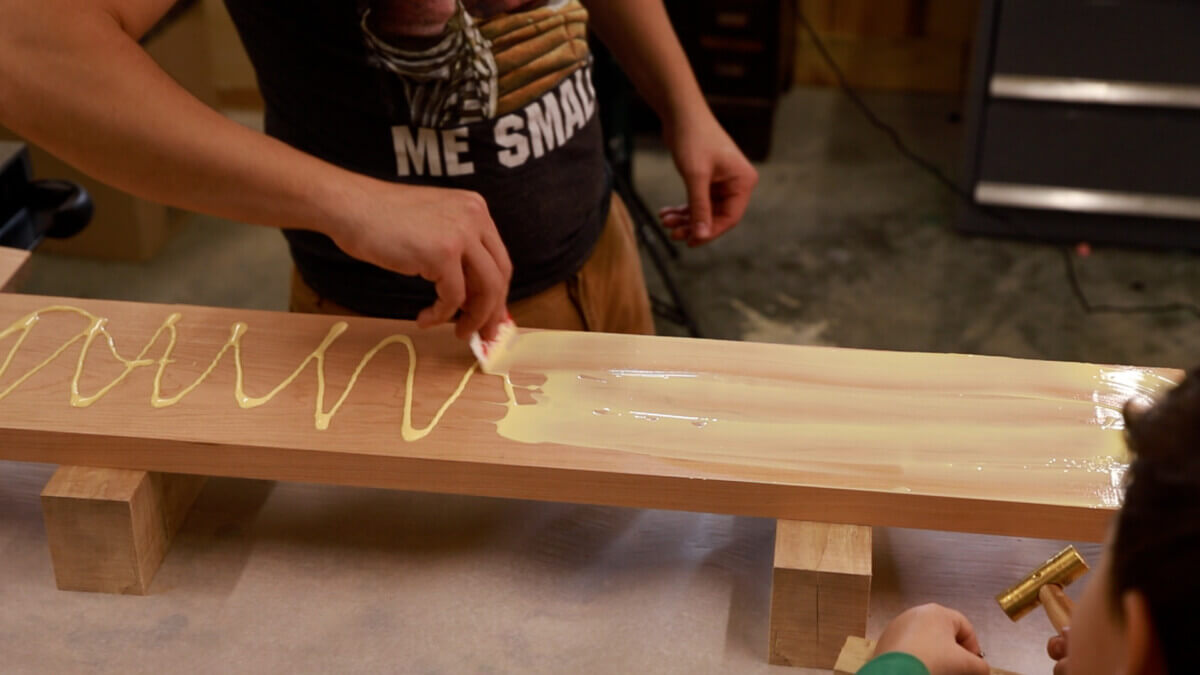
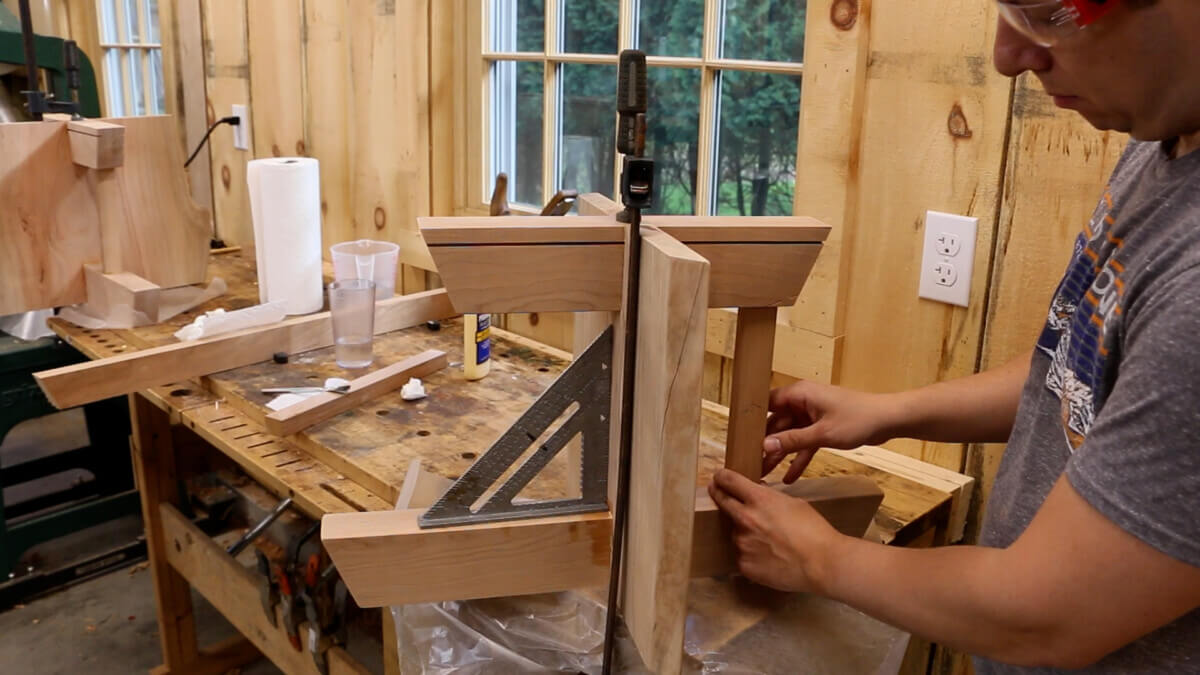
9.) Glue Up the Live Edge Coffee Table Base
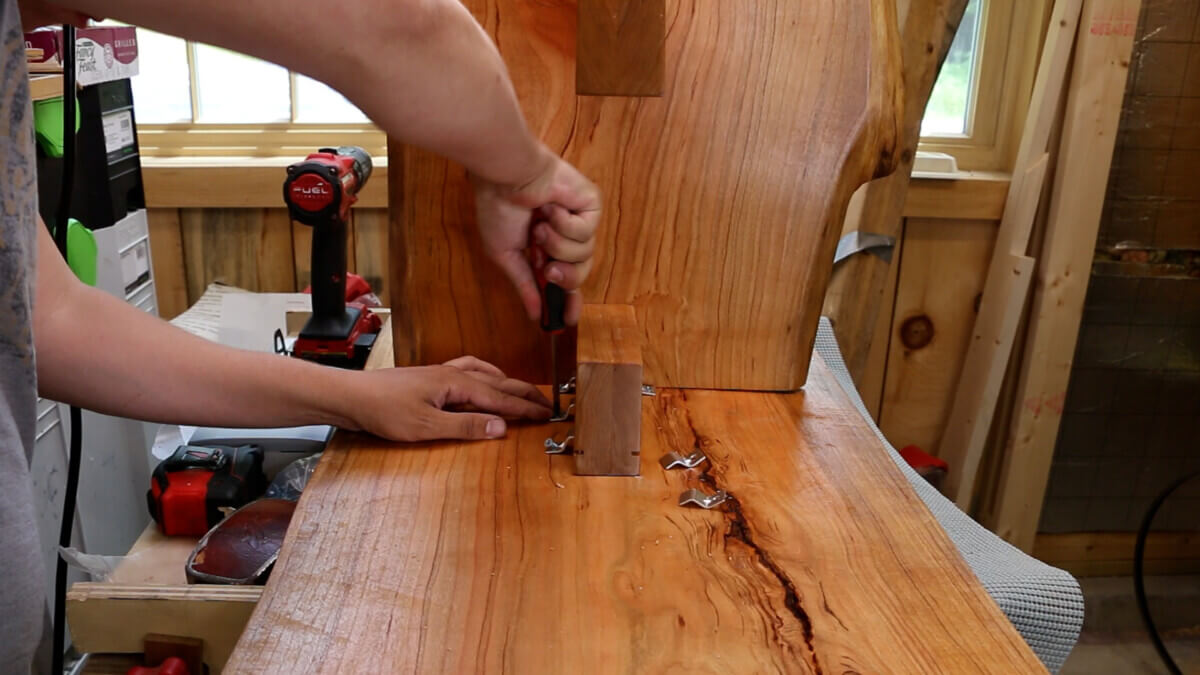
The Nakashima live edge coffee table will look like one solid piece once glued together. Use a brush to paint on some wood glue on all of the joints and where the wood will overlap.
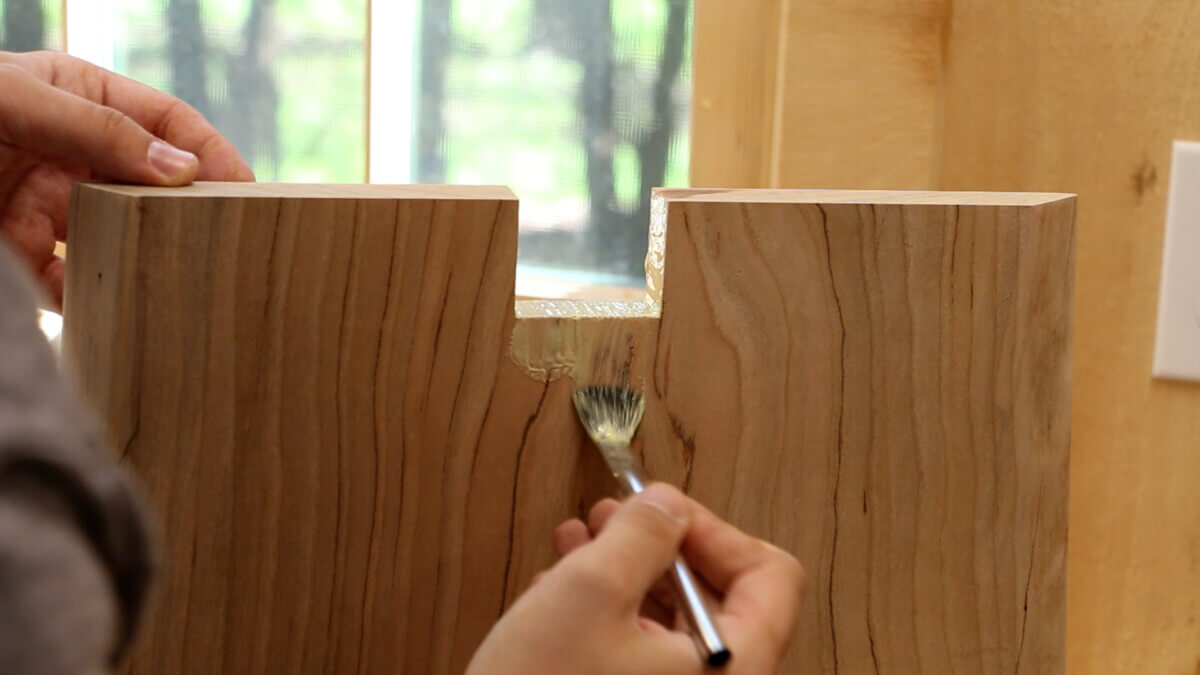
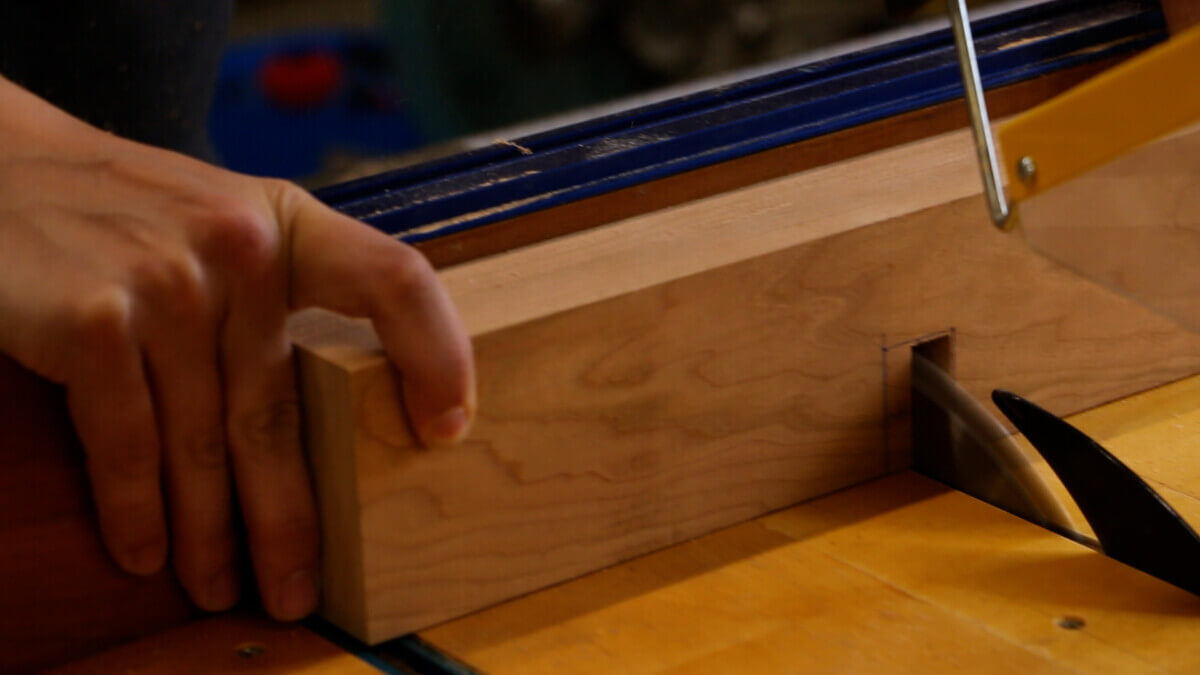
Cut a small piece of scrap wood (see the piece I am holding in the pic below) to support the table top cross support (C) while being clamped. Use a square to make sure that C is level before tightening the clamp. I found the best way to get clamping pressure was to position the base by the corner of a table.
Wait about 24 hours for the glue to dry.
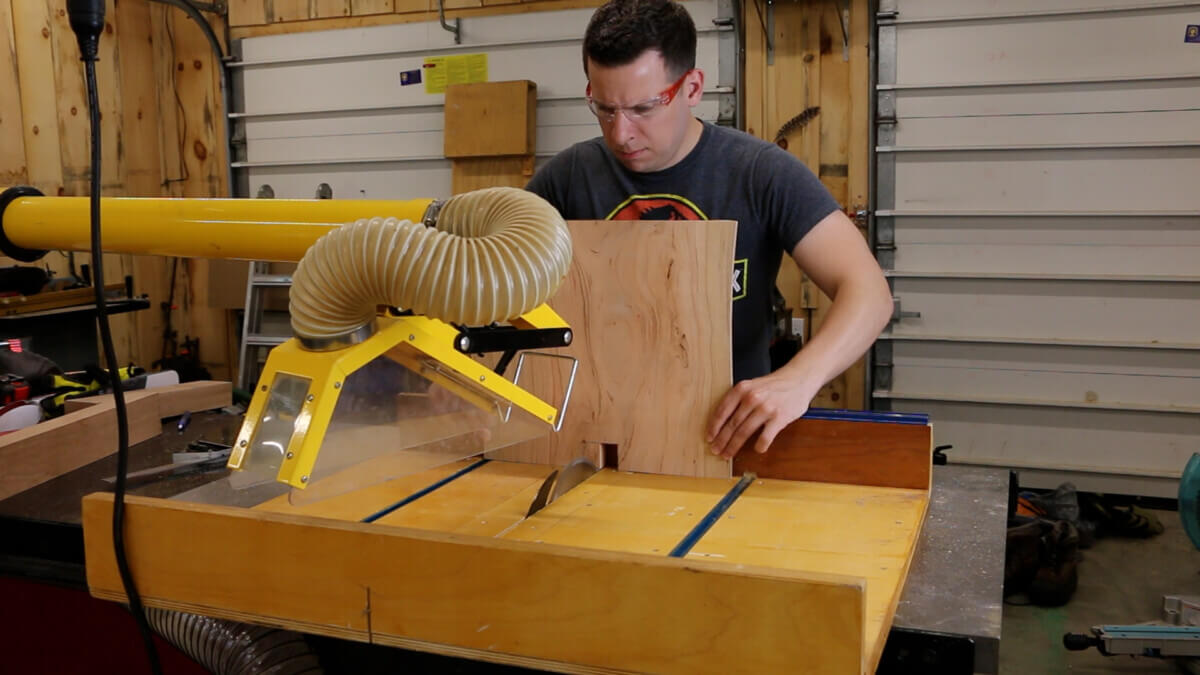
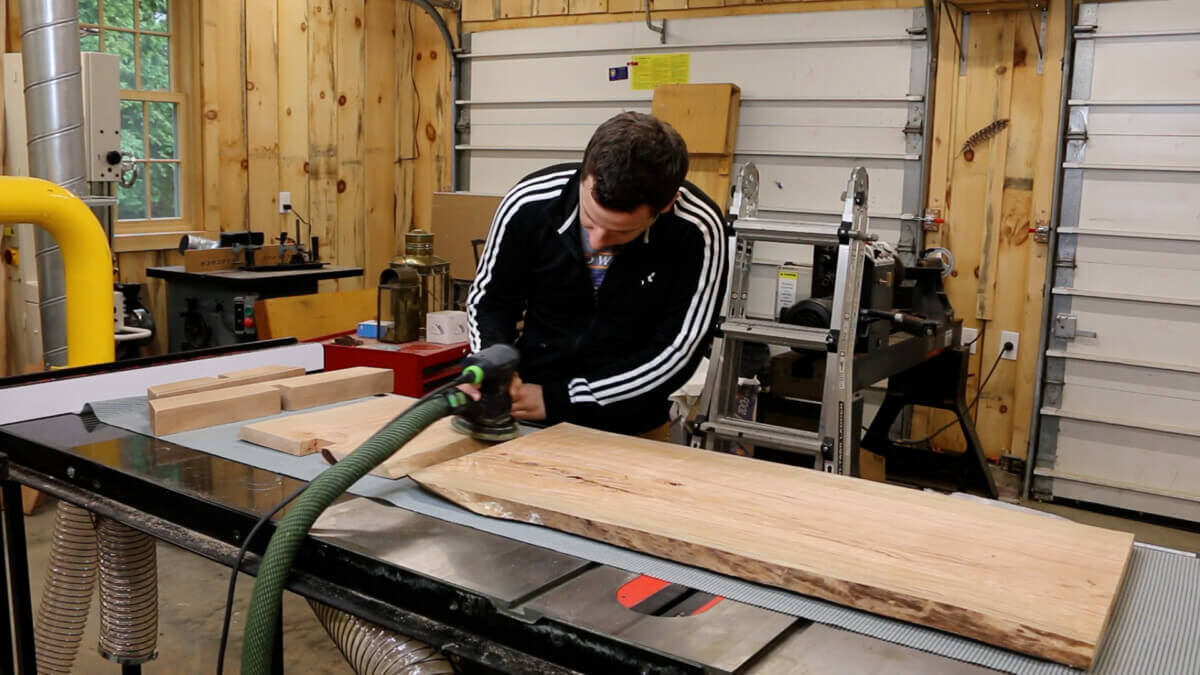
10.) Sanding the Live Edge Coffee Table
Everyone’s favorite part.. sanding… lots of sanding. Fire up your orbital sander and get to work.
Sand thoroughly the first grit, and successive grits will go by faster. Sand down and remove all glue marks. Then, work all pieces up to 400 grit. Sand off all leftover epoxy until it is flush.
Important: Don’t skip grits. Skipping grits will leave scratches and imperfections from the sander which will be AMPLIFIED when we add the lacquer finish.
The grit succession is 40, 60, 80, 100, 120, 150, 180, 220, 320, and 400.
But which grit to start on?
If you have deep saw marks to flatten, start at 100 grit. If after a few minutes with your sander you don’t see much progress, go down a grit to 80 and repeat this process until you can get a flat surface. Then, go up the grit succession.
I’ve found that putting a no-slip material underneath boards that I am sanding reduces the time it takes to get the job done.
11.) Apply the Finish
The finishing process has three steps. Two coats of Tung oil followed by 3 coats of Lacquer, buffed out and polished with 3 coats of paste wax. Finishing takes time, but will leave your live edge coffee table with a beautiful sheen that will last many years.
Here’s how long it takes with cure times:
The tung oil step will take 7-11 days to cure.
The Lacquer step takes 7-8 days cure.
The paste wax step takes less than a day.
Don’t rush a good finish!
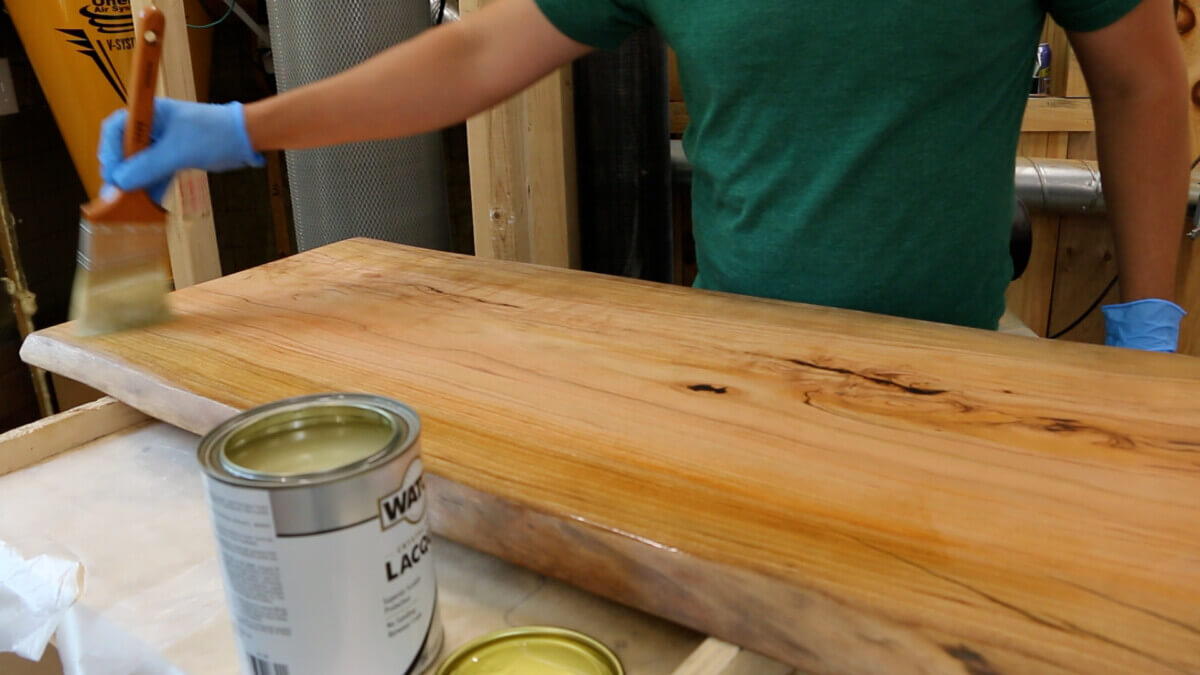
Tung oil
Use a cloth to wipe off any remaining saw dust remaining from sanding and then apply a generous coat of Tung oil with a cloth. Apply to all surfaces of the coffee table top and base.
With another cloth, wipe off any excess oil that hasn’t been absorbed by the wood after 30 minutes.
Let the tung oil penetrate the wood for 24 hours before adding another coat.
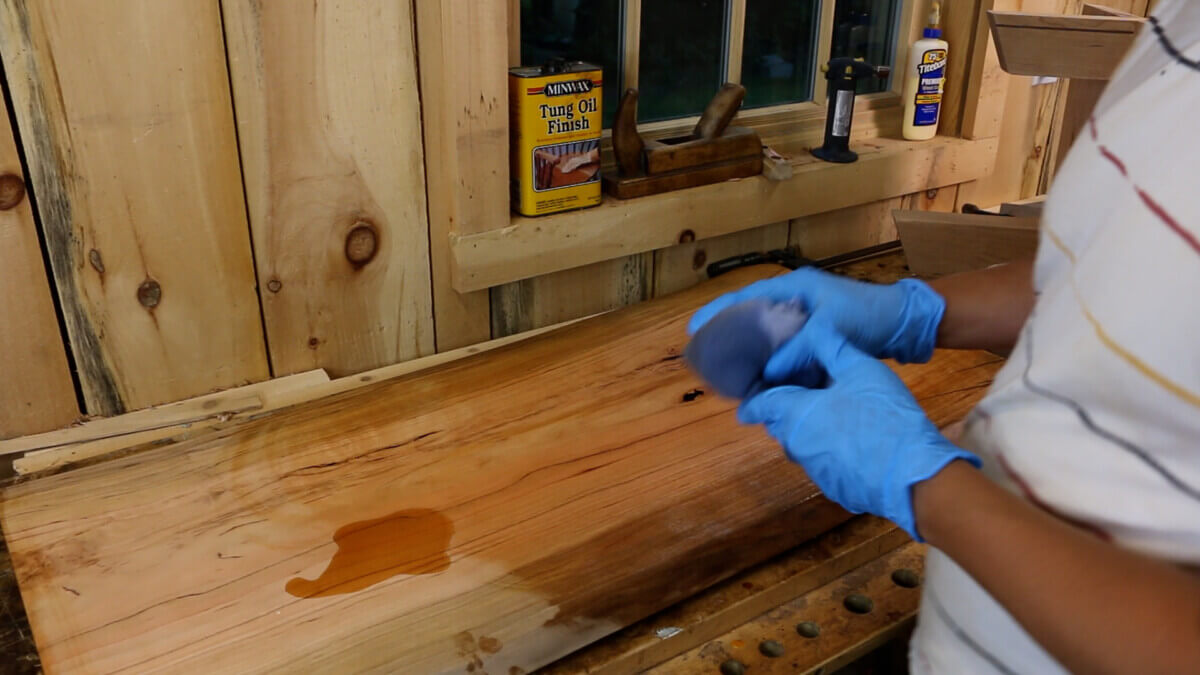
You ideally want the oil to cure before adding the final finish, so allow 7-10 days in a well ventilated area for the oil to dry.
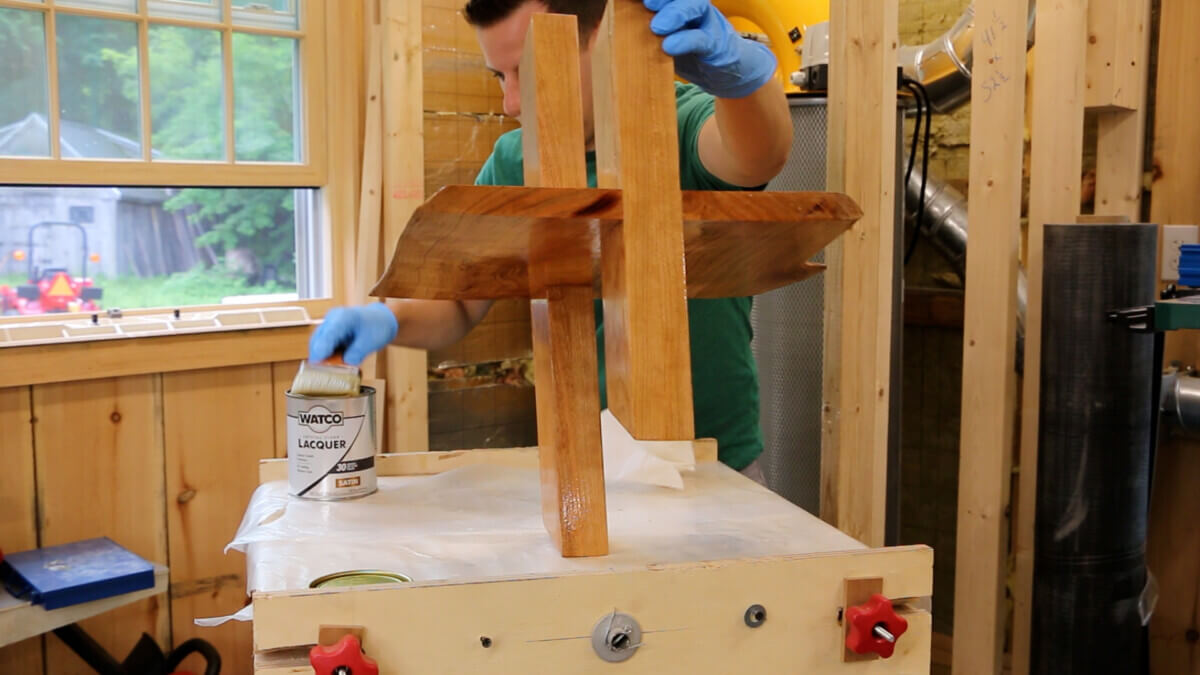
Lacquer
I selected a lacquer finish for the coffee table because it’s durable and easy to apply evenly. Coffee tables are often used daily and take a lot of wear. So the fact that lacquer finishes can later be repaired with new coats made this a good choice.
Polyurethane by comparison, cannot be repaired and when worn, it needs to be stripped to be restored.
Make sure to open windows and have proper ventilation when using lacquer.
I went with Watco satin clear lacquer. Apply the lacquer with long even strokes using a brush. Don’t apply too much, just thin even coats.
Lacquer dries fast. You can recoat once the current coat is dry to the touch, after 1-2 hours. Mine dried in under 30 minutes. Your mileage will vary based on your shop’s humidity. Our goal is three coats.
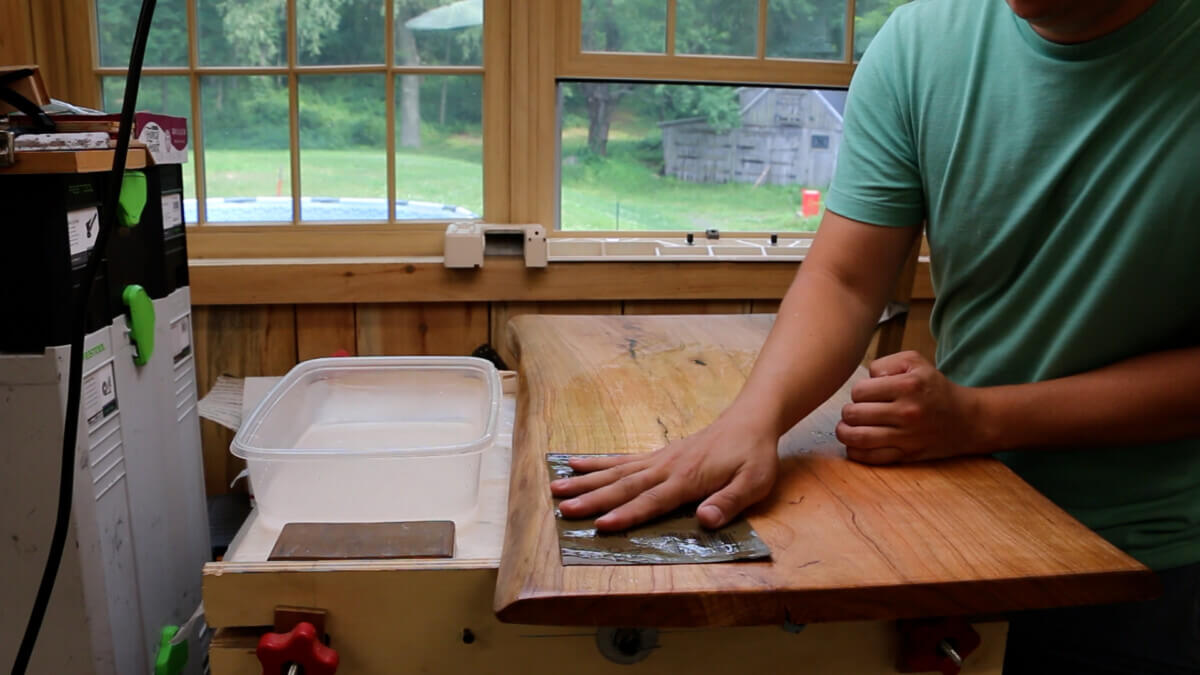
Between coats, submerge a piece of 600 grit wet/dry sandpaper in water and do a light wet sanding. Use a clean cloth or paper towel to wipe off all the sanded lacquer residue.
Be careful along edges as the sandpaper can sand through the finish. Don’t use any grit lower than 600.
I made a mistake of using 400 grit and I accidently sanded through the finish. Raw wood was exposed that showed a different color. Don’t make this mistake! Just go easy with 600 grit.
Also wet sand lightly again after your final coat and wipe clean.
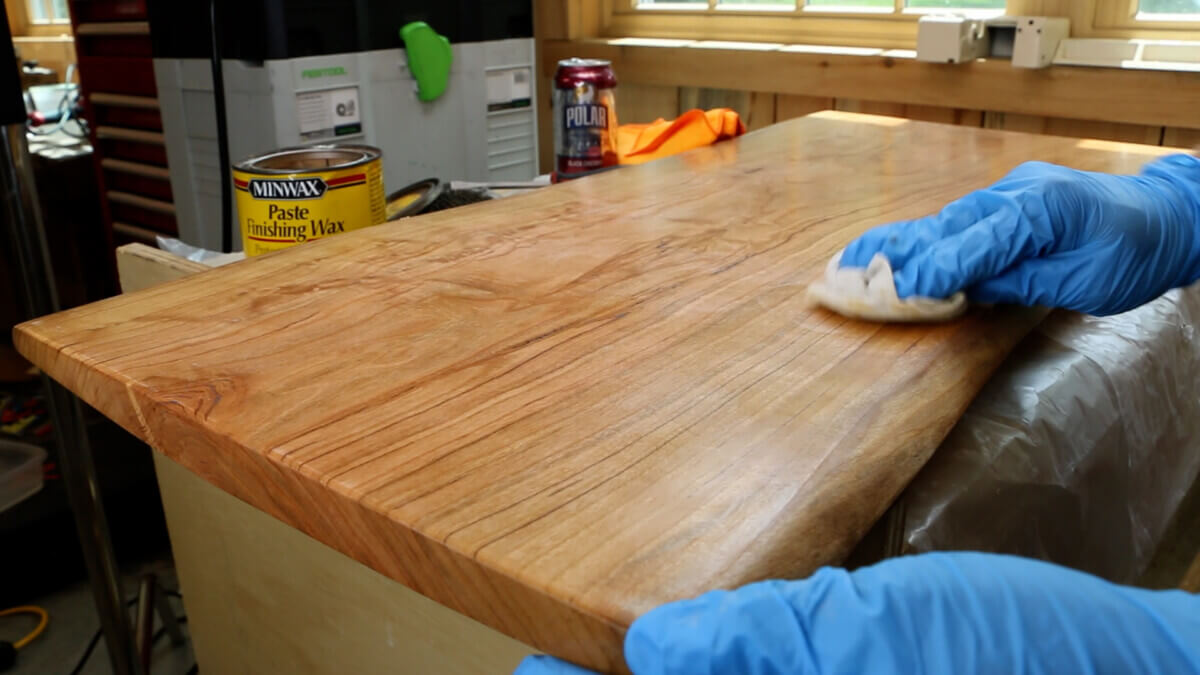
Paste Wax & Buffing
Why paste wax? Well, wax helps us here in a couple of ways. First, it will fill in any tiny imperfections with the lacquer surface. Second, it will give the live edge coffee table a glowing, lustrous shine. Plus, a silky-smooth surface and you won’t be able to resist running your fingers across.
This type of finish is what will set your table apart from mast produced furniture made today.
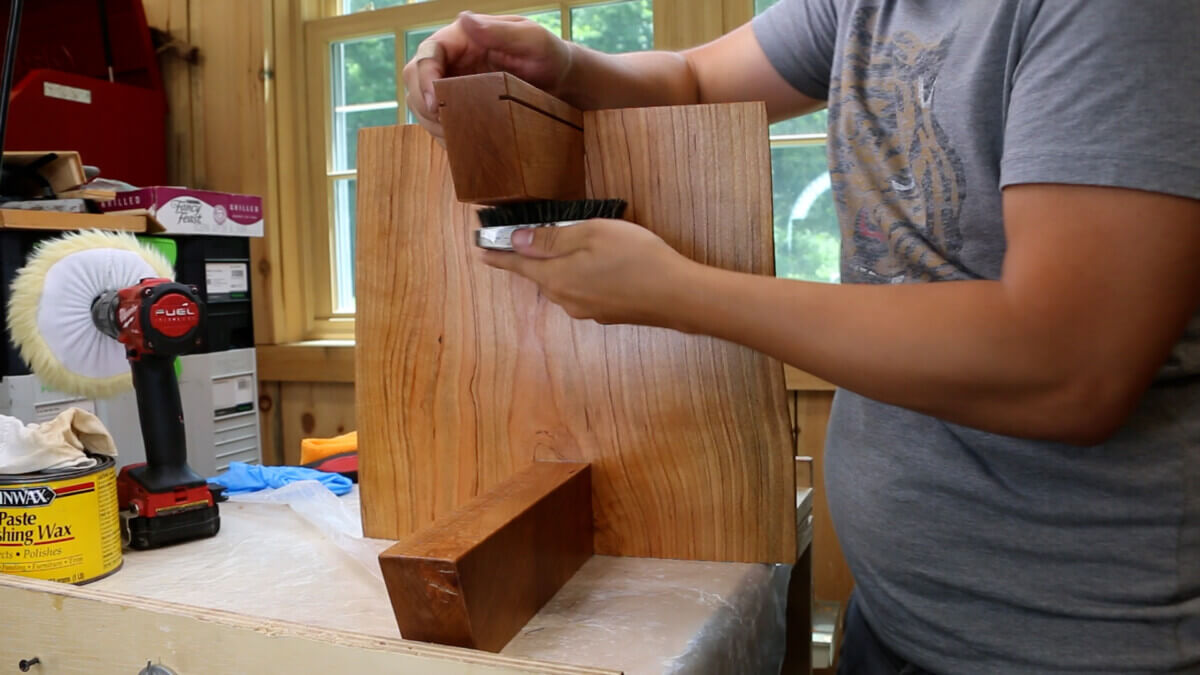
Apply paste wax to all surfaces and sides of the coffee table and base, except for the underside of the coffee table top. Rub in a circular motion using 0000 steel wool loaded up with wax.
Don’t apply a heavy coat. A thin even coat is all that is needed. We’ll be building upon this with 2 more coats for a total of three. After each coat, the paste wax will begin to haze up after 15 minutes.
Once the wax has hazed, first remove excess wax with a stiff brush. Do not let the wax sit for longer than 15 minutes as it will make it more difficult to buff out in the next step.
Now it’s time for the fun part. We put the wax on, now we take the wax OFF!

For the first 2 coats, you can use a cloth to wipe off the wax. Make sure that all the excess wax has been removed before putting on the next coat.
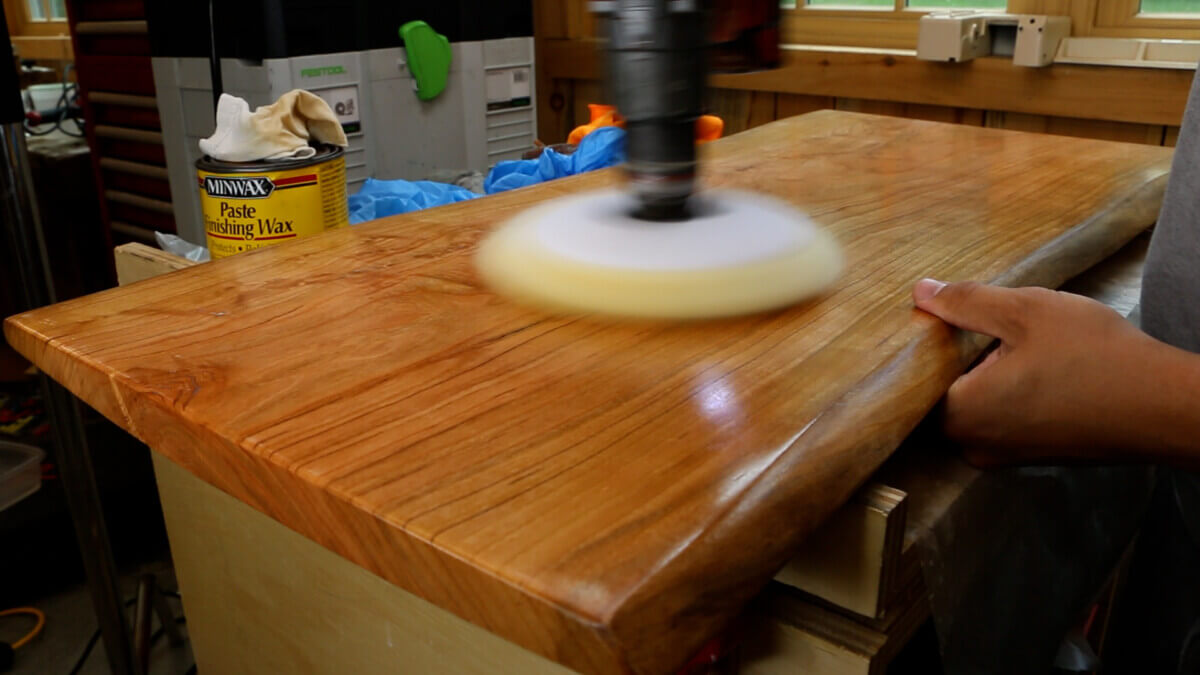
For the final coat, we are going to do something special…
It’s the secret to getting a beautifully buffed satin finish: a buffing wheel attachment for your drill!
Buff all surfaces except the underside of the table top until it’s a consistent sheen that’s to your liking. And that’s it, the finish is done!
We’re almost there… just one more step…
12.) Attach the Top
Flip your table top (A) upside down and measure out the center. Place the support stand on top of it centered.
Place one of the fasteners into the notch and drill a small hole. Don’t drill through the table top! Set a depth gauge by adding some masking tape onto your drill bit.
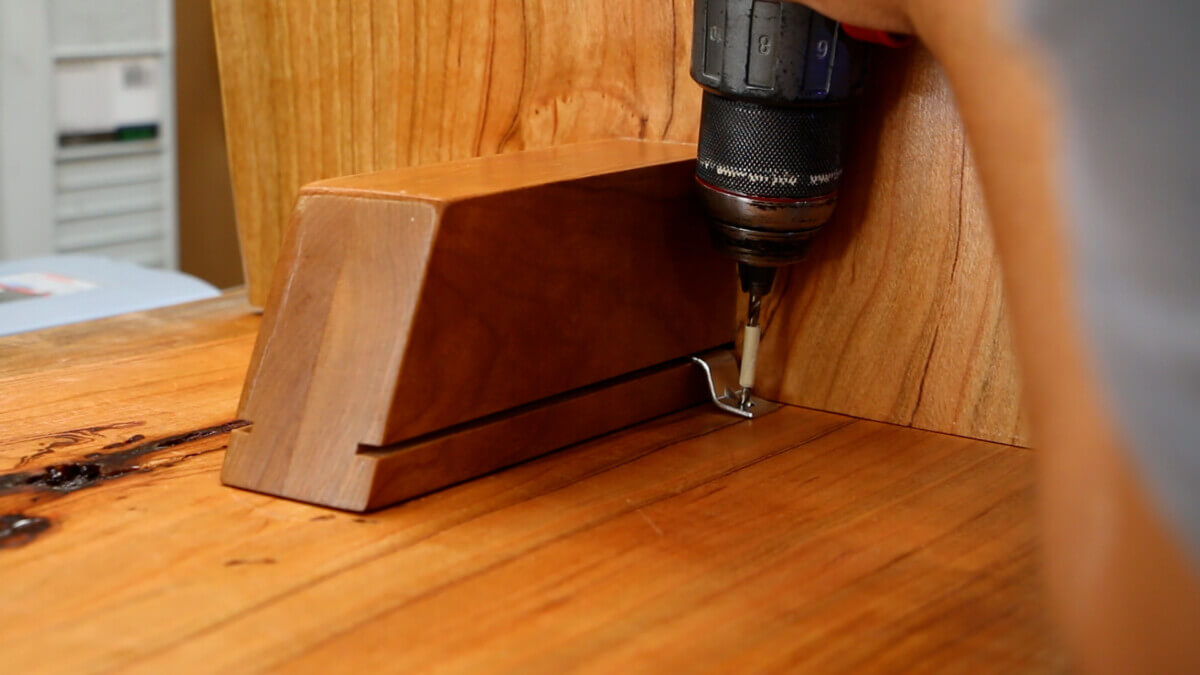
Using a screwdriver, screw in the first fastener. Then repeat this process.
I put one fastener on one side, and then the second one on the other side of the table top cross support so that it would lock in place. This made the process of adding the other fasteners easier because the board would no longer slip around.

Place a total of 3 fasteners on each side. For a total of 12 fasteners. Check that your live edge coffee table top is flat and secure and doesn’t rock.
You did it!
13.) Your Live Edge Nakashima-style Coffee Table is Done!
Bask in the glory of your accomplishment.
The first time I made this table it took me over 20 hours of work. The next one I build will take much less time, so I hope that you can learn from my mistakes!
Build on!

Leave a Reply