
How I found a burl and turned it into wooden bowl
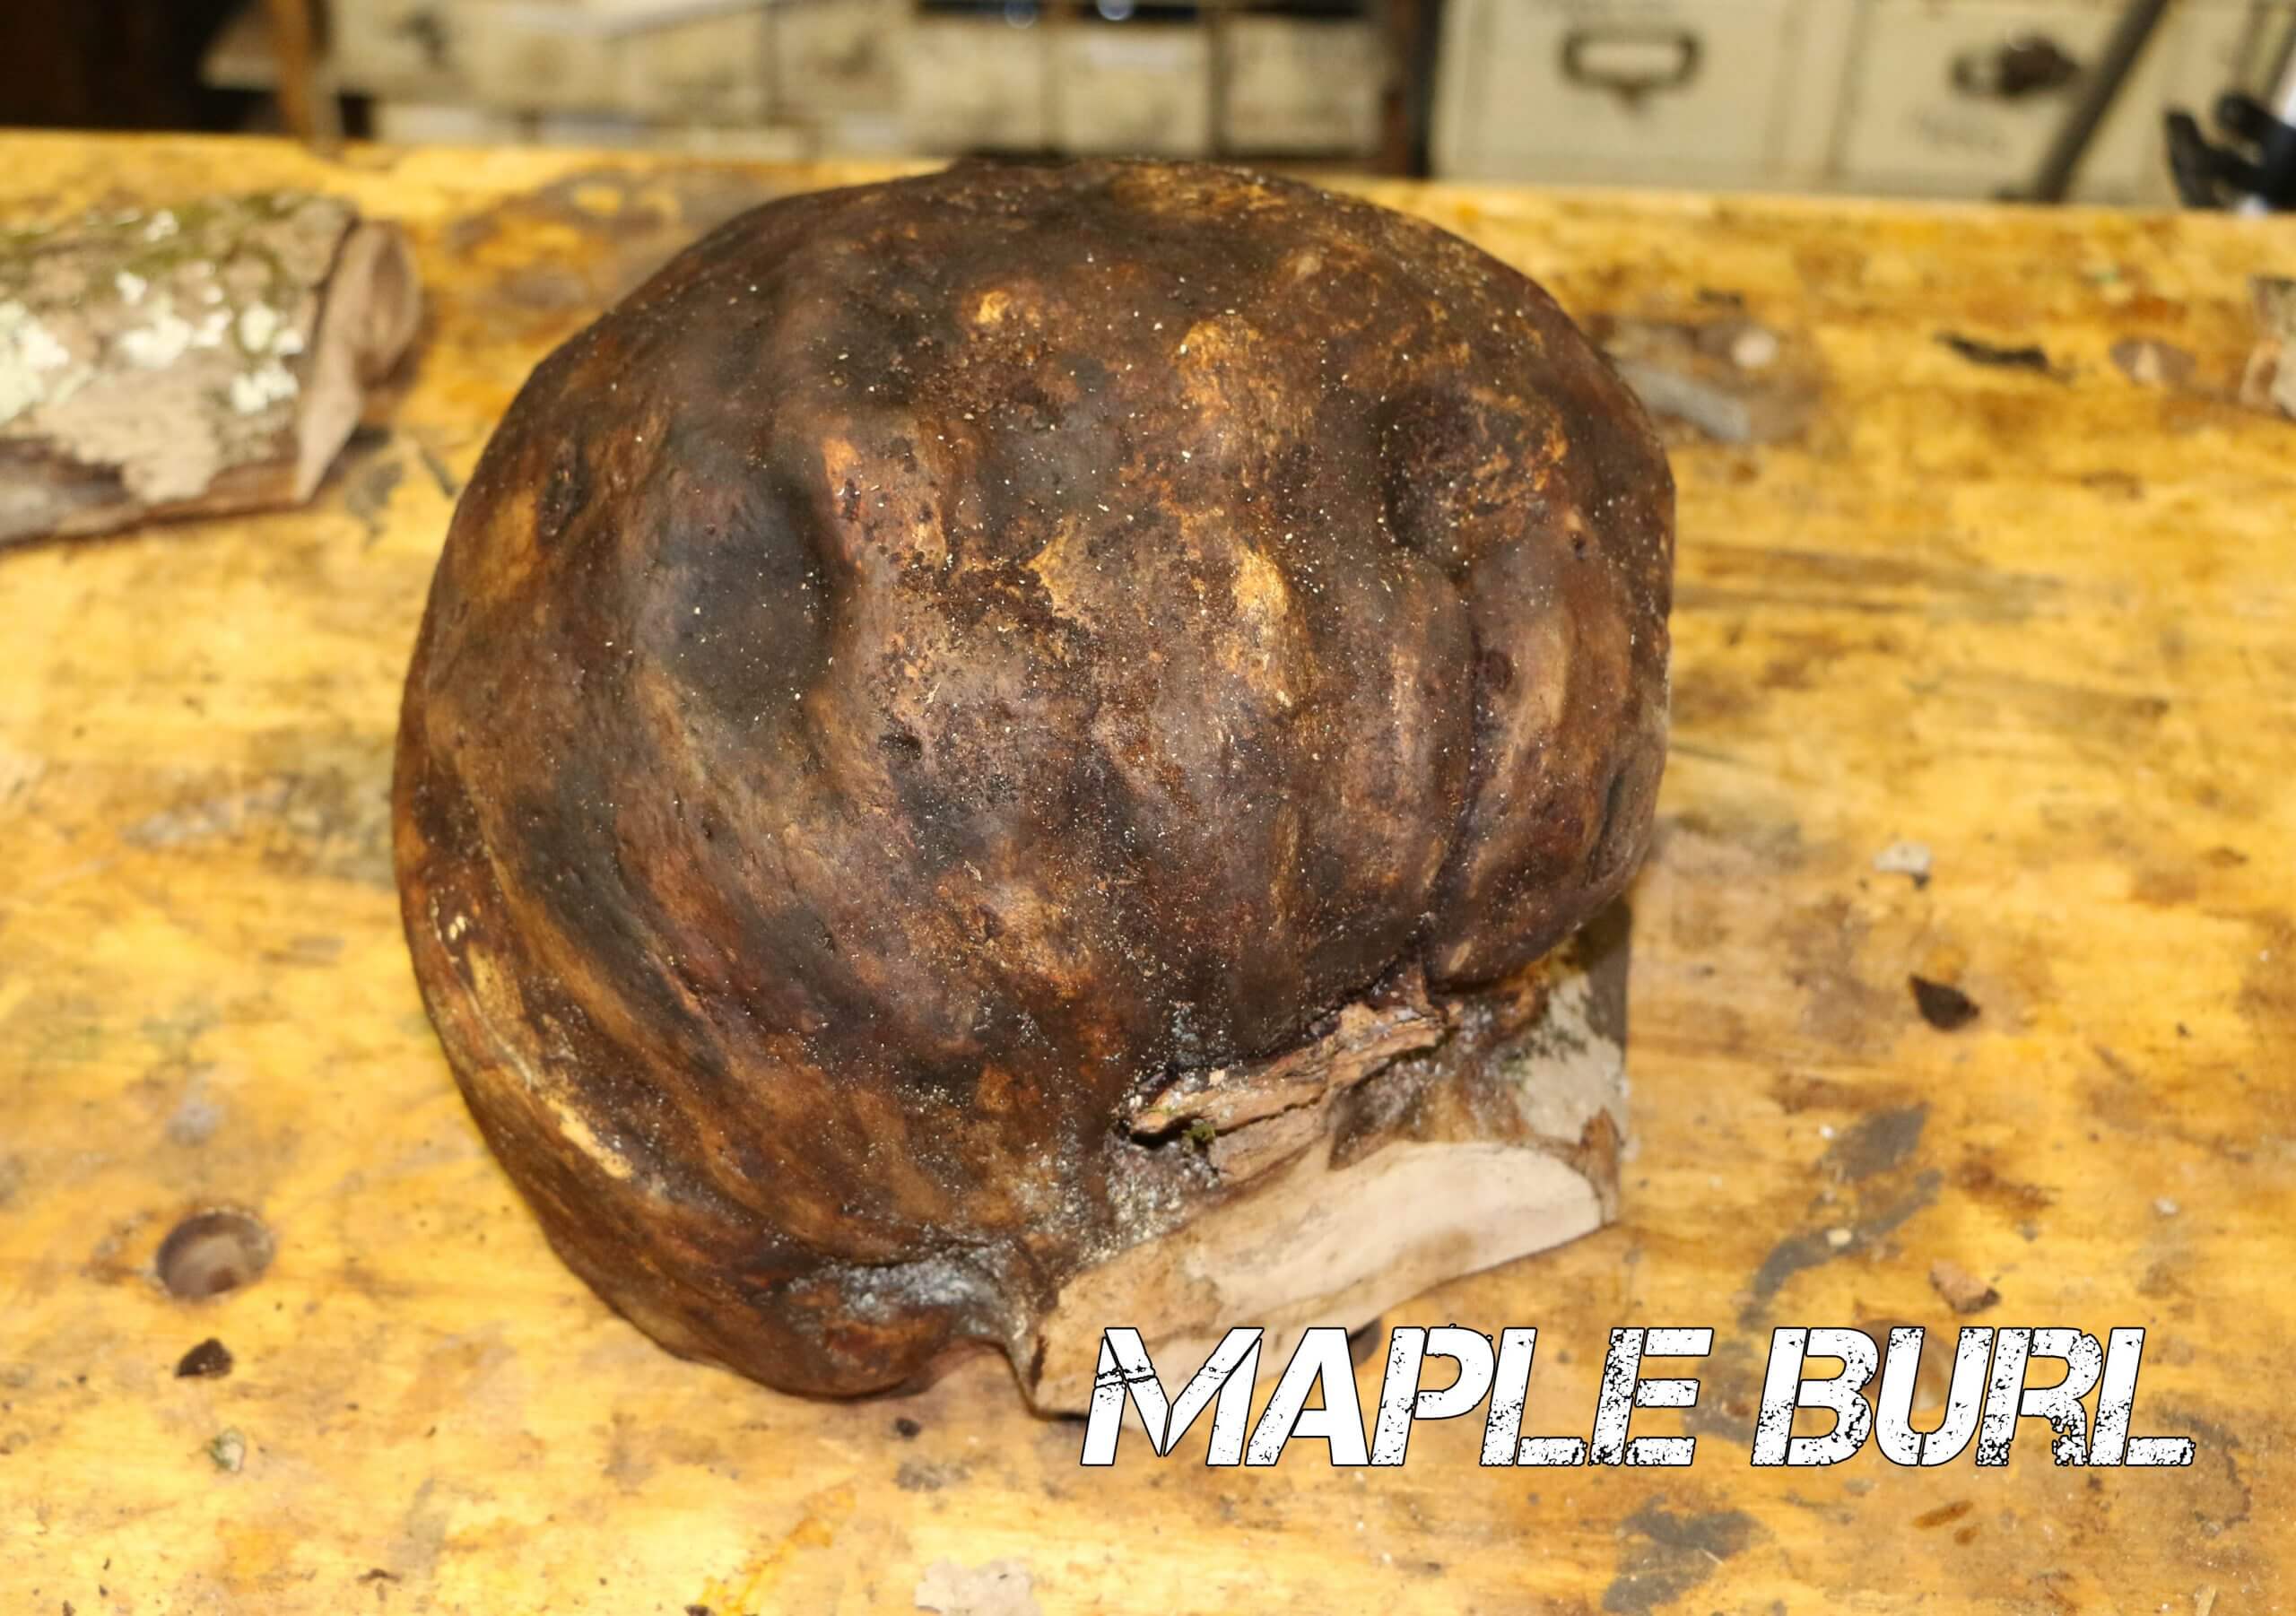
Green burls can found in the woods and turned on a lathe to create unique pieces of art, such as wooden bowls, that can be kept, given as gifts or sold for profit. Just check out what similar bowls are going for on Etsy. While walking in the woods the other day, some friends and I spotted a large maple burl on a downed tree. Using a small saw, we cut the burl from the log and brought it into the shop. After making some quick cuts on the bandsaw, we put it on the lathe and began to turn it. The beautiful grain of the wood came alive throughout the process. I’d like to thank my friend Jon Cooper at jcooperturnings.com for helping with this project.
What is a Burl?
Burls (or burs) are abnormal growths on trees that look like large bumps. The grain of the wood grows in random swirling patterns and makes for very beautiful wood veneers and turnings. These can be found on nearly any type of tree. Harvesting them usually will harm the tree, so try and only take them off of trees that are already dead, or if you have permission.

What you’ll need – standard woodturning tool setup
Wood Lathe (Need a bigger lathe for bigger bowls)
Turning Chisels: Bowl Gouge, parting tool & round nose scraper
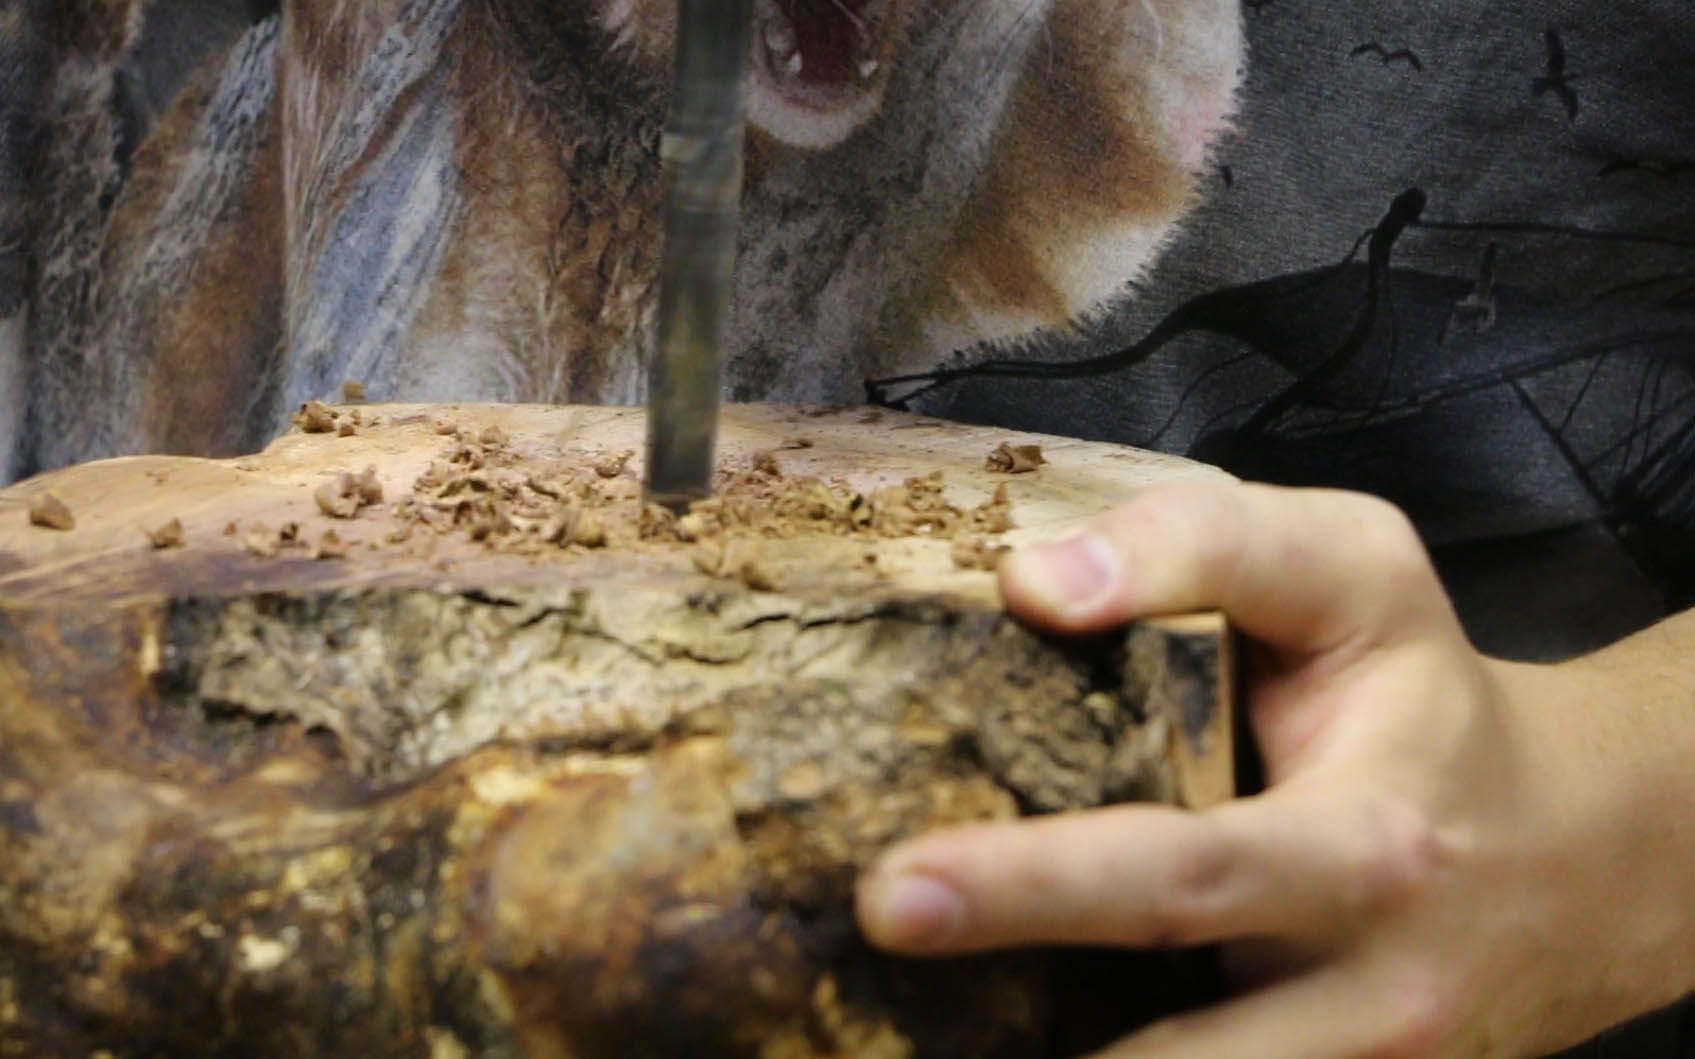
Drill
Bench grinder (or keep chisels sharp)
Bandsaw (or jigsaw for smaller burls)
Calipers (To measure thickness)
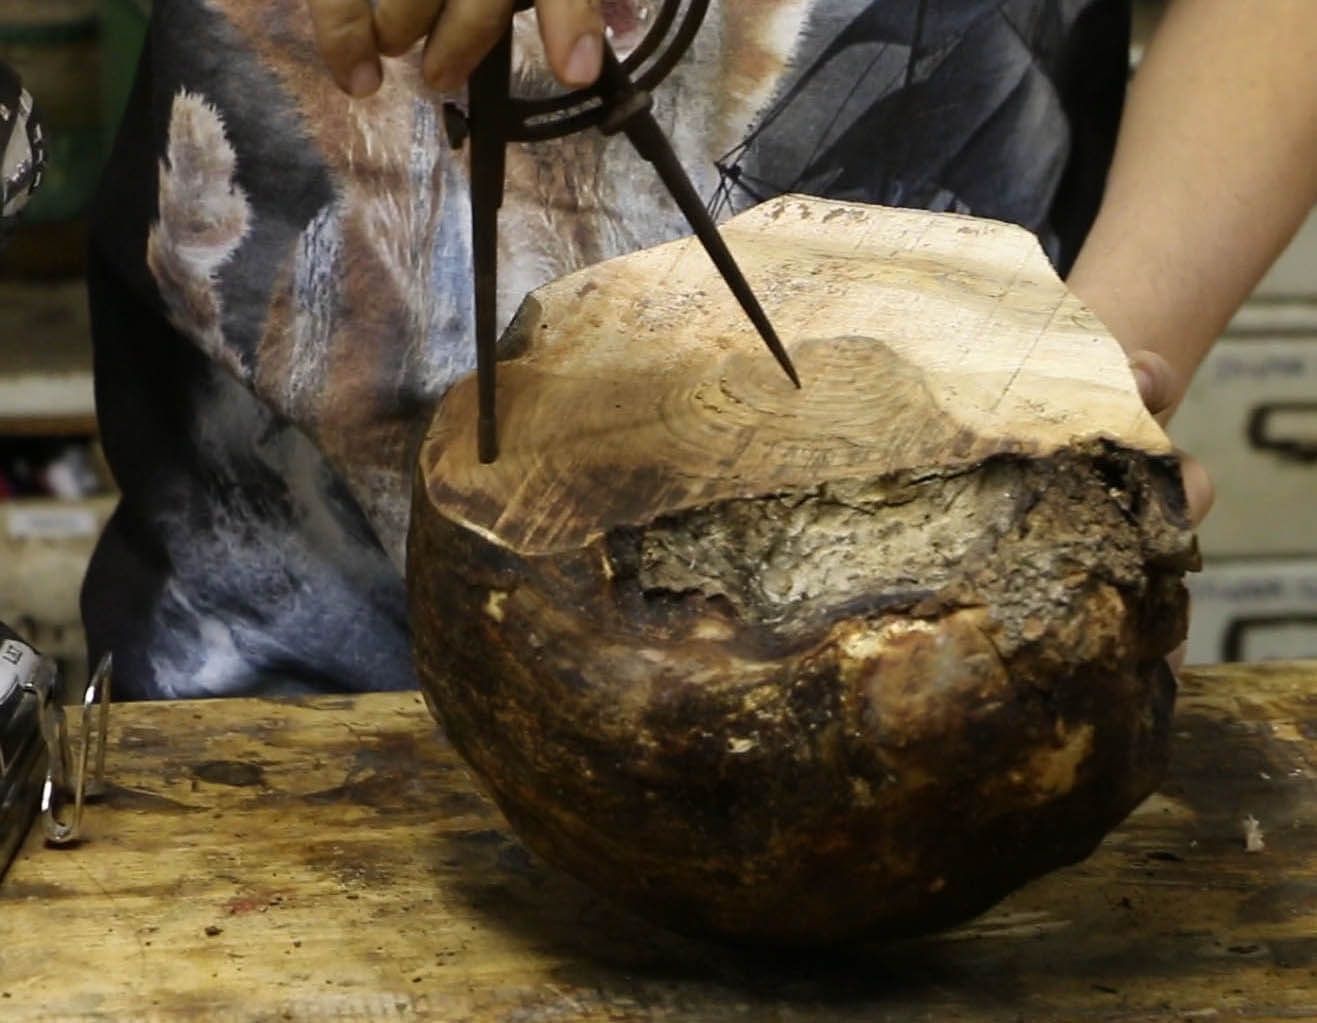
Compass (to find the center of the burl)
sandpaper 80,120,180,220 grits
Oil finish – salad bowl if you plan to use food, otherwise tung/danish oil
a burl! These can be bought from specialty lumber shops, eBay, or found in the woods.

Step one: harvesting and cutting the burl
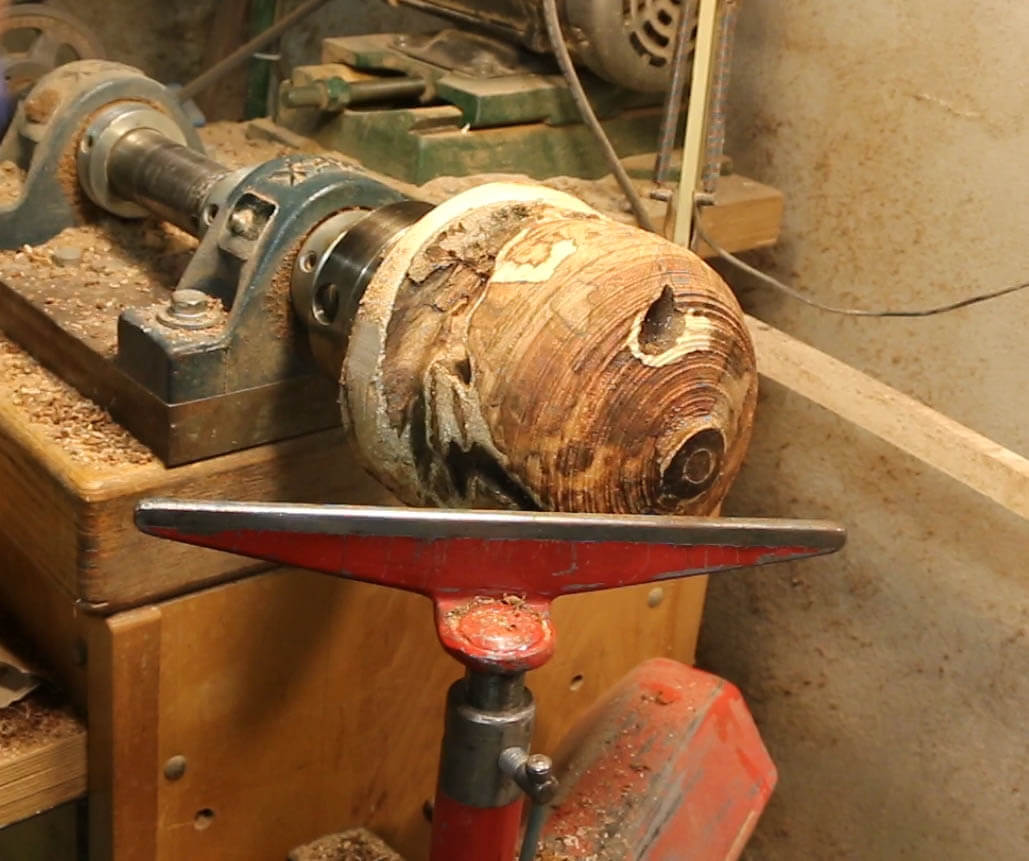
Obtain a burl large enough that can be turned into a wooden bowl of your choice. The diameter of the bowl will be quite a bit less than the burl itself as you turn it into a round shape. Burls can found in the woods or purchased on eBay or a local specialty lumber shop. You want to cut the burl from the branch that it is attached to so that it is small enough to carry and get into your shop. Then, remove the loose pieces of bark from the burl so that it doesn’t fly off later on when it is spinning on the lathe. Cut the burl into a very rough circular shape. Since the burl that I harvested was on both sides of the branch, but not connected, I had to cut it into a cross section.


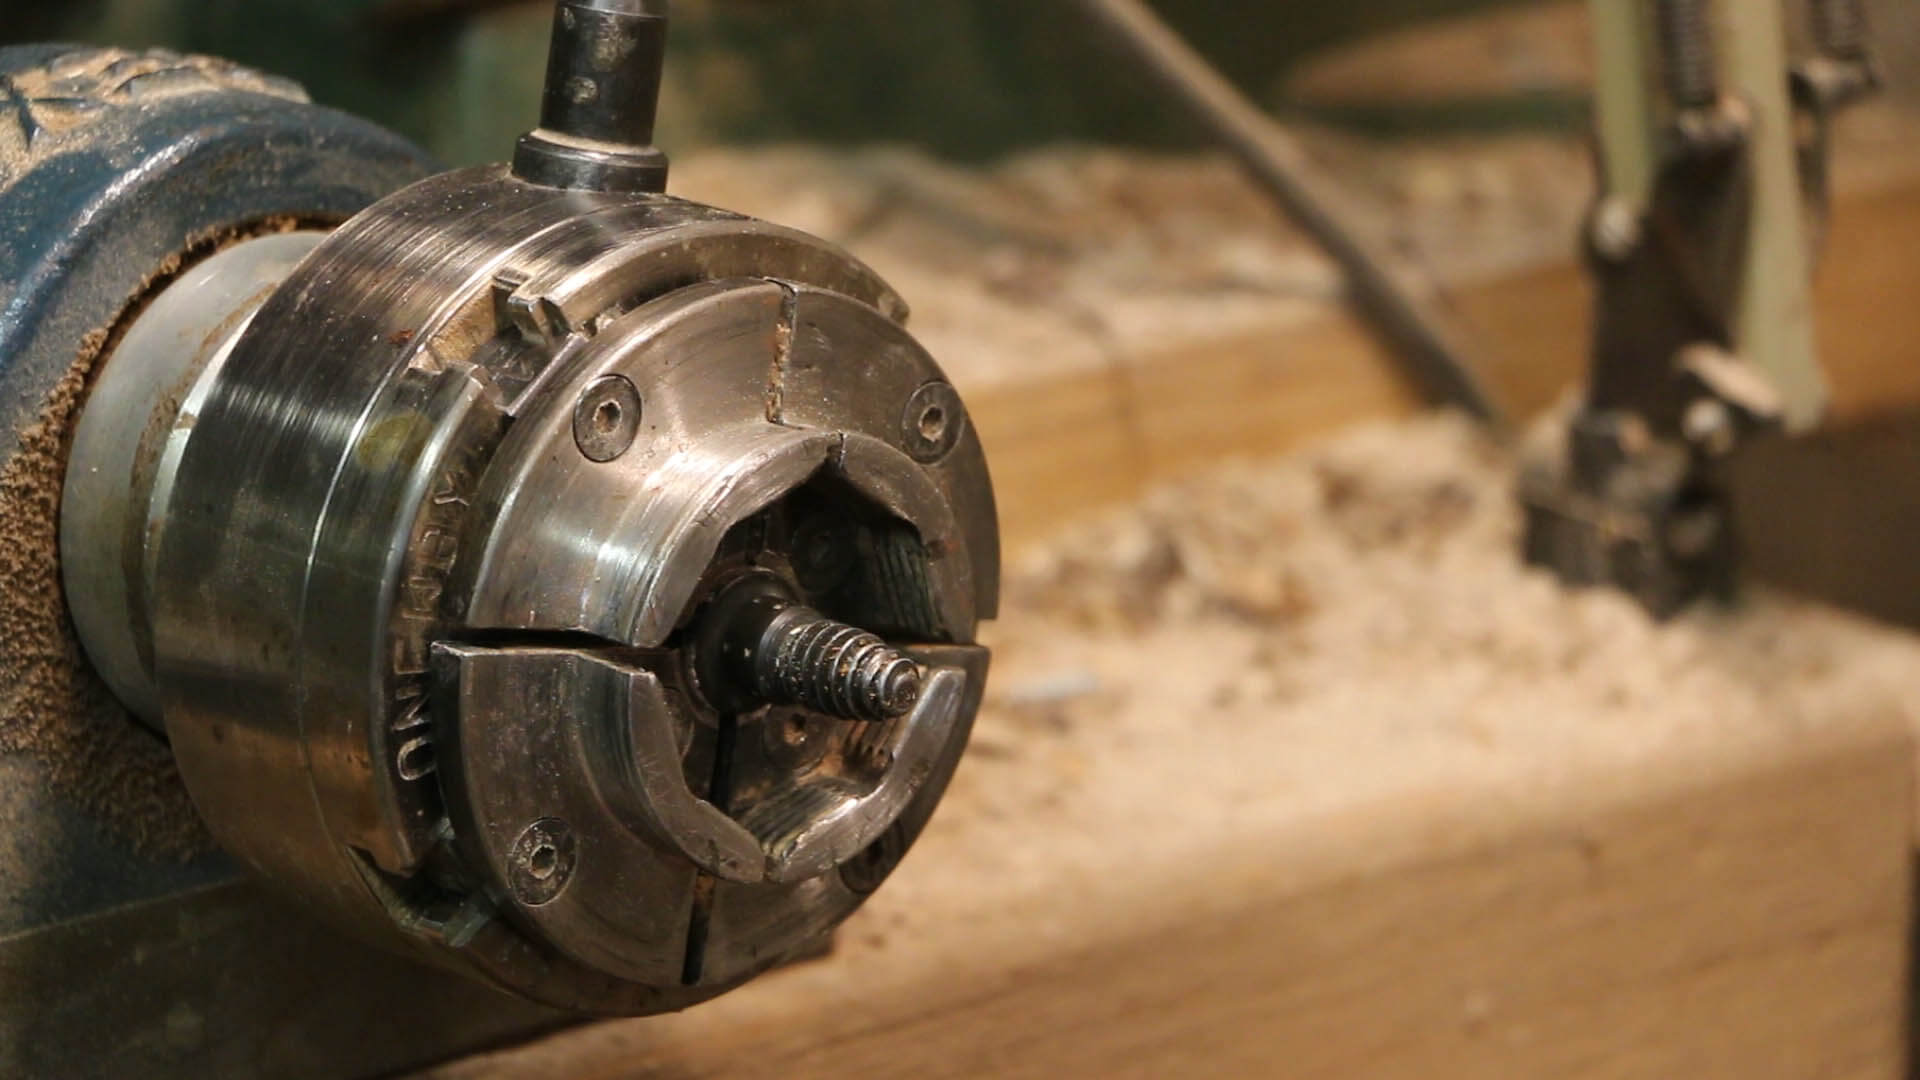
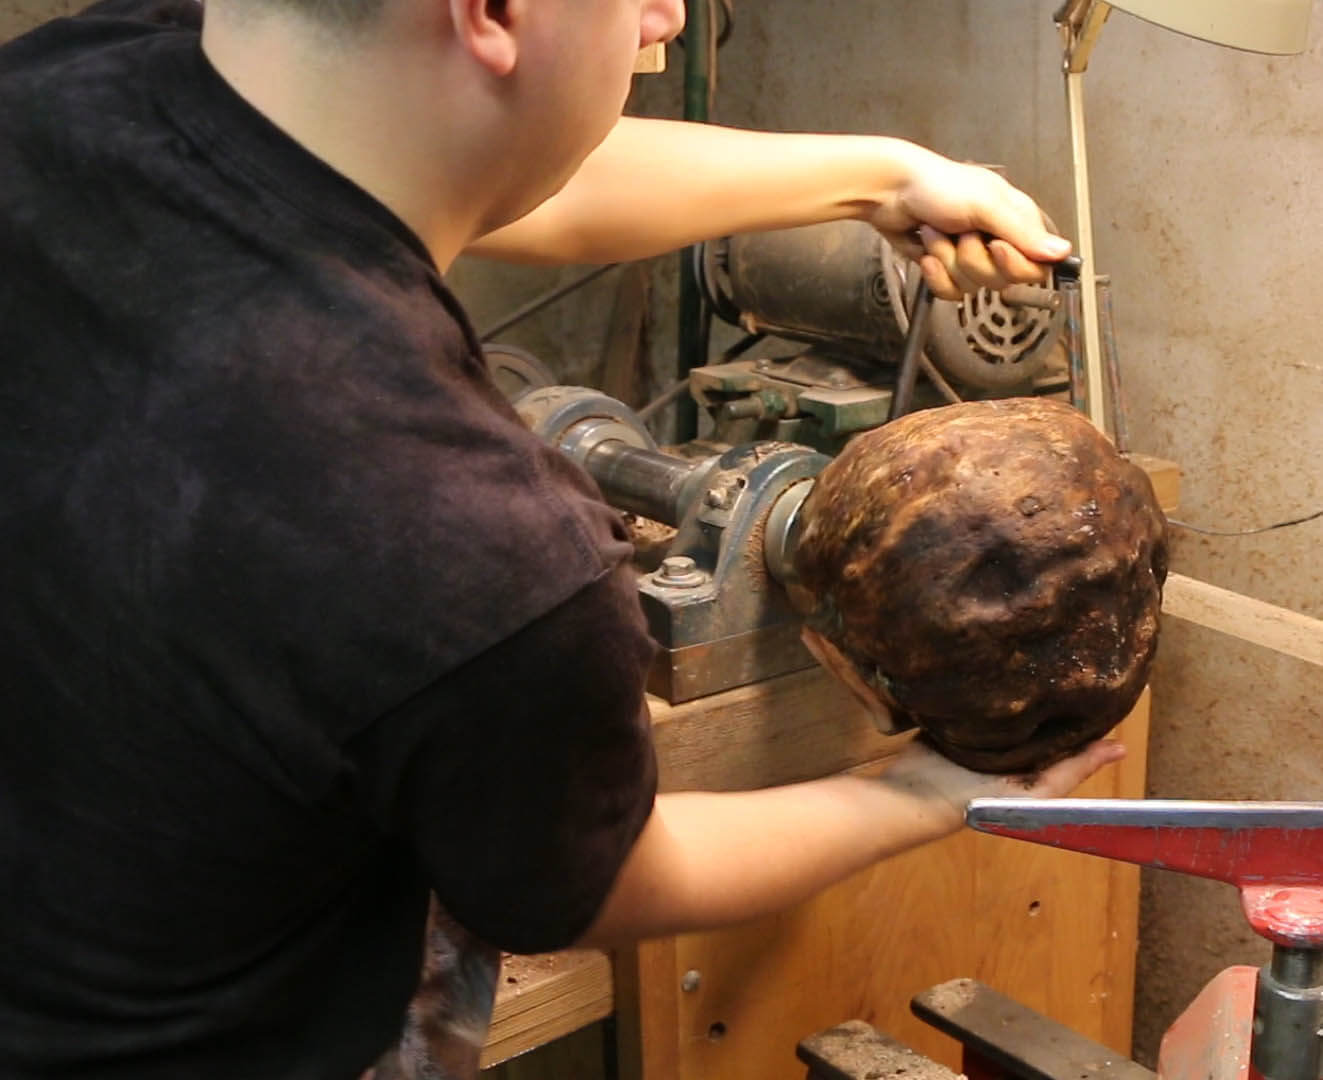
Step two: mount the burl on the wood lathe
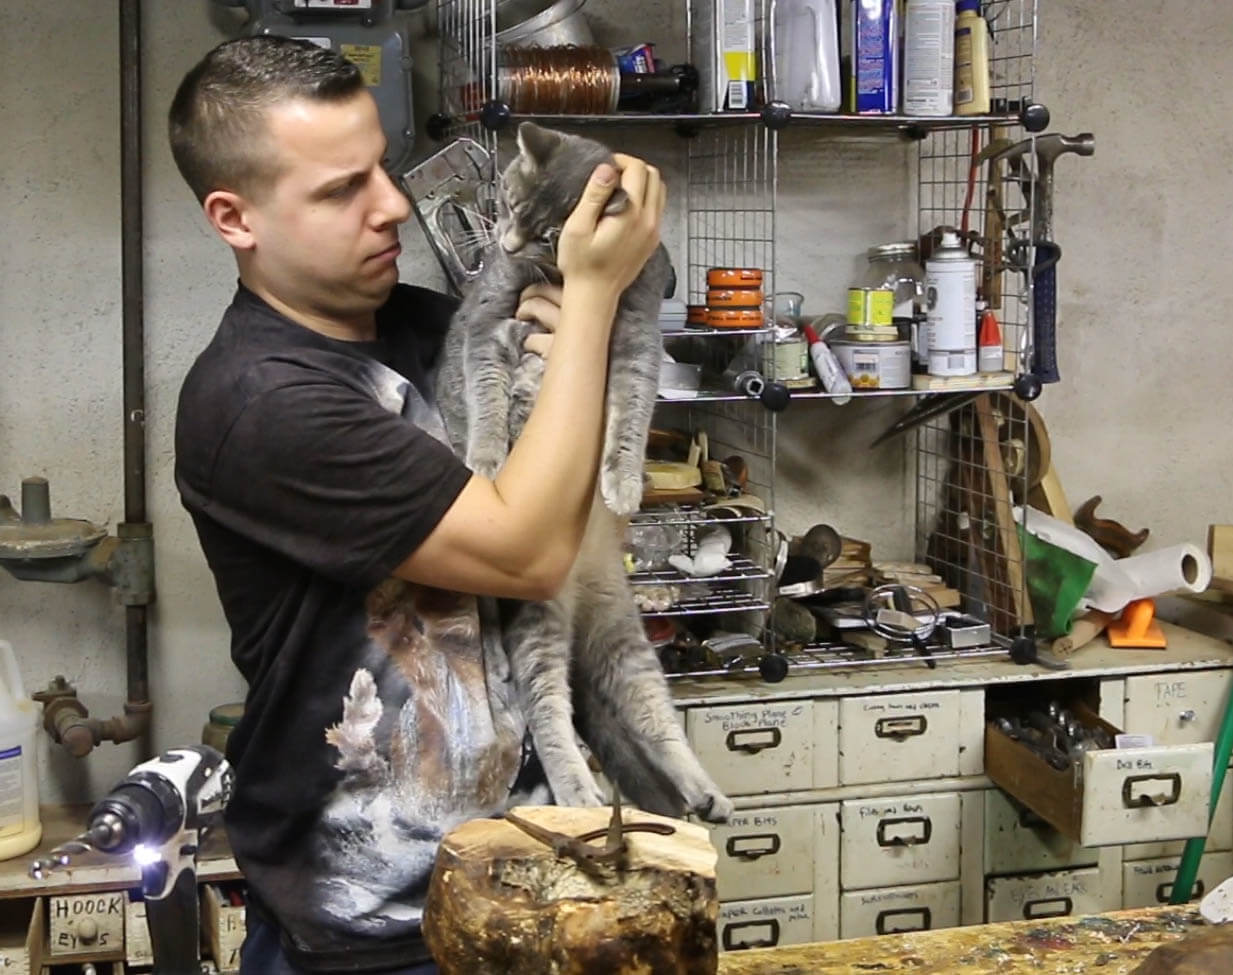
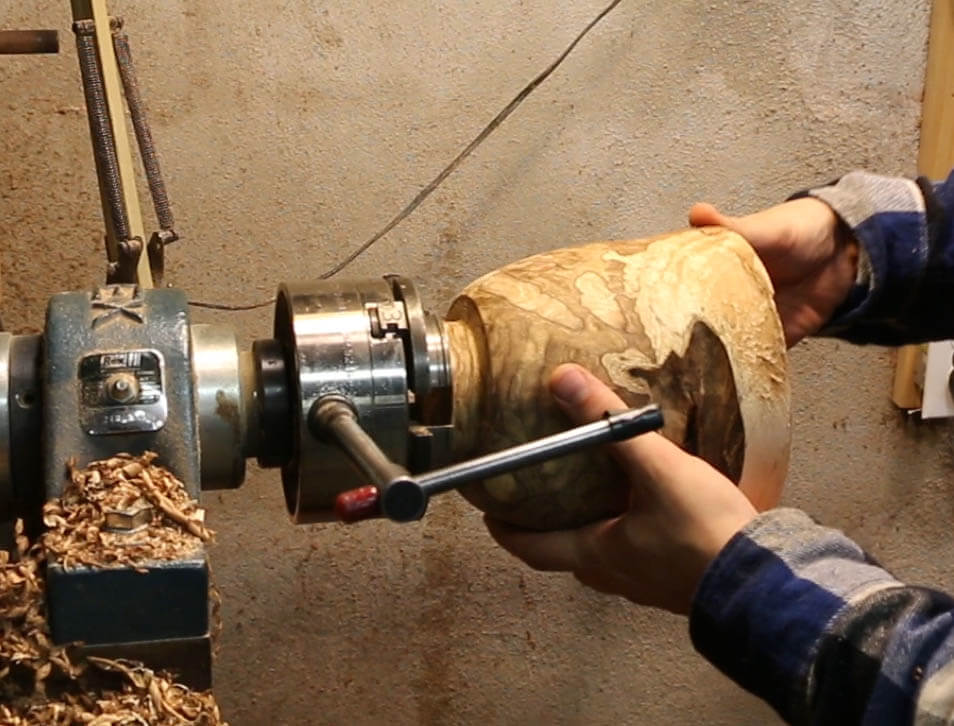
Using your compass, find the center of the burl and drill a hole the proper size to fit onto your chuck’s screw attachment. The closer your mark is to the exact center, the less work you will need to do later shaping the wooden bowl. **Note that you want to be drilling into what will be the TOP of the bowl at this stage. Then grab your burl and screw it onto the lathe very tightly. You don’t want it to fly off at 3,000 RPM! Also, be careful of nosy shop cats!
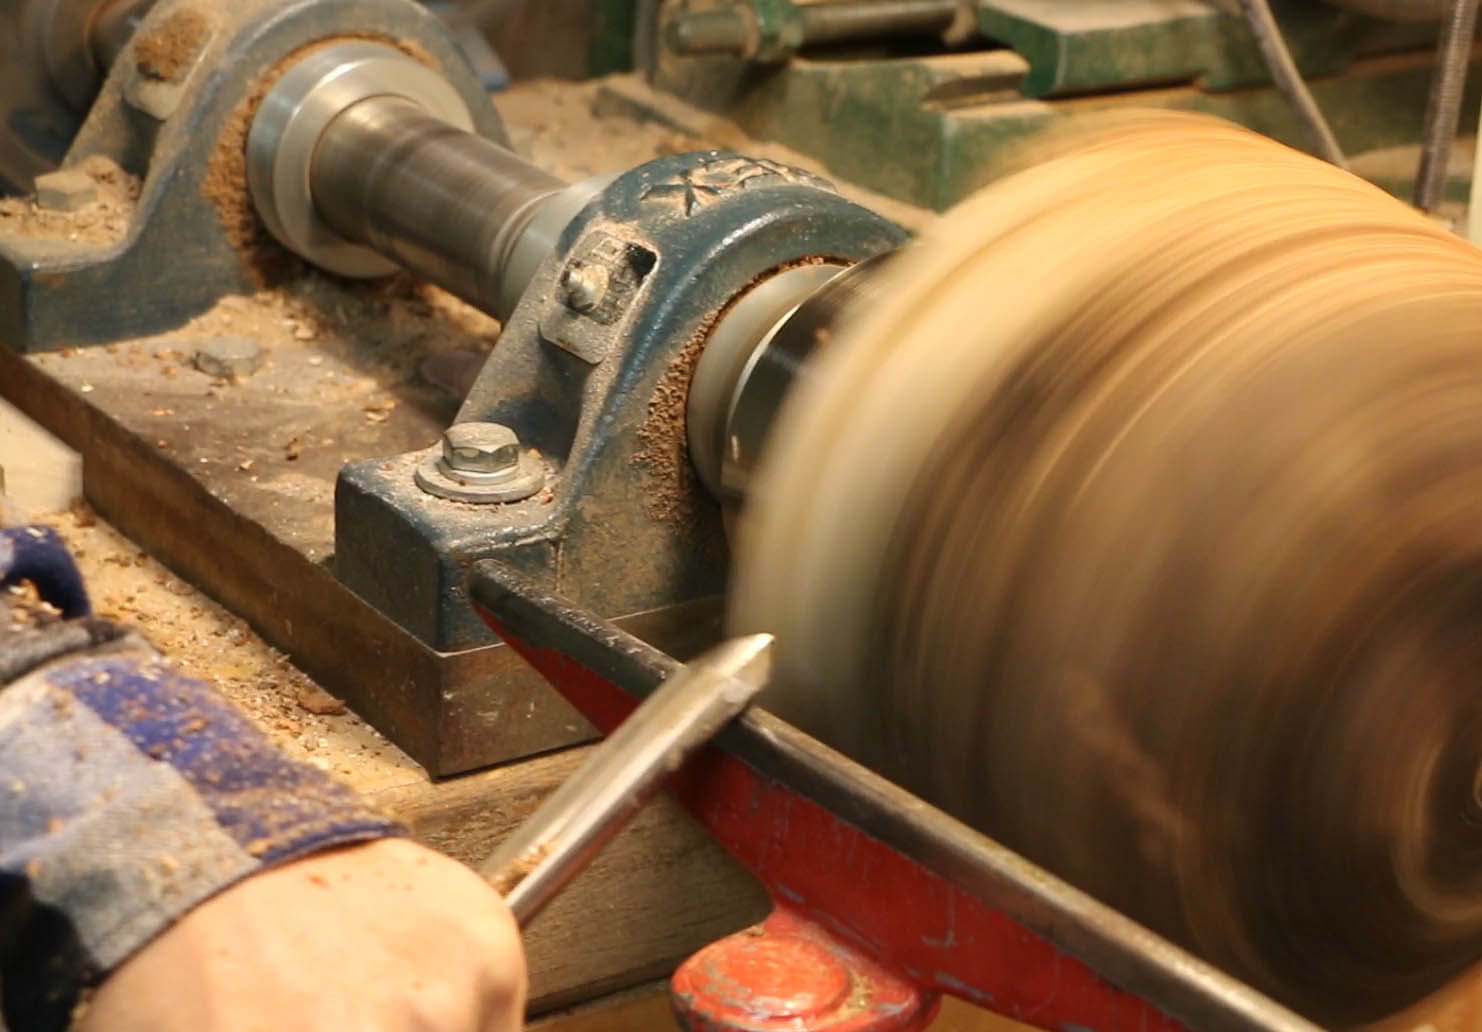
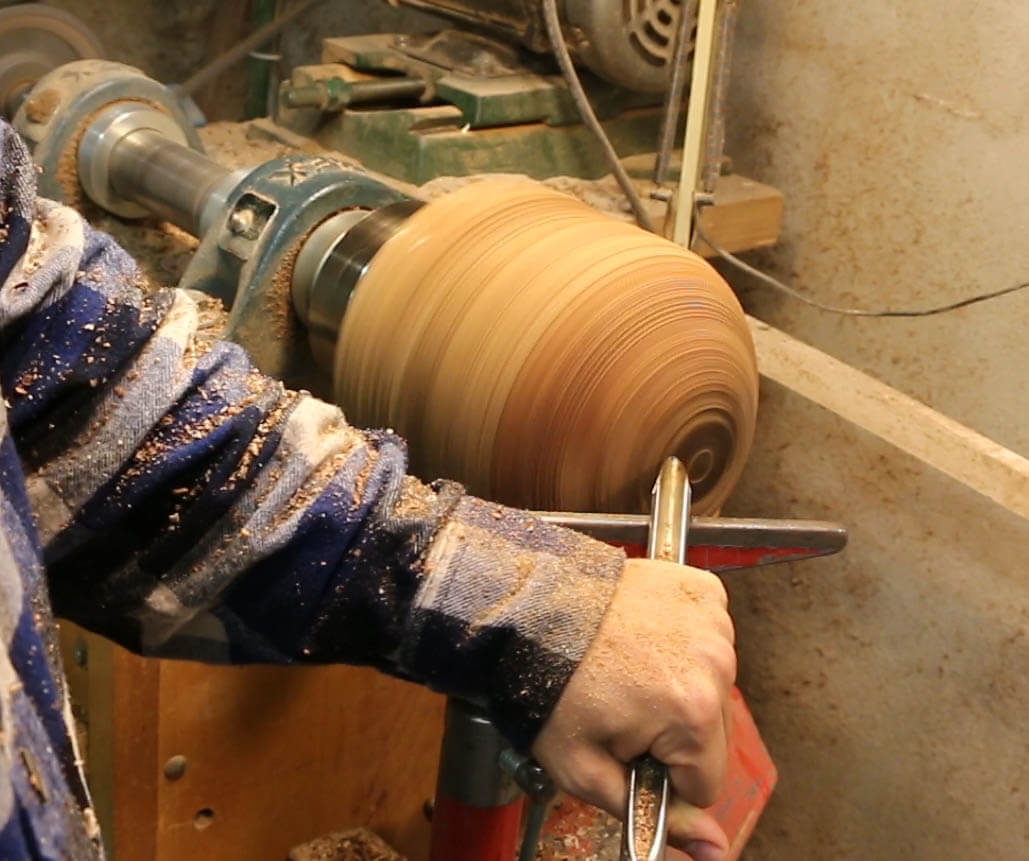
Step three: roughing the wooden bowl into a round shape
This step will require a bit of elbow grease, as the burl might wobble a bit on the lathe. This is because it is not perfectly round, so all the little nubs and valleys of the wood put a lot of torque on the lathe. Using your bowl gouge, brace it against your tool rest. Set your tool rest just below the center of the work piece. Make sure that the piece can make a full rotation without contacting the tool rest. Use a sturdy two handed grip with the chisel to avoid injury. Grab the very end of the chisel with your right hand, keeping the handle at a low angle, and use your left hand to brace close to the tool rest. Lightly bring the tool back and forth across the burl, with the lathe on a low speed and removing all the largest high points first.
As your wooden bowl blank becomes more round, you can increase your turning speed. Re-adjust your tool rest often, so that there isn’t a big gap between it and the work. Keep going until your bowl has cut marks all the way around it. Some gaps are OK, they will make the bowl look awesome when you are done! Just make sure that they aren’t took big or the bowl will be too fragile to finish. Cut your curves and shape the profile of the bowl. I went with a subtle bell shape that was widest at the top.
Step four: shaping the bottom of the wooden bowl & forming the foot
Move your tool rest towards the bottom of the bowl and begin making more cuts with your bowl gouge. Form this part of the bowl roughly into your desired shape.
Next, using your parting tool, cut in at an angle that is parallel with the top of the bowl to create a little peg at the bottom. This is what your chuck will be grabbing on to next, so make sure that it is the correct size and make it half an inch in height so that the chuck has some wood to grab on to. With another pass, square up the side of the foot, cutting perpendicular to the top of the bowl.
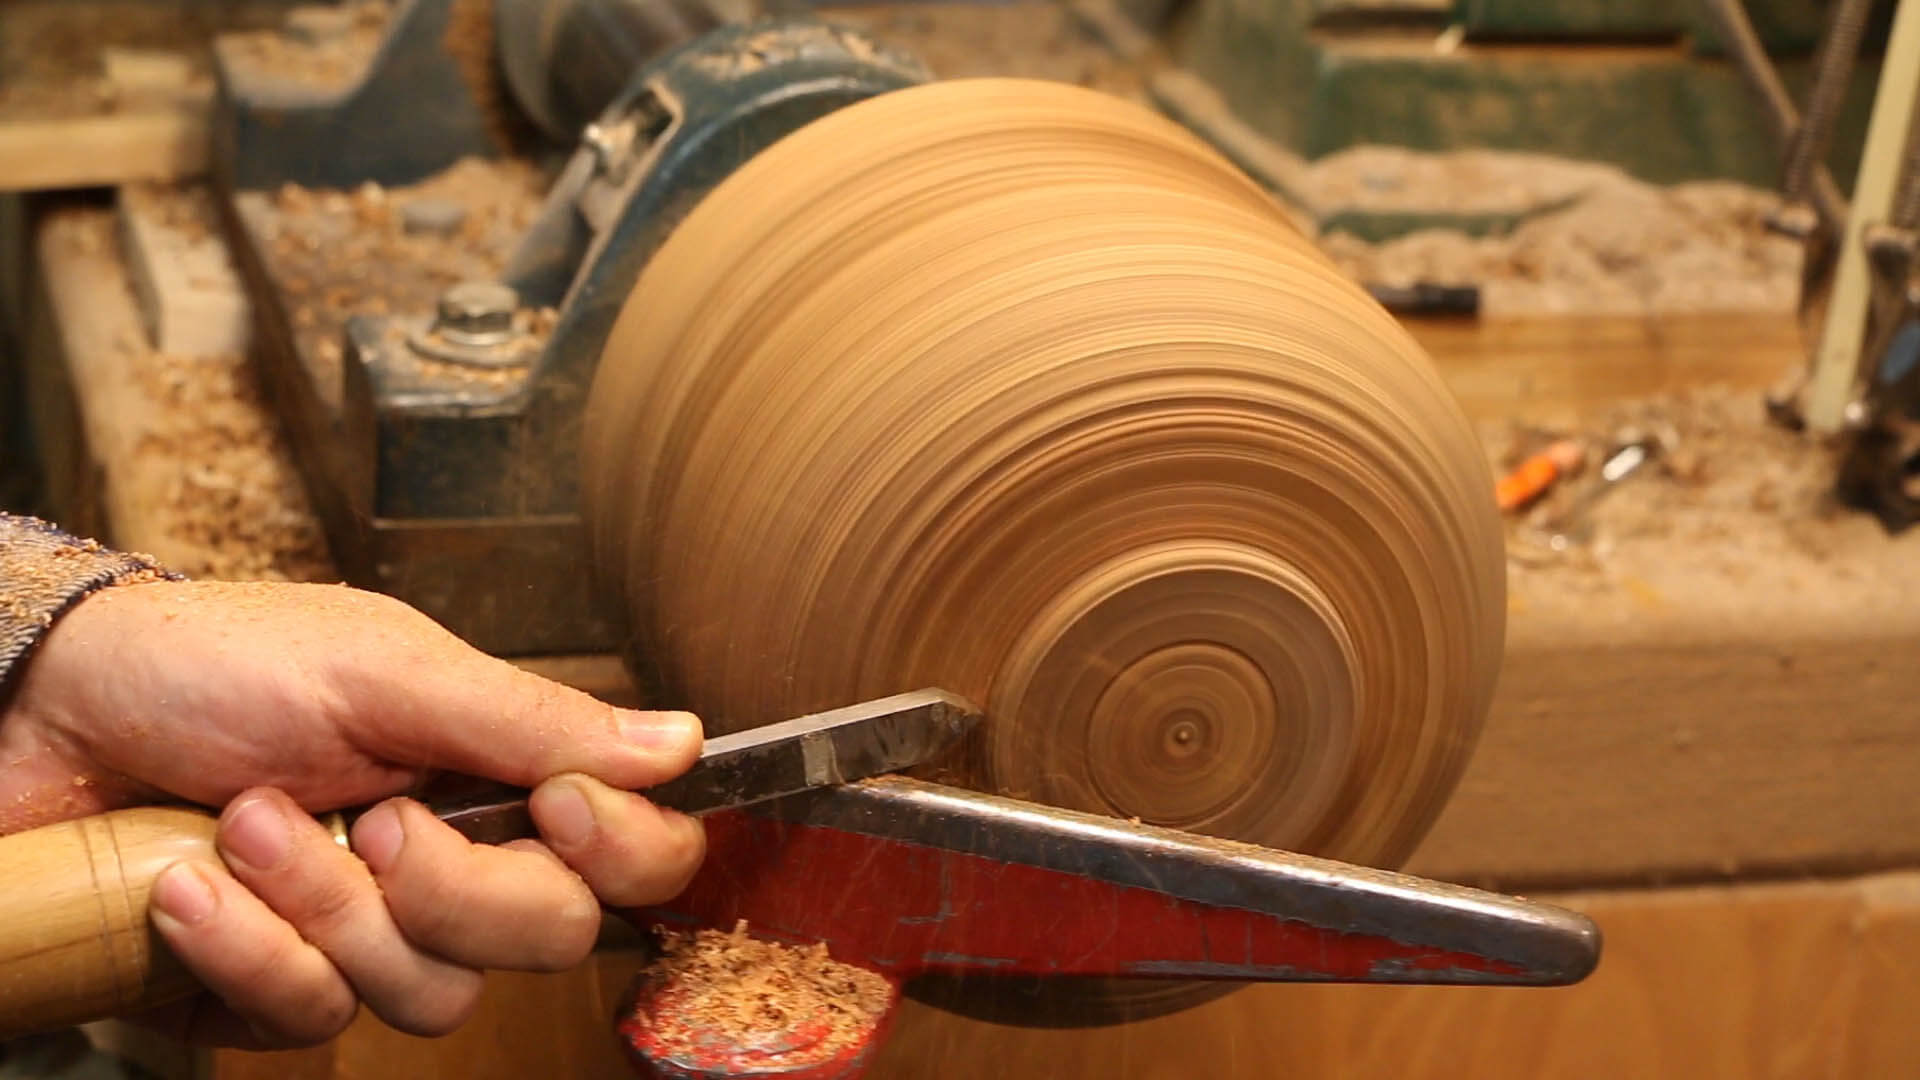
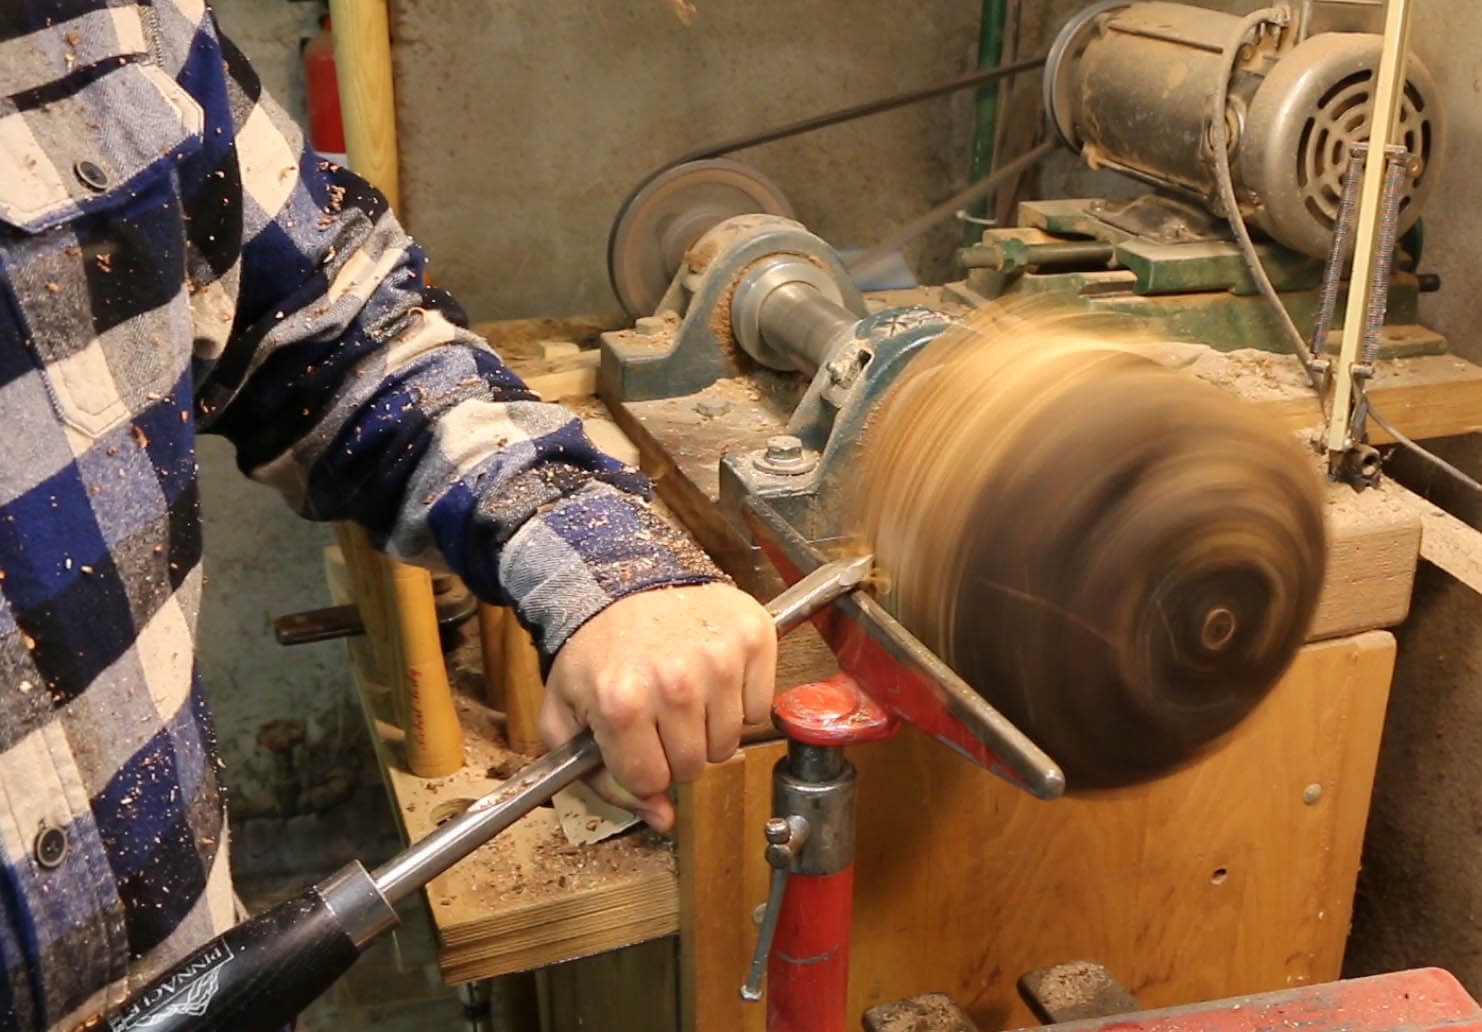
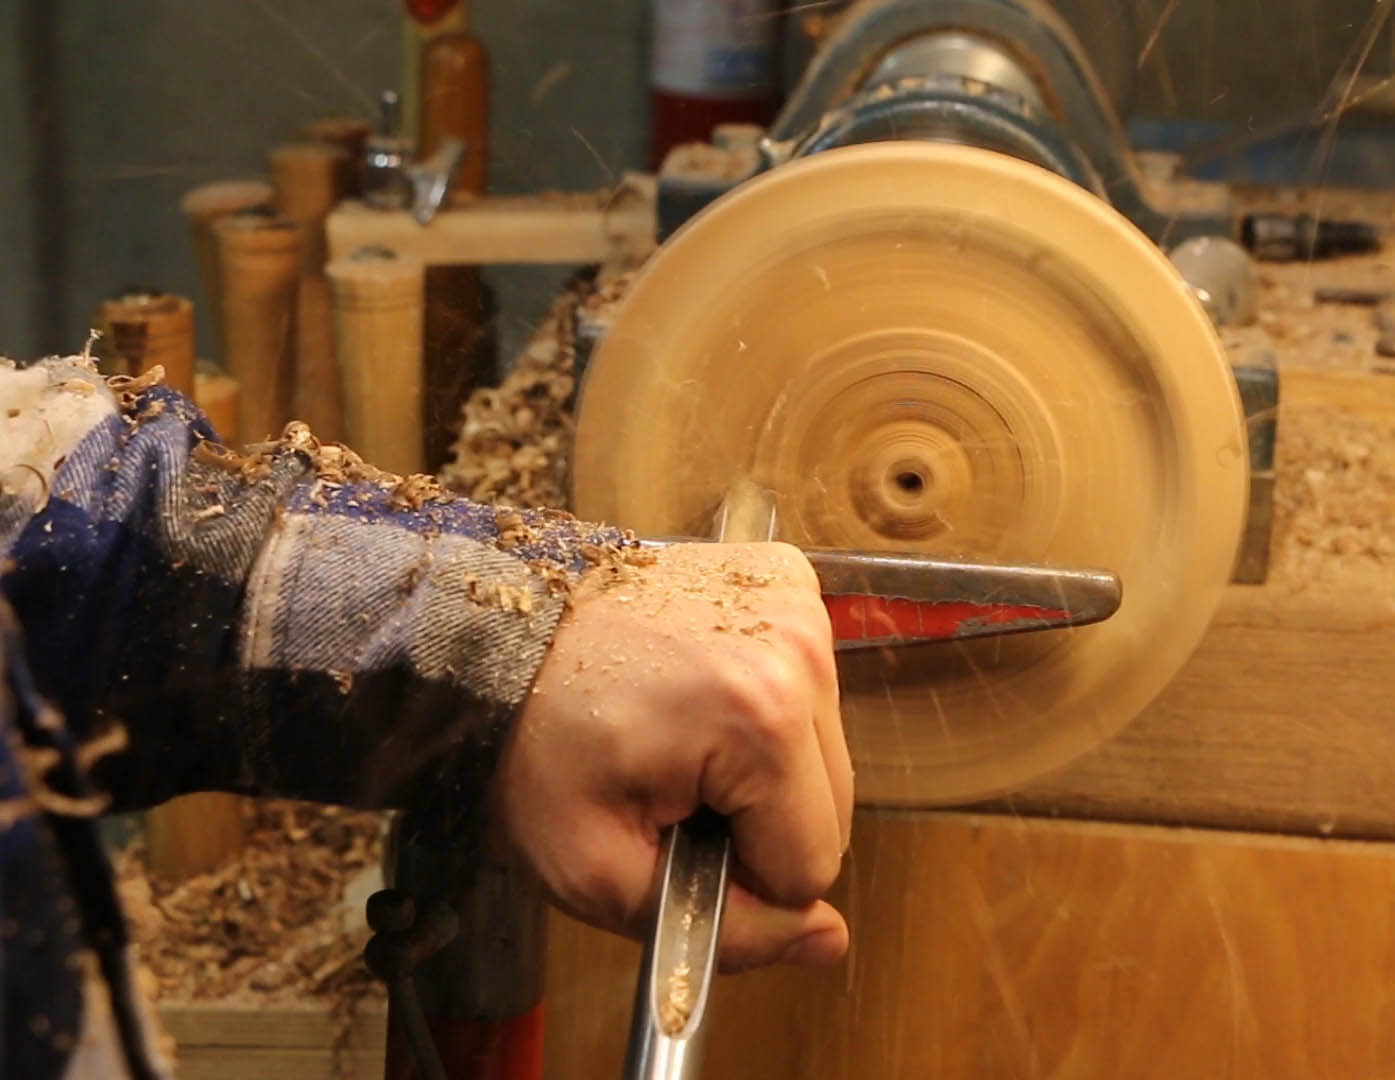
Step five: smooth the outside of the bowl
Using your bowl gouge, tilt it so that the side of the bevel is doing the cutting. This will produce a much smoother cut which you can use to smooth out the rest of the bowl. This part is a ton of fun! The chisel really shaves the wood off like butter. Make a final pass with your round nose scraper to finish up. **Note the round nose scraper should be held with the handle higher than the tool rest, which isthe opposite from other chisels used so far.

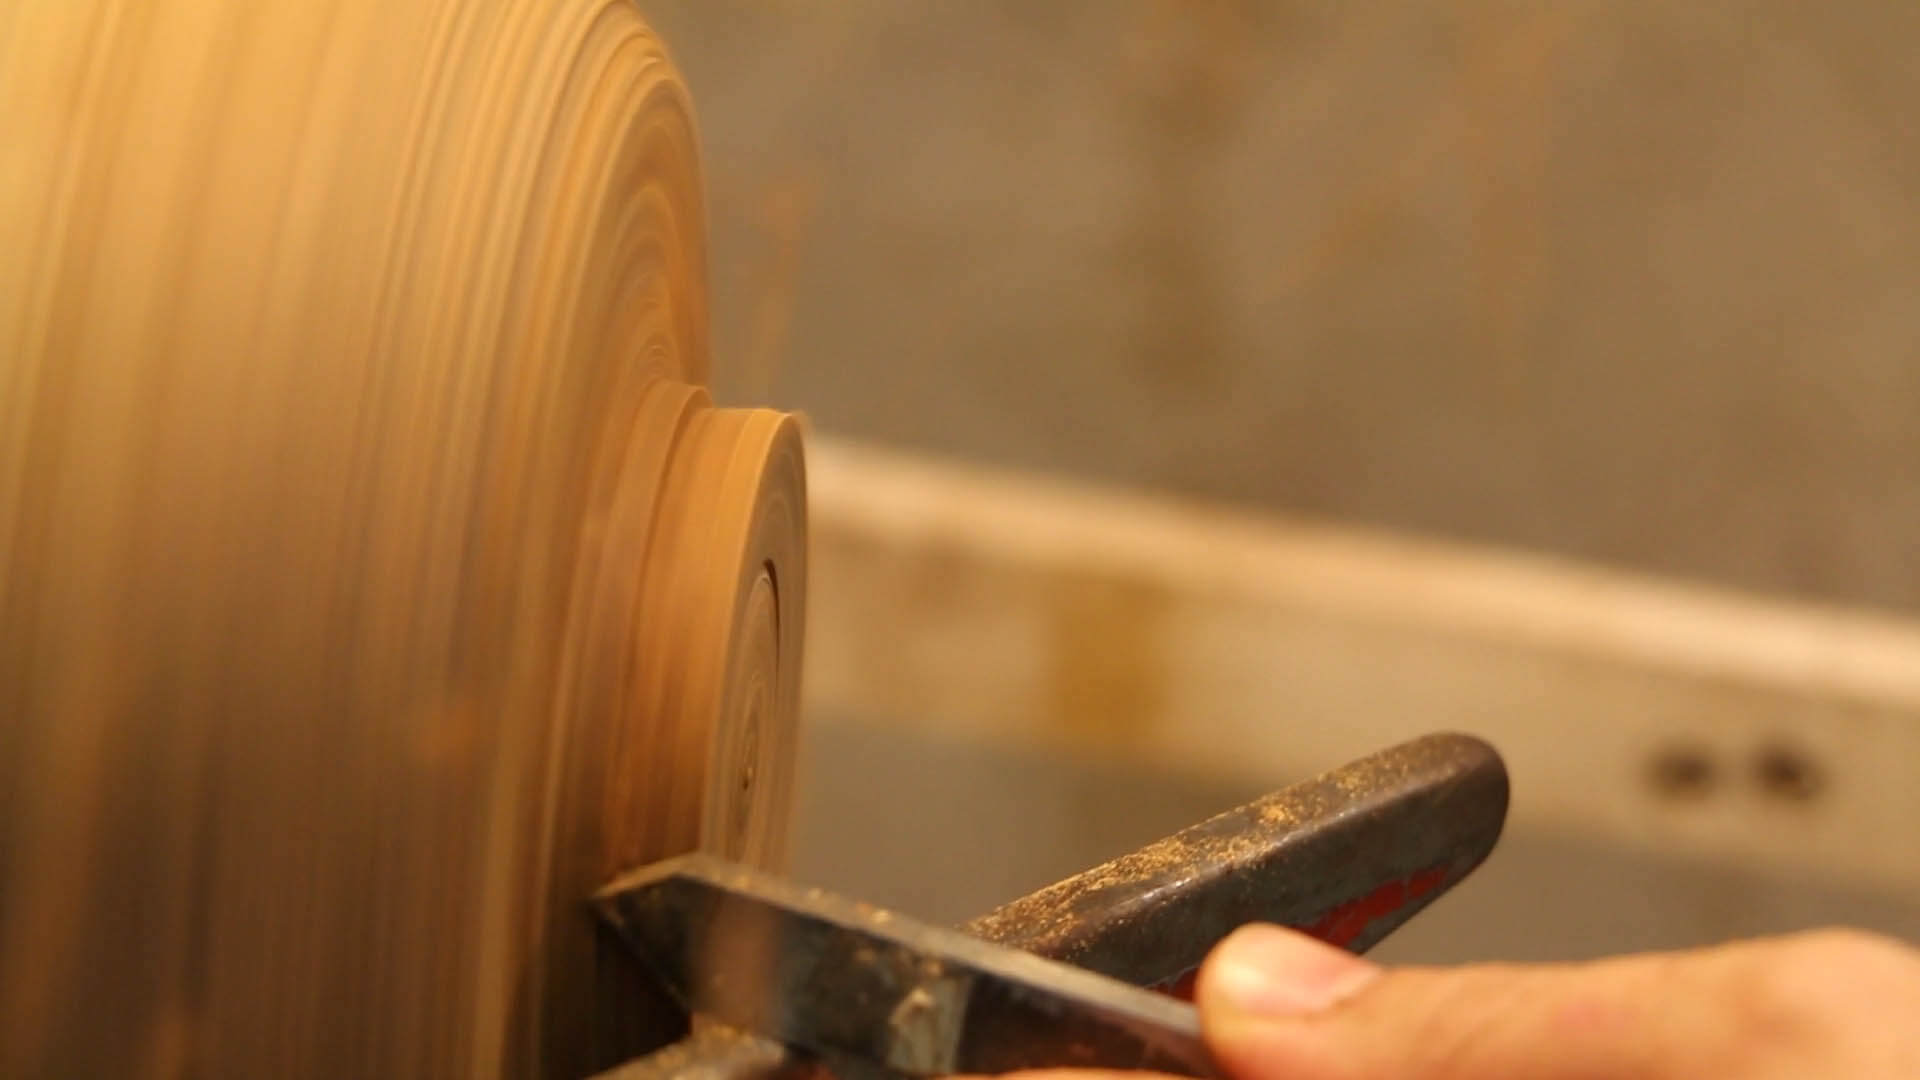
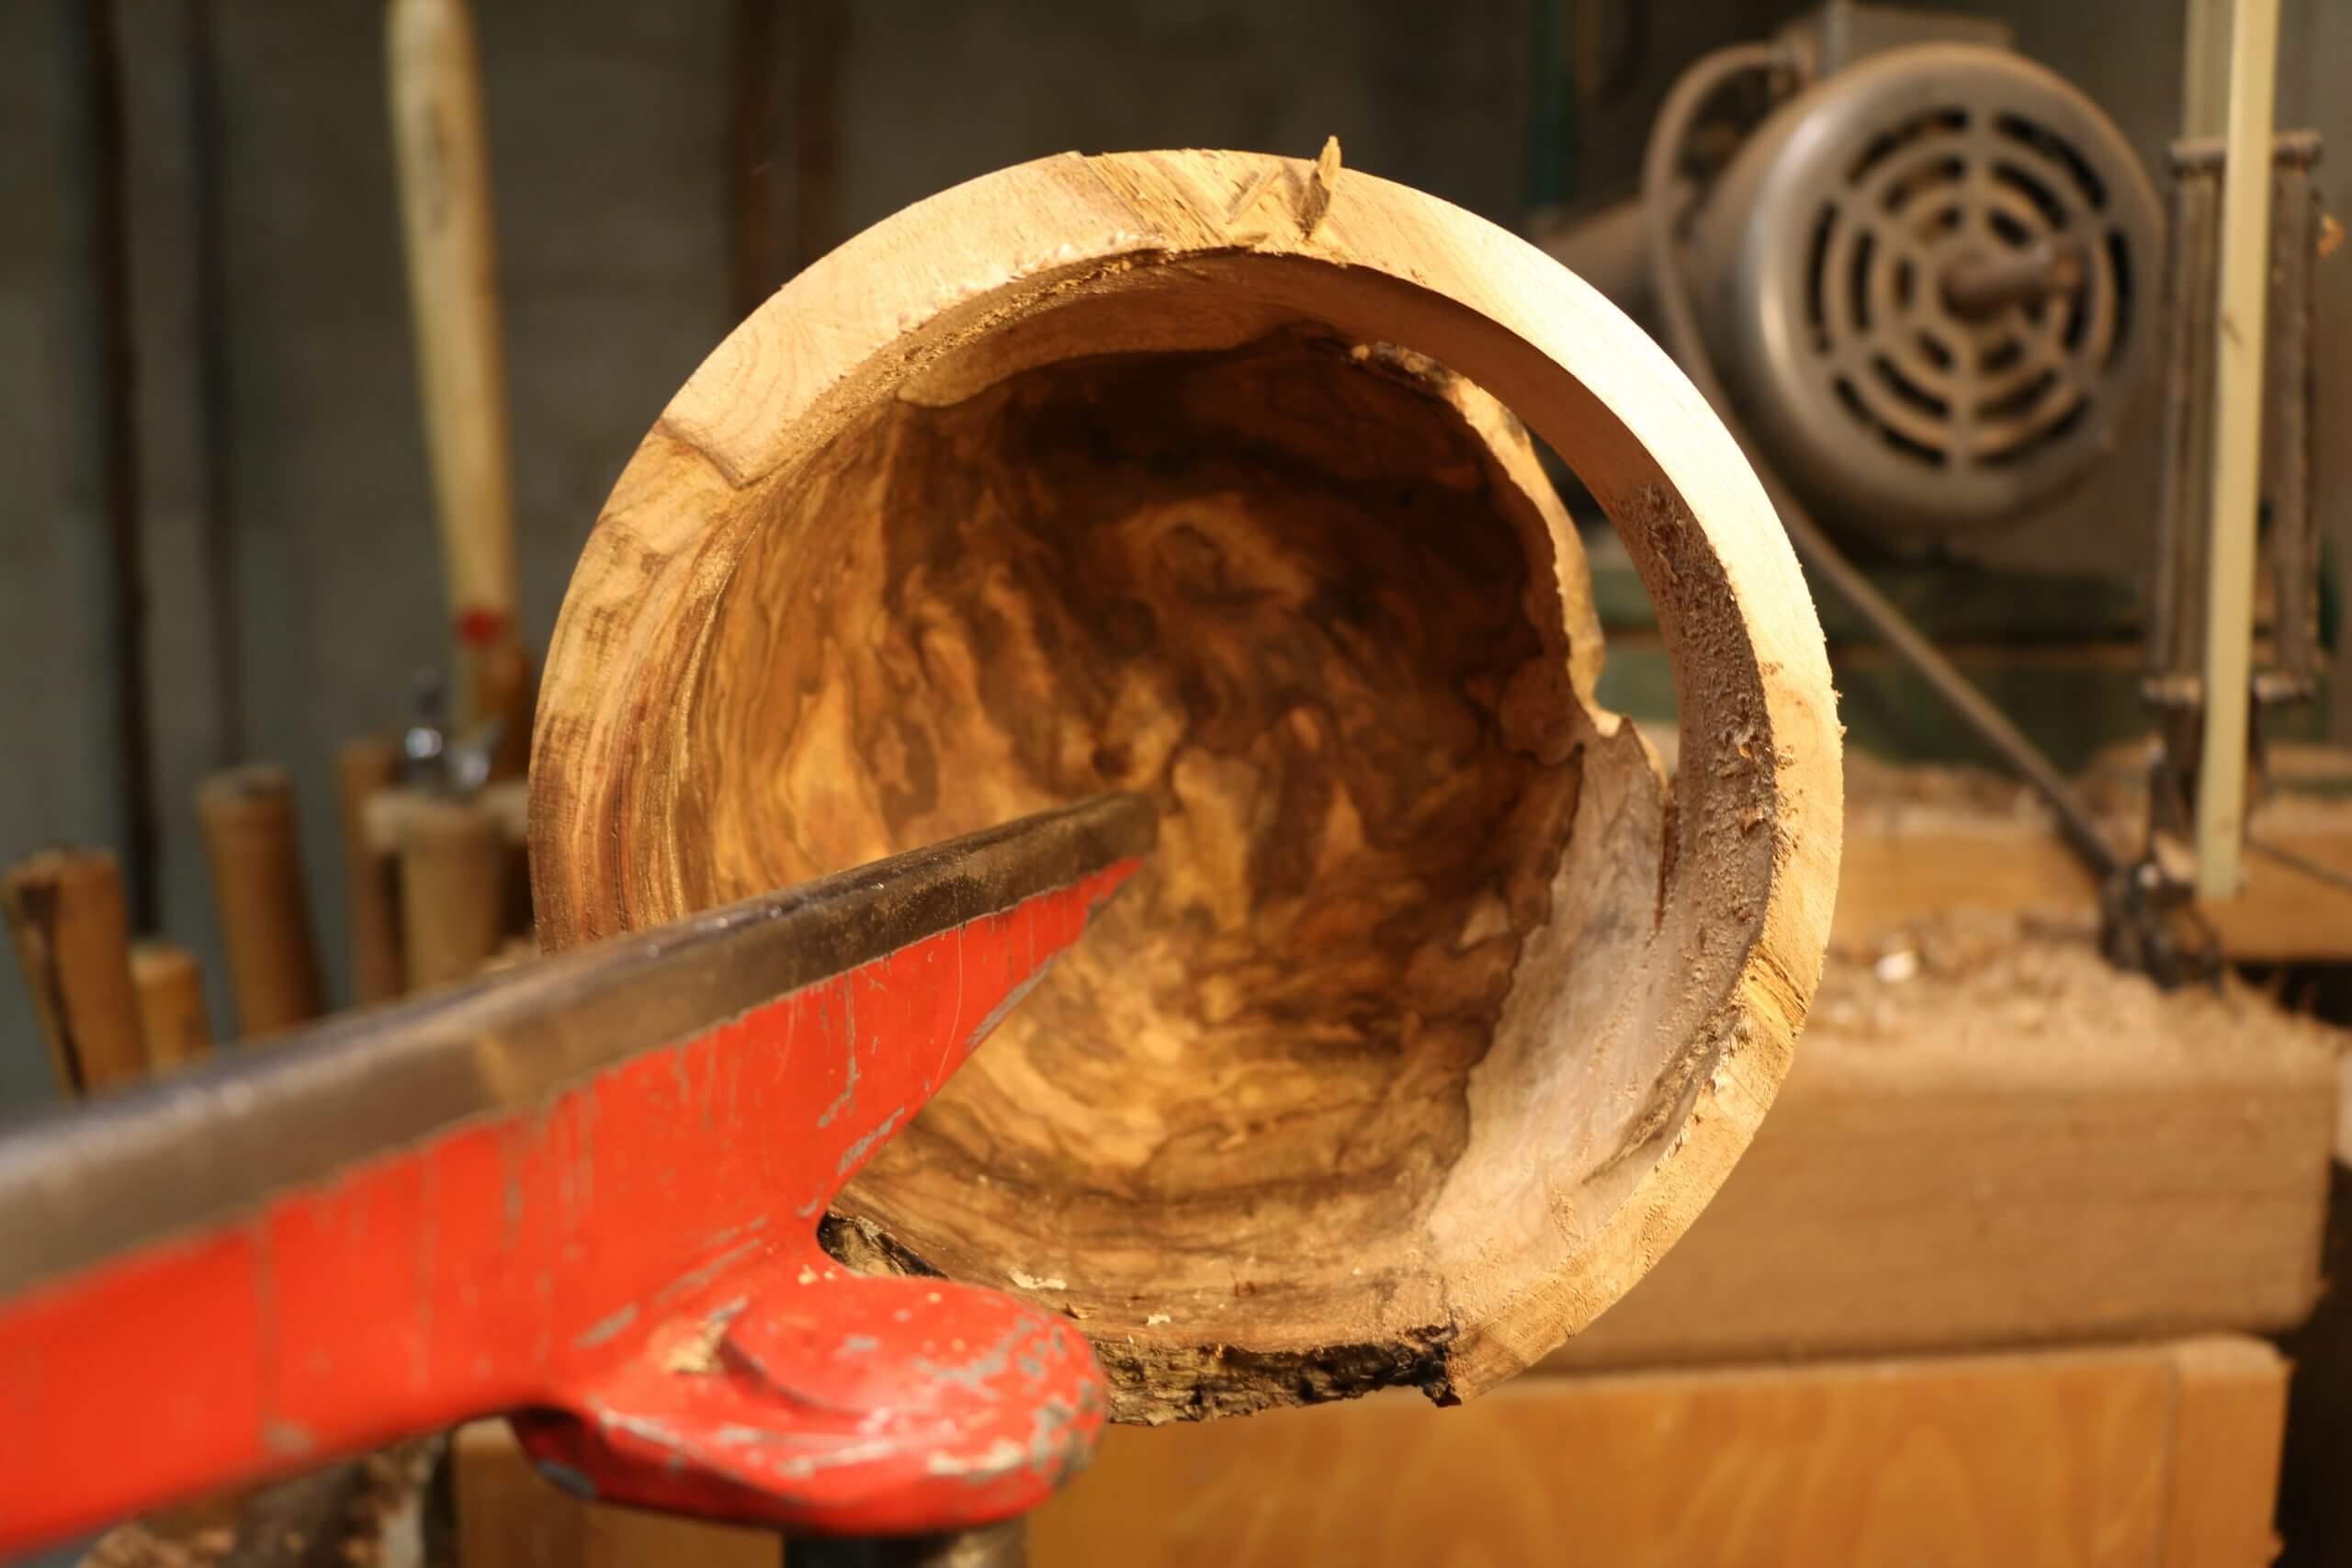
Step Six: hollowing out the inside of the wooden bowl
Almost there! To hollow out the inside of the bowl, first take it off of the lathe and reverse your chuck so that it can grip onto the foot. Set up your tool rest so that it is just below the center of what is now the top of the bowl. Using the bowl gouge, rough out the interior. Make note that you can only cut on the left side of the bowl at this time due to the rotation of the piece. If you put your chisel on the other side, it won’t cut because the wood isn’t being pushed into the bevel of the chisel.
Use your calipers here and periodically measure the thickness of the walls of the bowl. **To prevent cracking, make sure that the walls of the wooden bowl are close to uniform in thickness. This helps the wood dry evenly. Also, using your chisel, periodically check to see how deep you’ve cut. You don’t want to get too close to the bottom of the bowl since you will be removing the foot later on
Readjust your tool rest for the final smoothing with your round nose scraper.
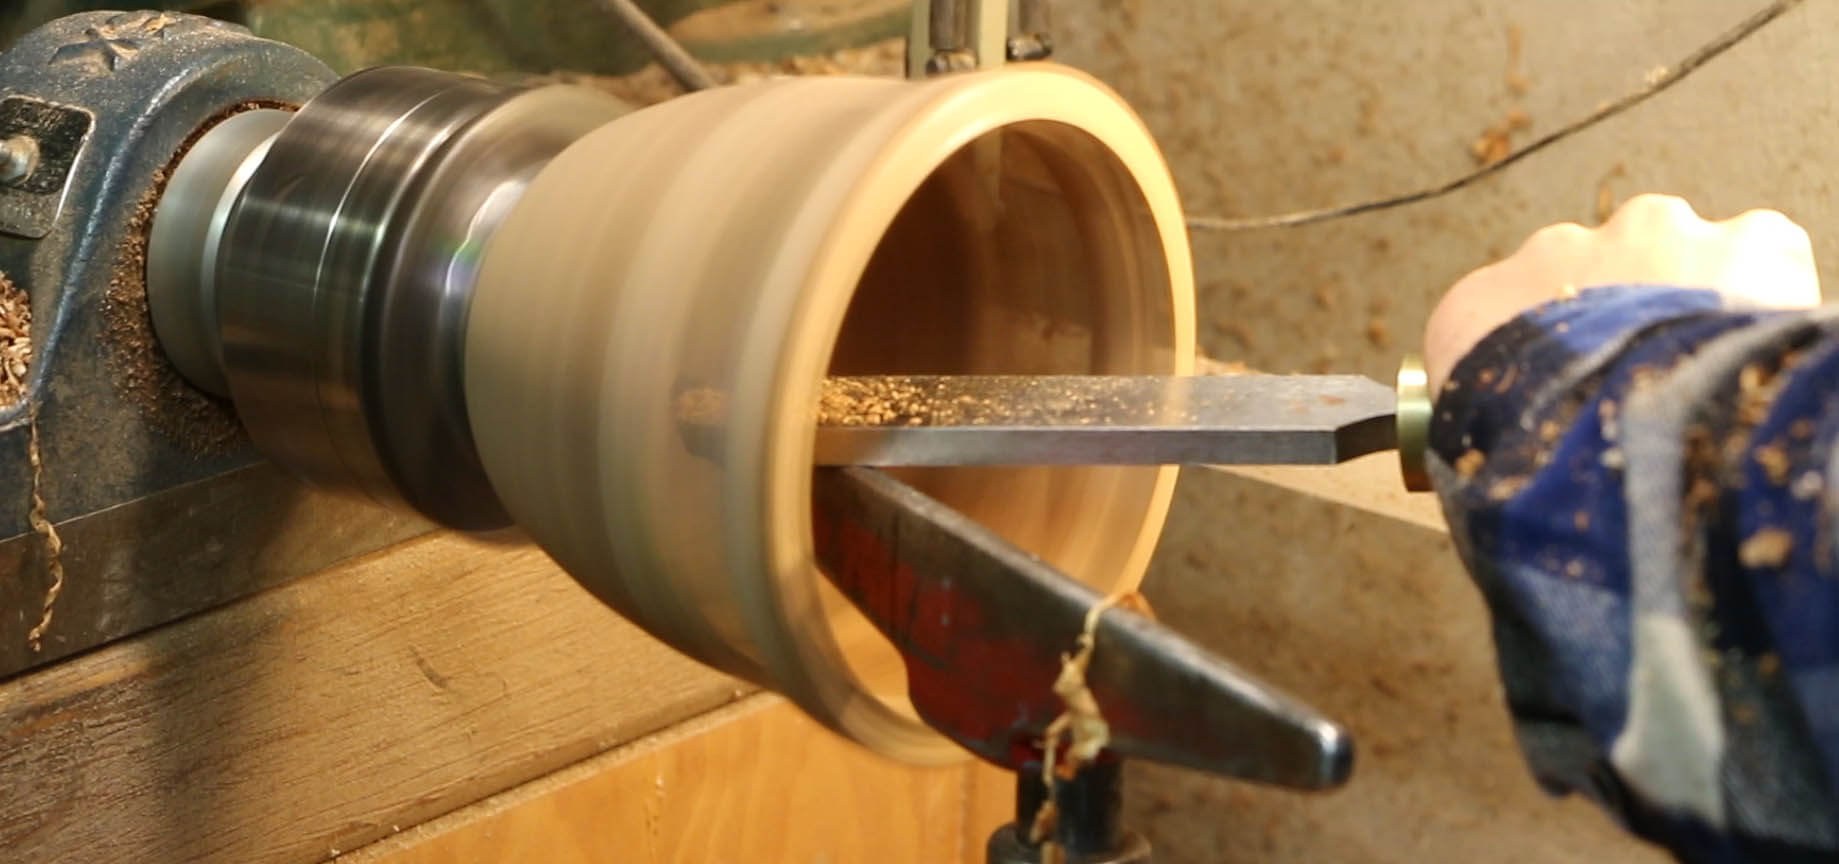
Step seven: sanding & finish!
Applying moderate pressure, press sandpaper against both the inside and outsides of the bowl. Don’t skimp on sanding! Do a really good job here, and you will reap the dividends of a beautifully smooth wooden bowl, without sanding scratches. Start with 80 grit and then 120, 180 and finish with 220.
Apply several coats of your favorite wood oil (tung, danish etc..) every few days to slow the drying process. Keep your bowl in a dry place out of sunlight to help this process while it cures. Enjoy your beautiful bowl or put it up for sale at a local craft fair or Etsy!


Ken
I really enjoy the variety of turning videos. I learn more by seeing and hearing versus a description in an article.
Jeff
Hello Ken,
Thank you and I agree. Turning videos are great because you can really see the work come alive with each pass of the chisel.